
SSL VPN between two DrayTek Routers
This document introduces how to establish an SSL VPN tunnel between two Vigor Routers. (For SSL VPN tunnel between Vigor Router and Vigor3900, please refer to the article here.)
LAN-to-LAN SSL VPN feature will be supported by Vigor2860 series starts from firmware version 3.8.1 and Vigor2925 series starts from firmware version 3.8.2. As for other models, please refer to their specifications.

VPN Server (Dial-in Site) Setup
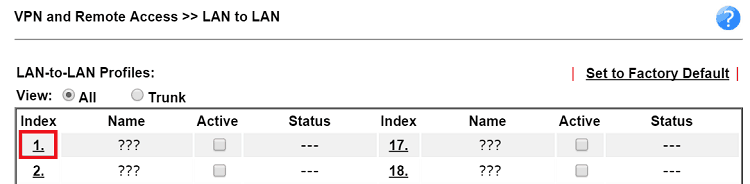
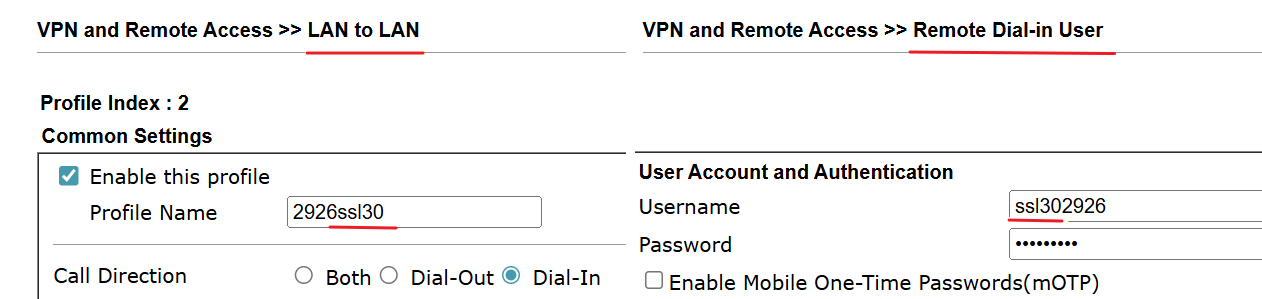
1. Create a LAN-to-LAN VPN Profile: Go to VPN and Remote Access >> LAN to LAN, click on a profile Index to add/edit a profile.
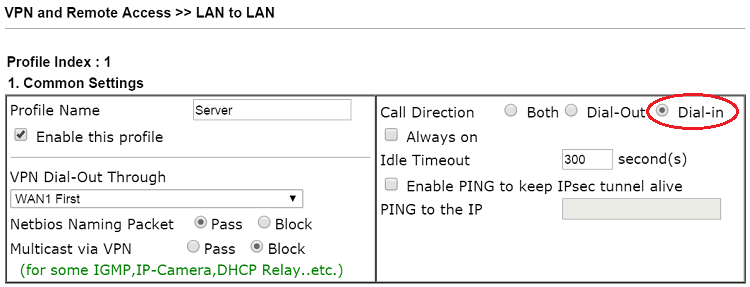
2. Edit the profile as follows:
- Enter Profile Name.
- Enable this profile.
- Set Call Direction as “Dial-in”.
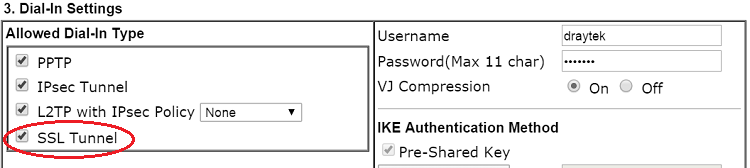
- Make sure Allow Dial-in Type has “SSL Tunnel” enabled.
- Enter Username and Password. Please note that admin cannot be used as the username, as it is reserved for router management via HTTPS.
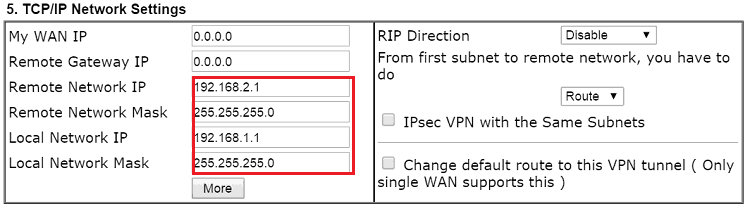
- For Remote Network IP/Mask, enter VPN client's LAN IP and subnet mask.
- Click OK to save the profile.
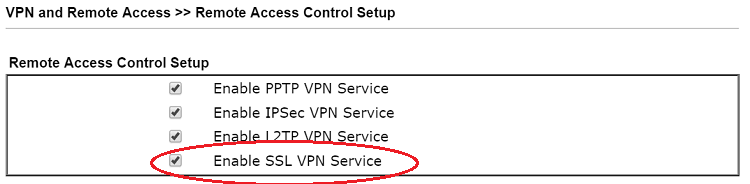
3. Go to VPN and Remote Access >> Remote Access Control to make sure the SSL VPN Service has enabled.
VPN Client (Dial-out Site) Setup
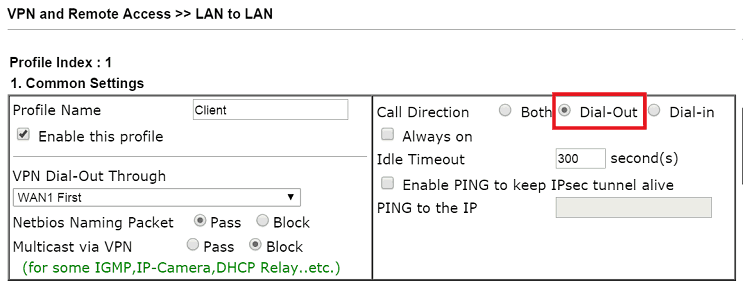
4. Create a LAN-to-LAN profile: Go to VPN and Remote Access >> LAN to LAN, click on an available index number.

Edit the VPN profile as follows.
- Enter Profile Name.
- Enable this profile.
- Set Call Direction to “Dial-out”.
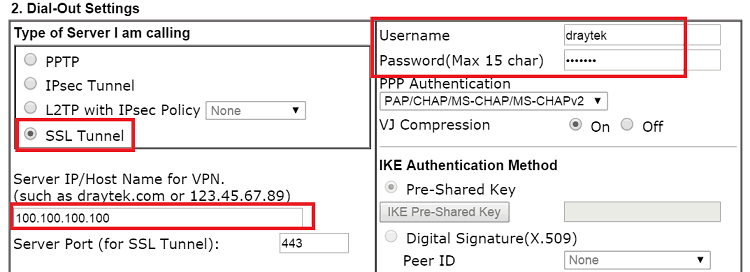
- Set Type of Server I am calling to SSL Tunnel.
- Enter Username and Password as the same set in VPN Client in Step 2.
- Enter VPN Server's WAN IP in Server IP/Host Name.
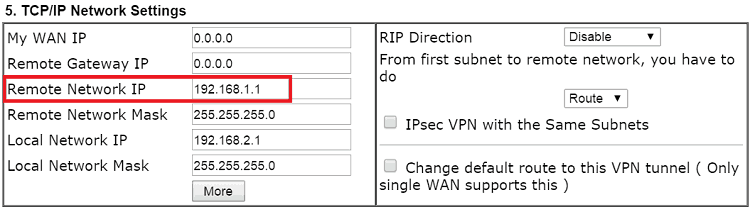
- Enter Remote Network IP/Mask as VPN Server's LAN settings. (Note that this has to be the same as Local Network IP/Mask setting in Step 2.)
- Click OK to save.
Establishing the VPN Tunnel:
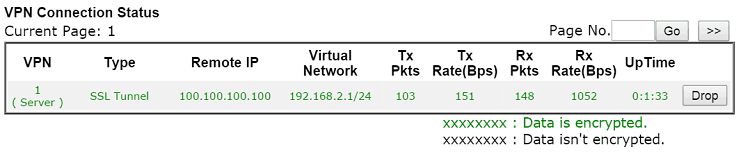
1. To dial the VPN, on VPN Client, go to VPN and Remote Access >> Connection Management, select the profile created previously and click on “Dial”.
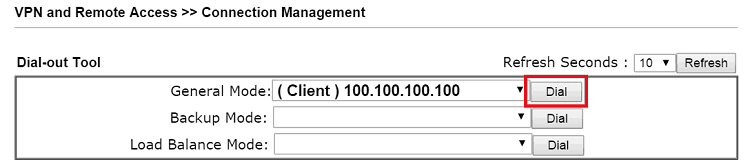
2. If all the credentials are Network administrator may check the VPN that is established and its Up Time from VPN and Remote Access >> Connection Management page.
Note:
To comply with EN18031, the default SSL VPN encapsulation has been updated from SSL 3.0 to TLS 1.2 in:
- Vigor3912 / 3910 / 2962: firmware 4.4.5 and above
- Vigor2135 / 2765 / 2766 / 2865 / 2866: firmware 4.5.1 and above
For SSL VPN connections to older models (e.g., 2925, 2926, 2952, 2862, 2912, 2620) running firmware 3.9.* or earlier, or to Vigor2962 / 3910 / 3912 running firmware 4.4.3.4 or earlier, the connection may fail.
To resolve this, include “ssl30” in the LAN-to-LAN profile name or remote dial-in username to ensure proper SSL VPN operation.
Since firmware version 1.1.0 or above, Vigor2960 and Vigor3900 supports LAN-to-LAN SSL VPN. This document introduces how to establish a LAN-to-LAN SSL VPN between two Vigor2960 or Vigor3900.
VPN Server (Dial-in Site) Setup
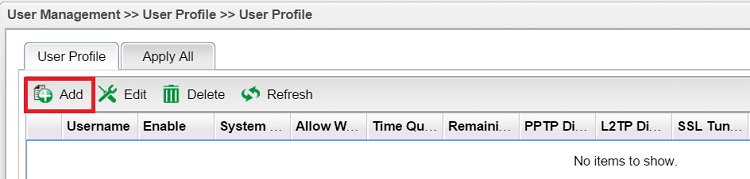
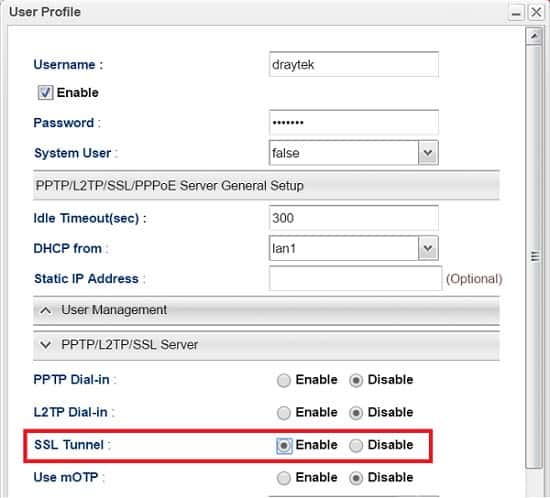
1. Create a user profile for SSL VPN login. Go to User Management >> User Profile, click Add to create a new profile.
2. Edit the user profile as follows:
- Enter Profile Name.
- Enable this profile.
- Enter Password.
- In PPTP/L2TP/SSL Server, enable SSL Tunnel.
- Click Apply to save.
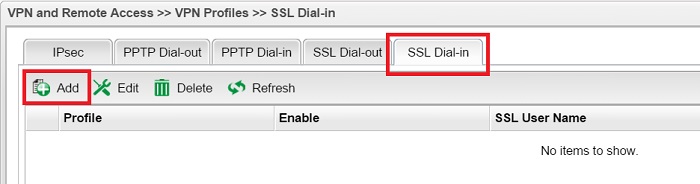
3. Create a VPN profile: Go to VPN and Remote Access >> VPN Profiles >> SSL Dial-in, click Add to add a new profile.
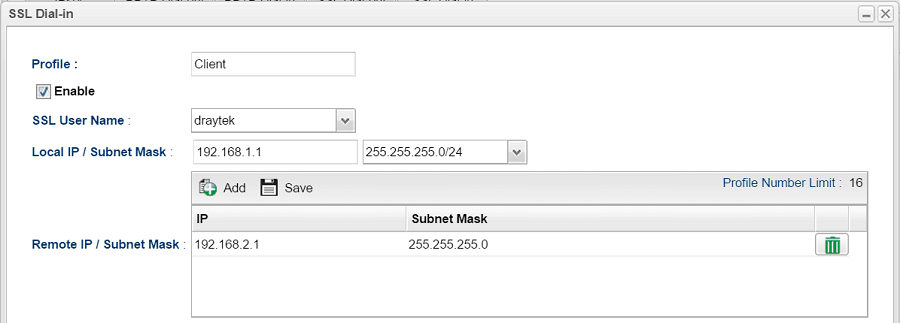
4. Edit the VPN Profile as follows:
- Enter Profile name.
- Enable this profile.
- For SSL User Name, select the profile we created in Step 3 from the drop-down list.
- Enter Local IP /Subnet Mask as the LAN settings on VPN Server.
- For Remote IP /Subnet Mask, click Add and enter VPN client's LAN settings.
- Click Apply to save.
5. Go to VPN and Remote Access >> Remote Access Control to make sure SSL Tunnel Service is enabled.
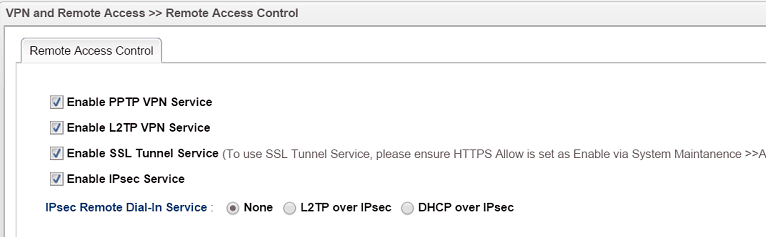
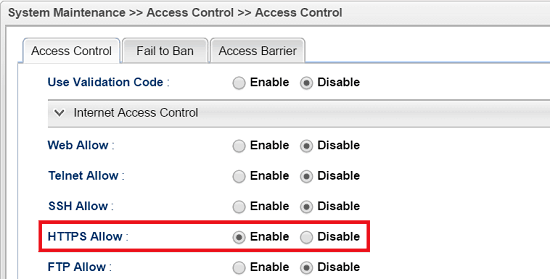
6. And go to System Maintenance >> Access Control >> Internet Access Control to make sure HTTPS Allow is enabled.
VPN Client (Dial-Out) Setup
7. Create a VPN profile: Go to VPN and Remote Access >> VPN Profiles >> SSL Dial-out, clickAdd to create a new profile.
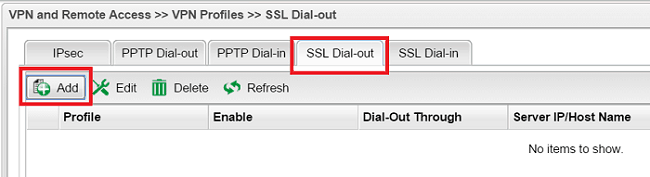
8. Edit the VPN Profile as follows:
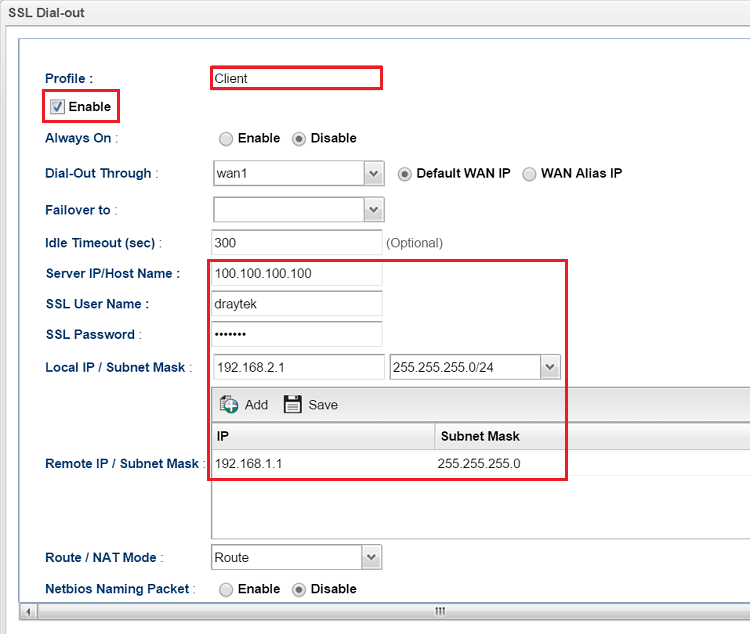
- Enter Profile name.
- Enable this profile.
- For Server IP/Host Name, enter VPN Server's WAN IP address or host name.
- For SSL User Name and SSL Password, enter the same as in Step 2.
- Enter Local IP/Subnet Mask as the local LAN subnet you would like to connected to remote site.
- For Remote IP/Subnet Mask, click Add and enter VPN Server's LAN settings.
- Click Apply to save.
Establishing the VPN:
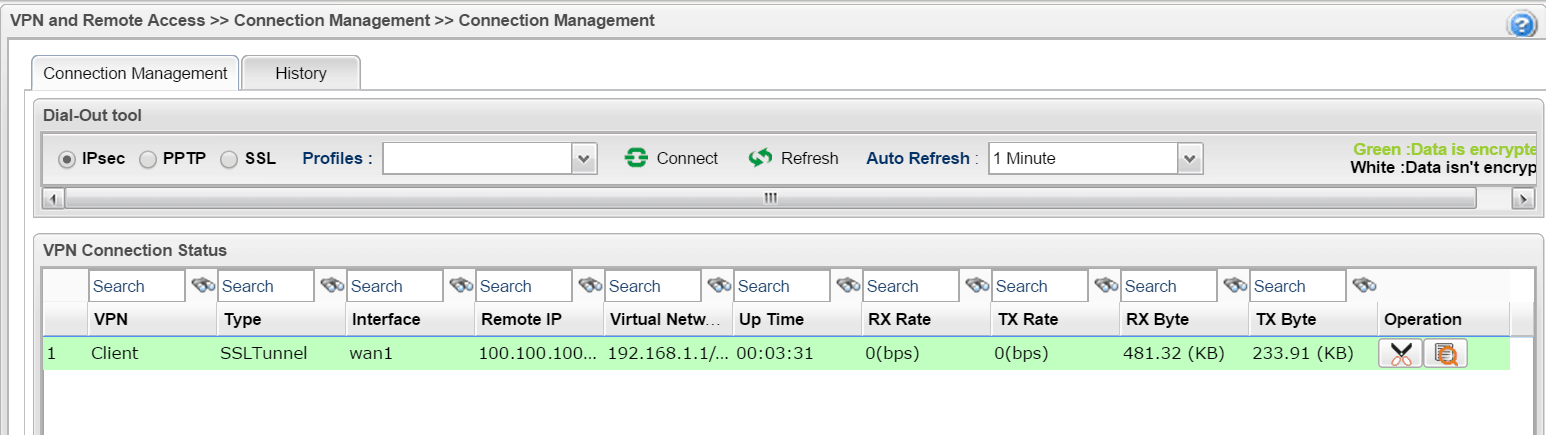
1. To dial the VPN, on VPN Client, go to VPN and Remote Access >> Connection Management, select SSL and choose the VPN profile created in Step 3 from the drop-down list. Click Connectto establish the VPN tunnel.

2. If all the credentials are correct, VPN will be established. And network administrator may check the connected VPN and its Up Time from VPN and Remote Access >> Connection Management page.
Published On: Jul 08, 2019
ShareWas this helpful?