
IPsec VPN with X.509 Authentication from Windows to Vigor3900/2960 by Smart VPN Client
Vigor3900 can act as a CA server, and we can use the feature to generate and sign an X.509 certificate for a PC to create an IPsec tunnel with it. The examples below will show how to achieve the purpose with three parts.
- Part A: Certificate Generation and Import
- Part B: Create IPsec VPN Profile on Vigor3900 for PC to Dial-In
- Part C: Use Smart VPN Client to Dial IPsec VPN to Vigor3900
Part A: Certificate Generation and Import
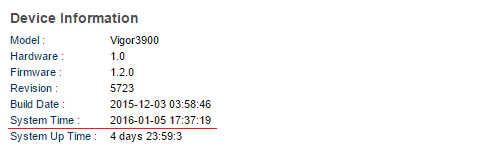
1. On the Online Status page, check if the current System Time of Vigor3900 is equal to the Time of PC.
2. Open Certificate Management >> Trusted CA Certificate, click Build RootCA.
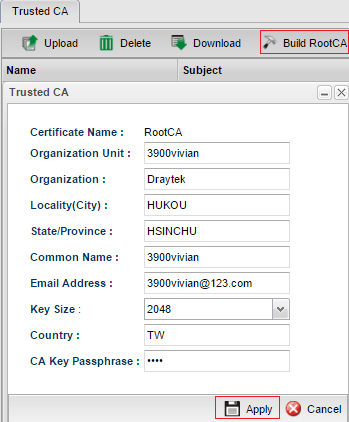
3. We will see Add Success Message and then can see the RootCA certificate listing on the Trusted CA page.

4. Open Certificate Management >> Local Certificate page, click Generate to create a local certificate.
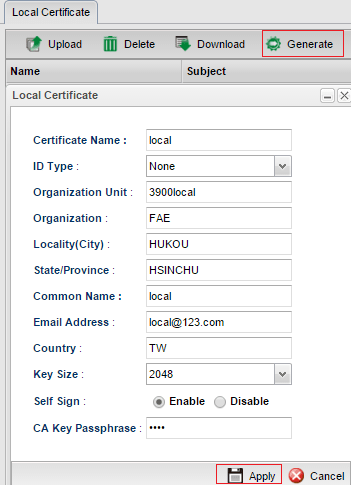
5. We will see Add Success Message and then can see the local certificate listing on the Local Certificate page.

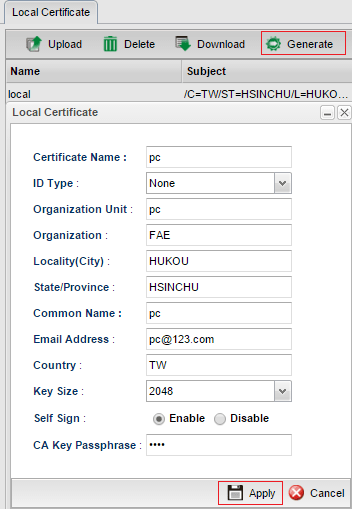
6. Open Certificate Management >> Local Certificate page, click Generate to create a certificate for the PC.
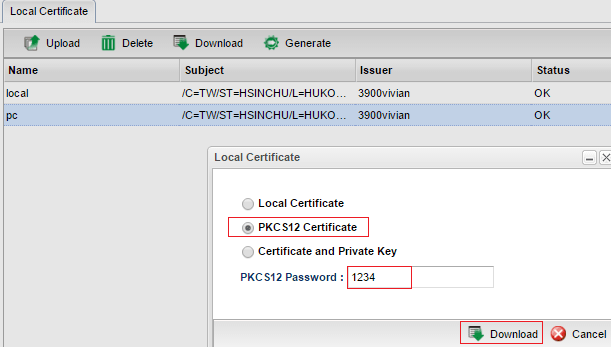
7. Select the certificate for PC and then click Download.

8. Select PKCS12 Certificate as the format, input the PKCS12 Password, and then click Download. The certificate will be saved to the PC with the filename pc.p12.
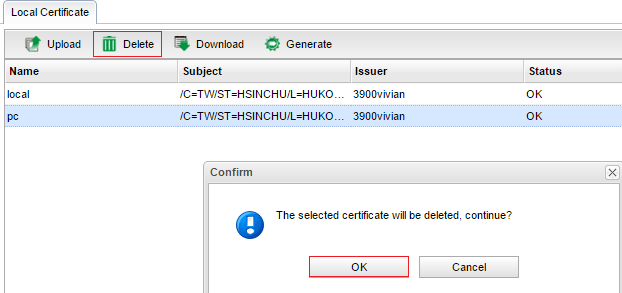
9. Delete the certificate for PC on the Local Certificate page.
10. Upload the downloaded PKCS12 Certificate pc.p12 to Vigor3900 via Certificate Management>> Remote Certificate page.
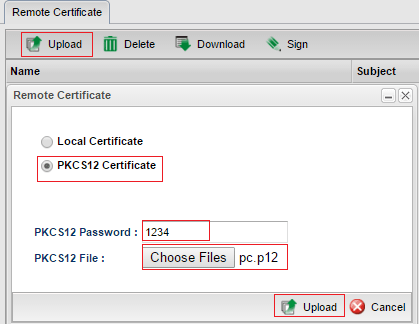
11. Make sure the certificate status is OK

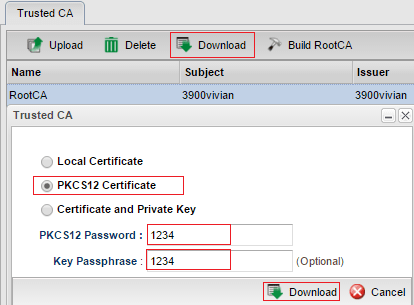
12. Open Certificate Management >> Trusted CA Certificate to download the Trusted CA Certificate with format PKCS12 from Vigor3900 to PC. The Trusted CA certificate file will be saved with the filename RootCA.p12.
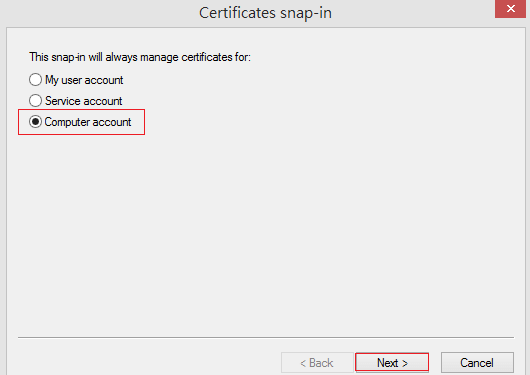
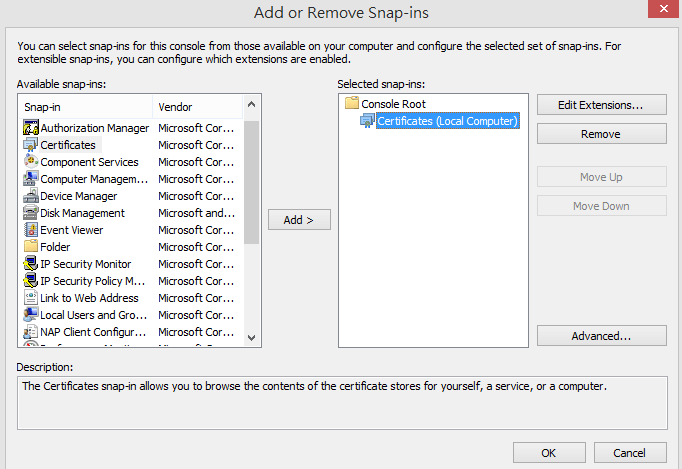
13. Run mmc on Windows PC to open the computer management console. Select Certificates then click Add.
- Certificates snap-in wizard will pop up, select Computer account, then click Next.
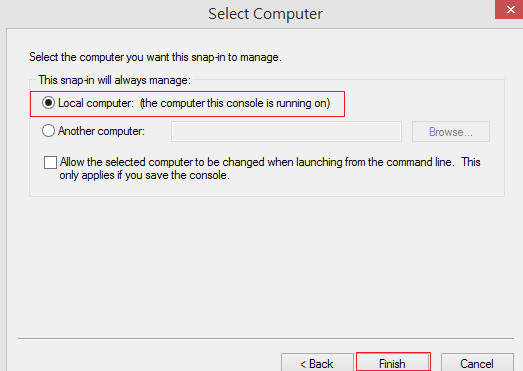
- Select Local computer and click Finish.
- Certificate components have been added successfully.
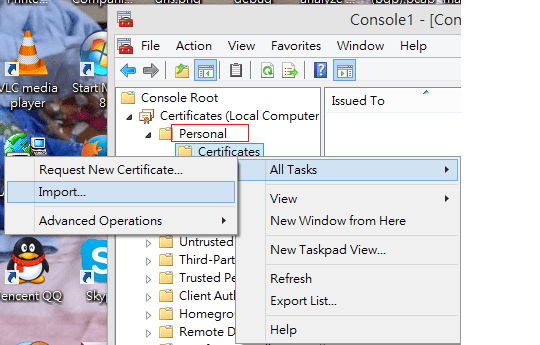
14. Import certificate pc.p12 as Personal Certificate.
- In Personal, right-click on Certificates and then click ALL Tasks >> Import...
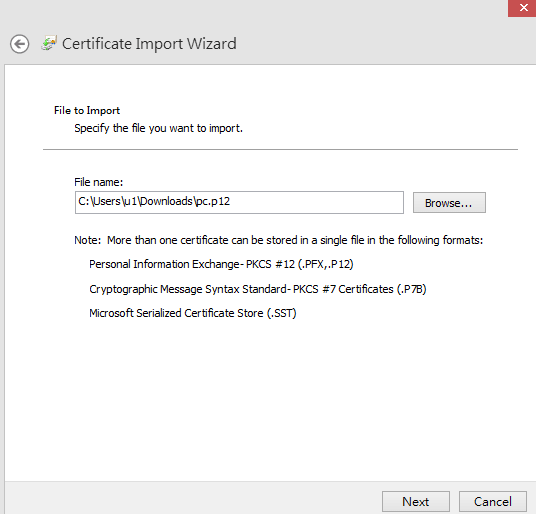
- When Certificate Import Wizard starts, click Browse to select the certificate for PC which we downloaded from Vigor3900, then click Next.
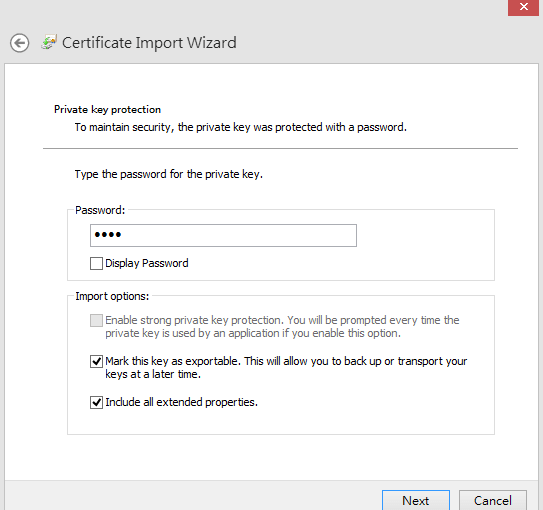
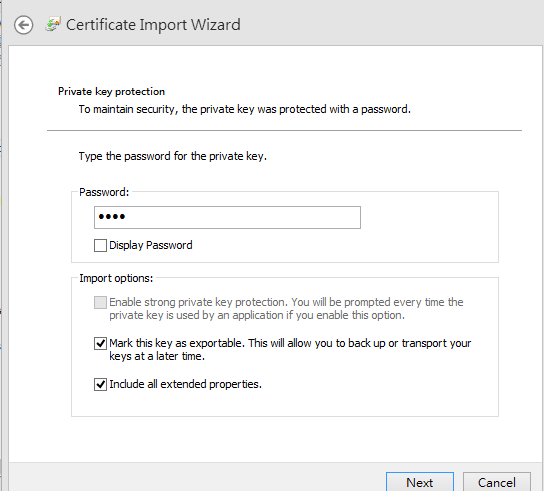
- Type the password for the private key, and then click Next.
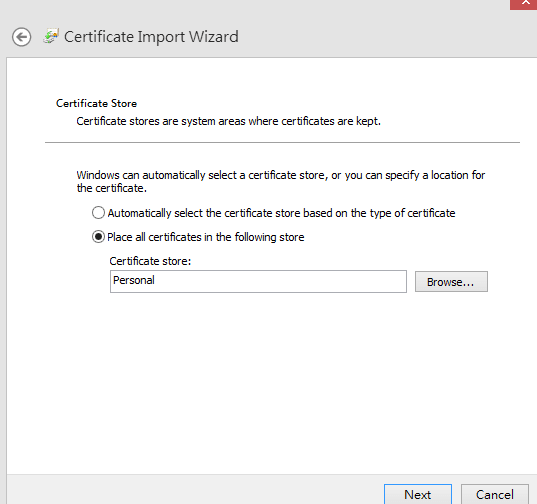
- Select Place all certificates in the following store “Personal”, then click Next.
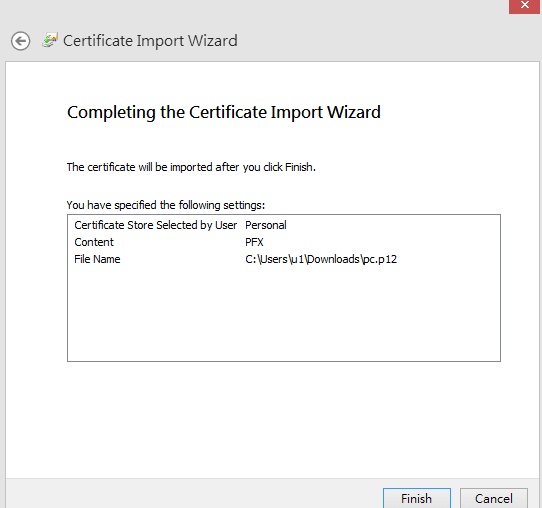
- Click Finish to complete the Certificate Import Wizard.
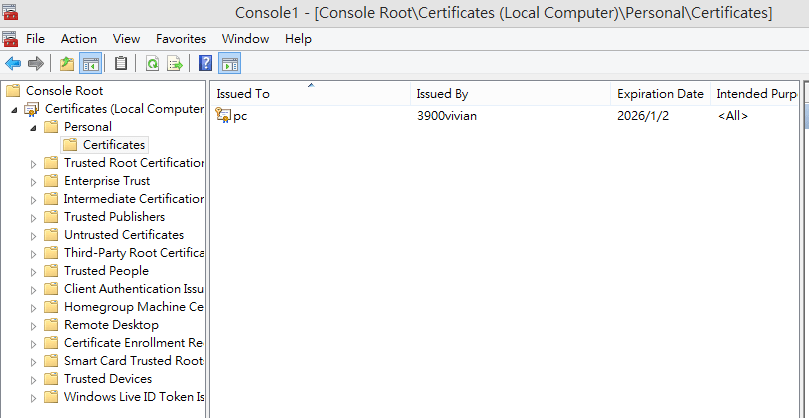
- We can see the certificate
pcin Personal Certificates.
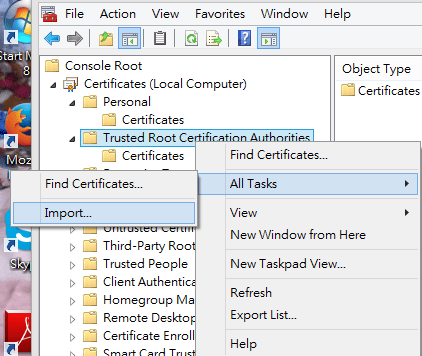
15. Import certificate RootCA.p12 as the Trusted Certificate.
- In Trusted Root Certification Authorities, right-click on Certificates and then click ALL Tasks >> Import.…
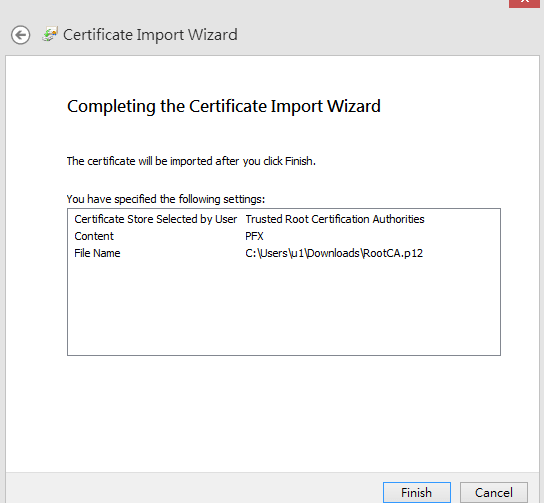
- When Certificate Import Wizard starts, click Browse to select the RootCA certificate which we downloaded from Vigor3900, then click Next.
- Type the password for the private key, and then click Next.
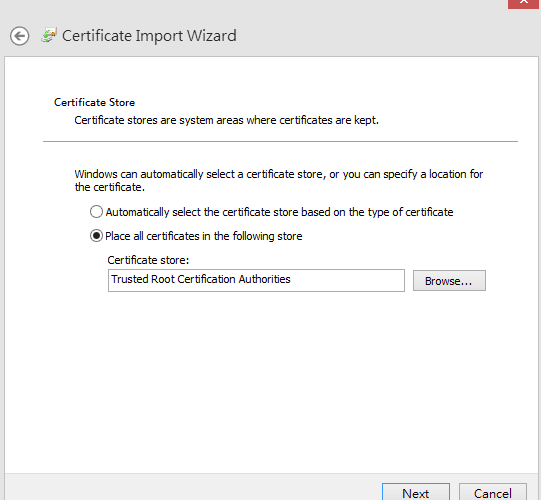
- Select Place all certificates in the following store “Trusted Root Certification Authorities”, then click Next.
- Click Finish to complete the Certificate Import Wizard.
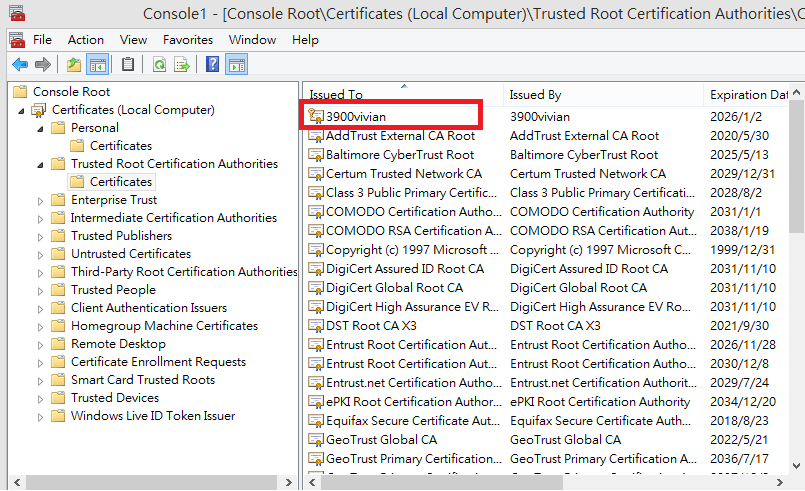
- We can see the certificate
3900vivianin Trusted Root Certification Authorities.

Part B: Create IPsec VPN Profile on Vigor3900 for PC to Dial-In
Open VPN and Remote Access >> VPN Profiles, select IPsec and then click Add to create a new VPN profile.
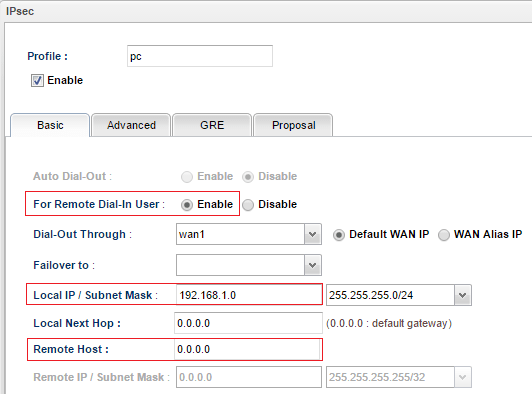
- Select "Enable" for Remote Dial-In User.
- Input Vigor3900's local IP /Subnet Mask
- Specify Remote Host IP. If the remote host has a dynamic IP, please use
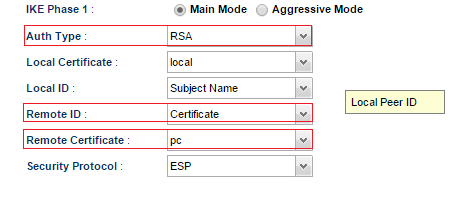
0.0.0.0. - Select “RSA” for Auth Type.
- Leave Local Certificate and Local ID fields as default. (This could be ignored for IPsec Remote Dial-In)
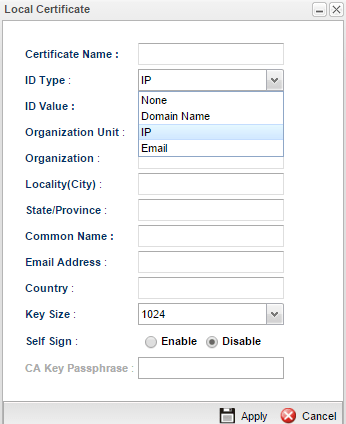
- In the Remote ID field, there are five types:
- Accept Any means accept connections as long as they have the same certificate issuer.
- Subject AlterName: IP means accept connections with the same IP as Subject AlterName. (The remote certificate must be generated with IP ID Type)
- Subject AlterName: Domain Name means accept connections with the same Domain Name as Subject AlterName. (The remote certificate must be generated with Domain Name ID Type)
- Subject AlterName: Email means accept connections with the same Email. (The remote certificate must be generated with ID Type Email)
- Certificate means accept connections with the same certificate (selected in the Remote Certificate field).
- In Remote Certificate, select the certificate “pc”.
- Apply the settings.
Part C: Use Smart VPN Client to Dial IPsec VPN to Vigor3900
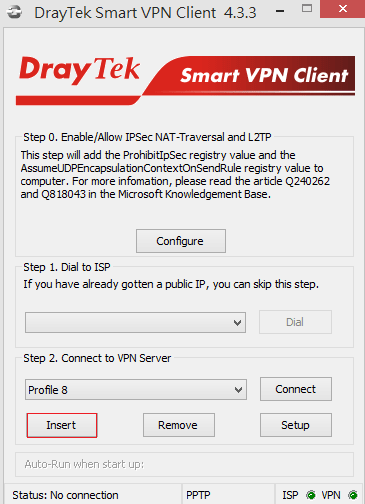
1. Run Smart VPN Client and Insert a VPN profile.
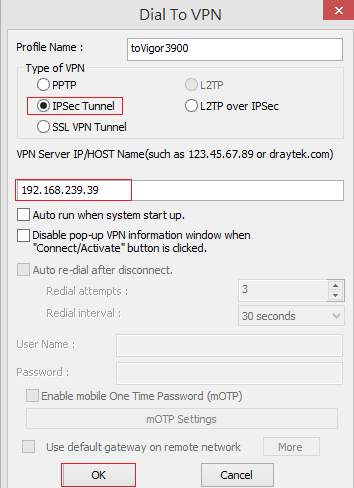
2. In Dial to VPN window:
- Input Profile Name
- Select “IPsec Tunnel” for Type of VPN
- Enter Vigor3900's IP or hostname in VPN Server IP or Host Name
- Click OK.
3. In IPsec Policy Setting window,
- Select “Standard IPsec Tunnel” for Type of IPsec, and then input Remote Subnet and Remote Subnet Mask (which is the local network IP of Vigor3900)
- For Key-exchange Method, select “DH Group 2”
- Select Security Method as “ESP” and “3DES with MD5”
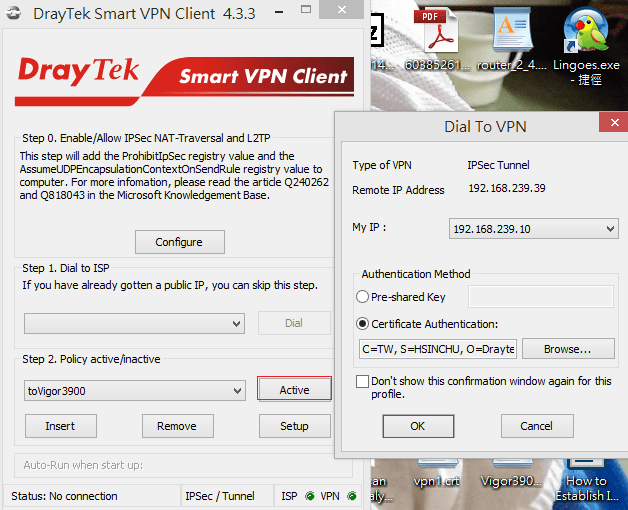
- For the Authentication Method, select “Certificate Authentication” and then click Browse to choose a certificate.
- Select the trusted CA we imported and click OK.
- Click OK to save the settings

4. Click Activate. Dial to VPN window will pop up, and then click OK.
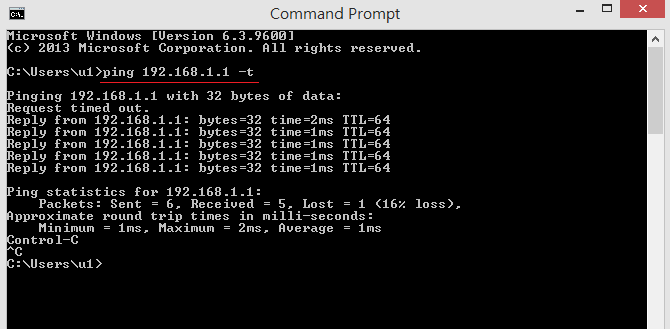
5. Ping Vigor3900's LAN IP on the PC to trigger the IPsec tunnel. When seeing replies from the IP, it means the IPsec tunnel is up.
6. We may also see the IPsec connection status on Vigor3900 from the VPN and Remote Access >> Connection Management page.

Published On:2016-01-22
Was this helpful?