
OpenVPN Setup on Vigor Router with XCA
OpenVPN is an open-source VPN technique which is capable of traversing network address translators (NATs) and firewalls, since it uses a custom security protocol that utilizes SSL/TLS for key exchanges. A certificate is one of the client authentication methods that OpenVPN supports. With a Certificate Authority (CA) to sign the certificate, the server can use a different certificate for each client in a multi client-server topology.
In this article, we will use XCA, a free Certificate Authority (CA) software, to generate and manage the server and client certificate that required for OpenVPN configuration. This article includes:
- Part 1. Making Server Certificate on the Router
- Part 2. Create a new CA on XCA
- Part 3. Importing Signed Server Certificate and CA Certificate to the Router
- Part 4. Making a Private Certificate and Private key for VPN Client
- Part 5. Router Setup as OpenVPN Server
- Part 6: Client Setup in OpenVPN GUI
Part 1. Making Server Certificate on the Router
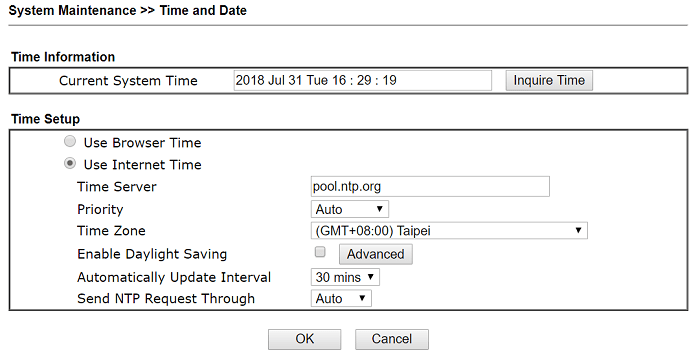
1-1. Since the certificate has a valid period, please make sure the time settings of the router is correct at System Maintenance >> Time and Date.
1-2. Go to Certificate Management >> Local Certificate to generate a new certificate. Type the information, then click Generate.
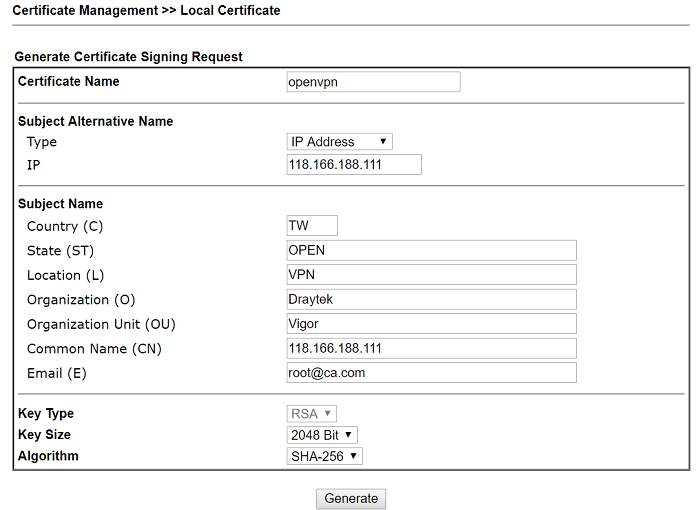
1-3. After clicking Generate, you will see the Certificate Signing Request, which needs to be signed by a CA. Copy the certificate at PEM Format Content.

Part 2. Create a new CA on XCA
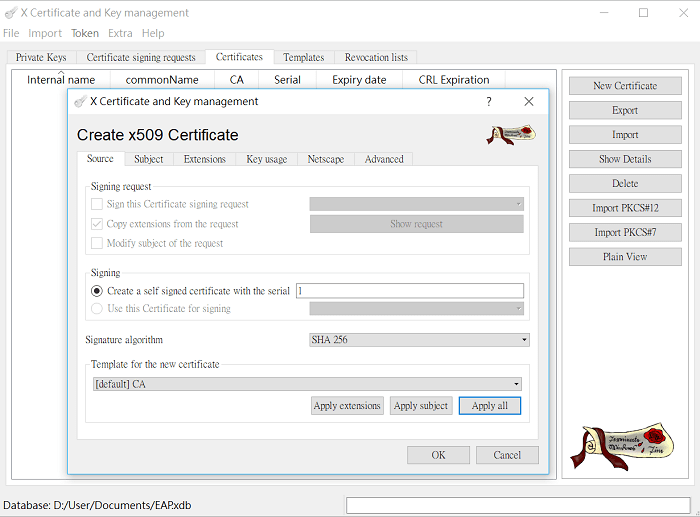
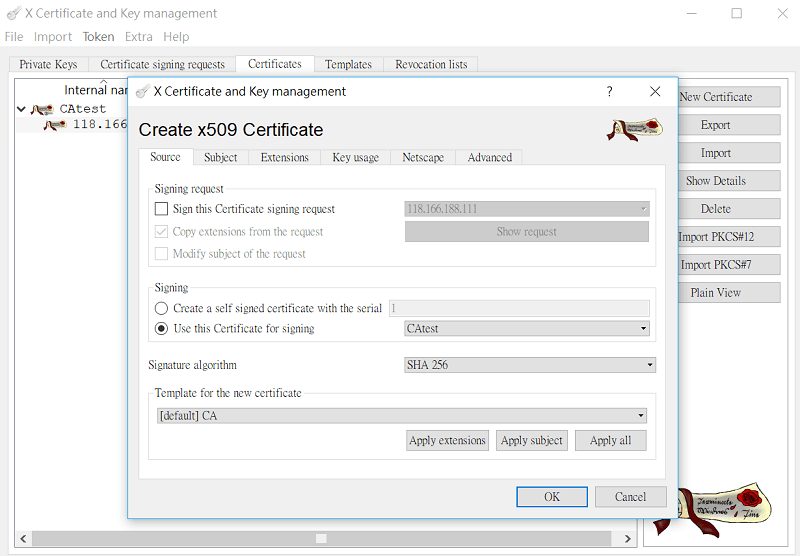
2-1. Launch XCA, go to the Certificates tab, click New Certificate. Select Create a self-signed Certificate with the serial. Click Apply all to apply the CA Template.
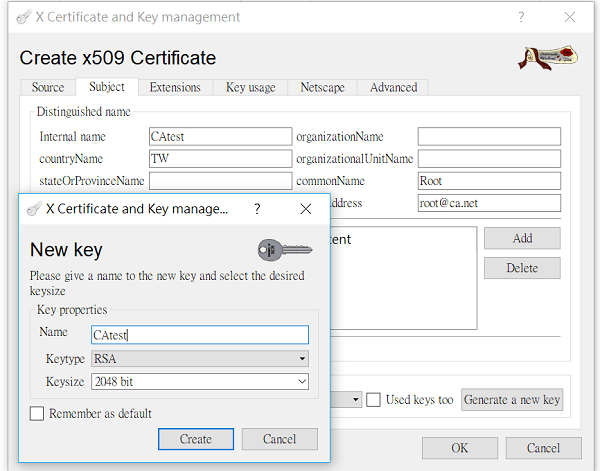
2-2. Go the Subject page,
- type distinguishable information for the certificate, then click Generate a new key.
- Select "RSA" for Keytype and "2048 bit" for Keysize, then click Create.
- Click OK to generate the CA Certificate. Now we have the Trusted CA Certificate to sign the server certificate and client certificate.
Part 3. Importing Signed Server Certificate and CA Certificate to the Router
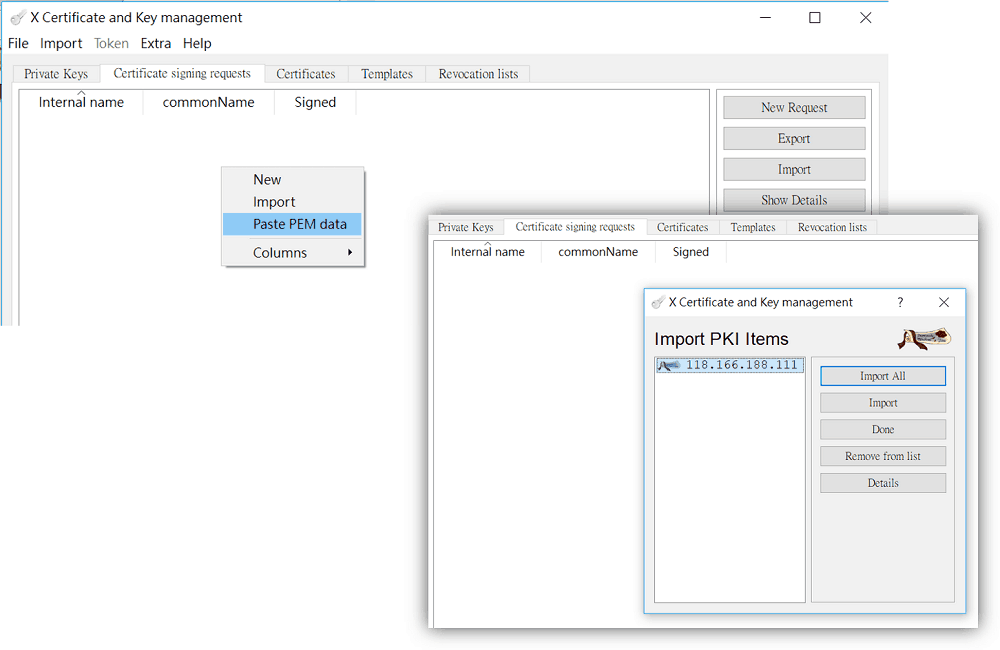
3-1 Go to Certificate signing requests, select Paste PEM data and paste the PEM Format Content copied from the router in step 1-3.
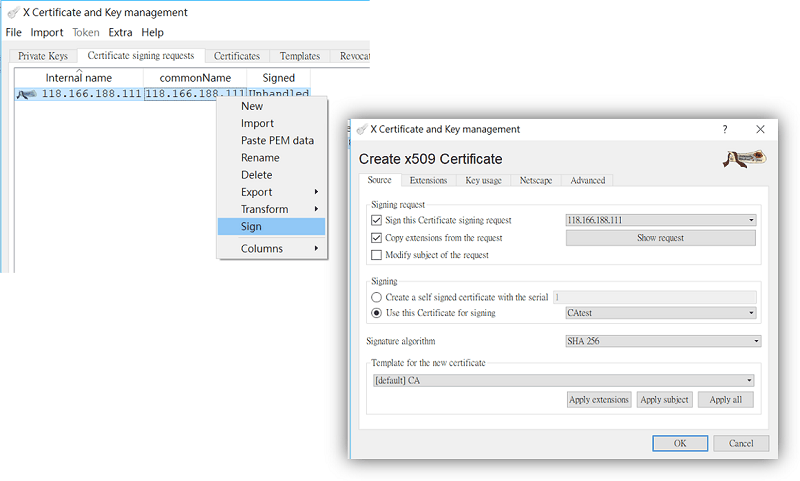
3-2. Right-click on the imported certificate and select Sign. Use the certificate created in step 2 to signing.
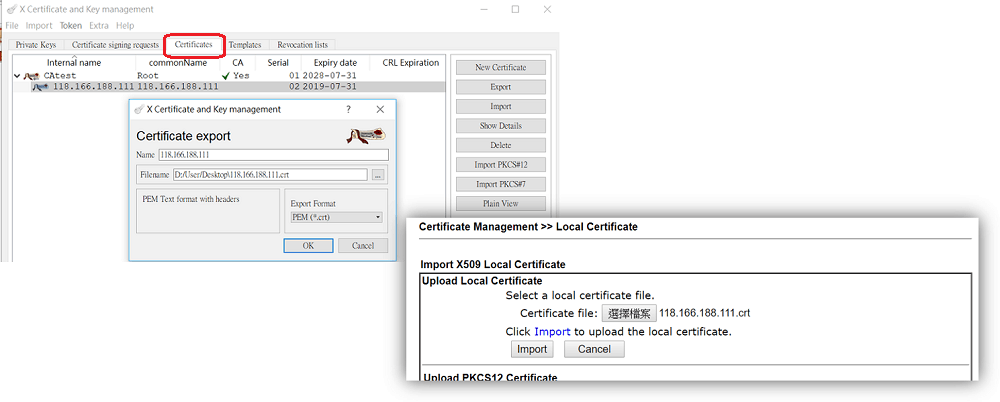
3-3 At Certificate tab, export the Singed Local Certificate in .crt format. Go back to the router's GUI, import it to the router at Certificate Management >> Local Certificate >> Upload Local Certificate.
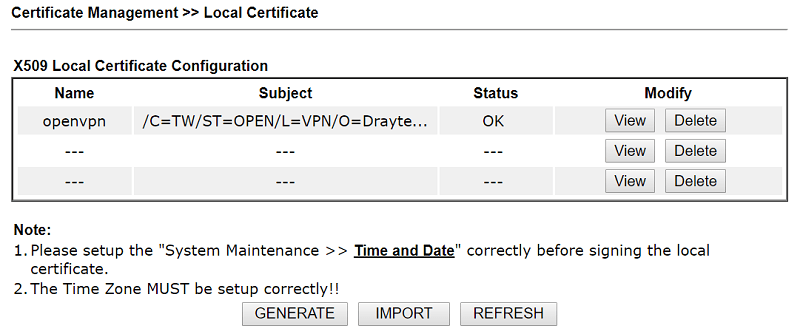
3-4 Make sure the status of the certificate uploaded is OK.
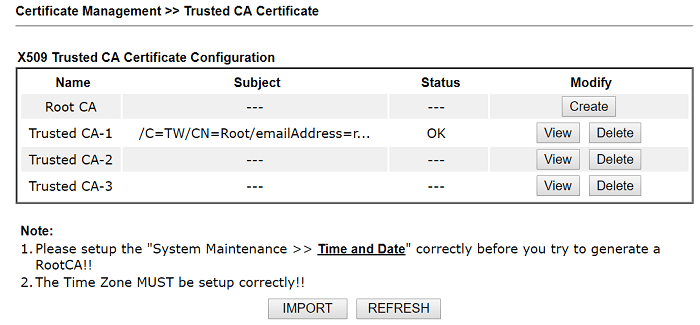
3-5 On XCA, go to Certificate, choose the CA certificate and export it in .crt format, and import it to the router at Certificate Management >> Trusted CA Certificate.
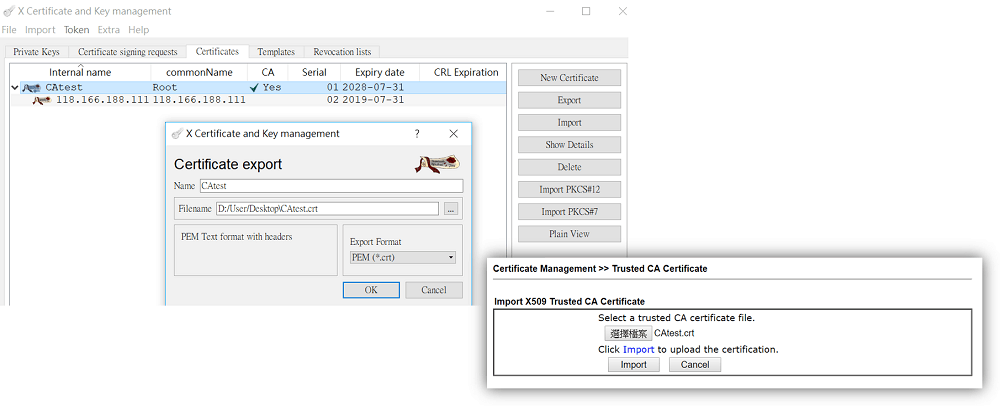
3-6 Make sure the status of the Trusted CA imported is OK.
Part 4. Making a Private Certificate and Private key for the VPN Client
4-1 On XCA, go to Certificates, click New Certificate. At Signing, select use the CA certificate for singing.
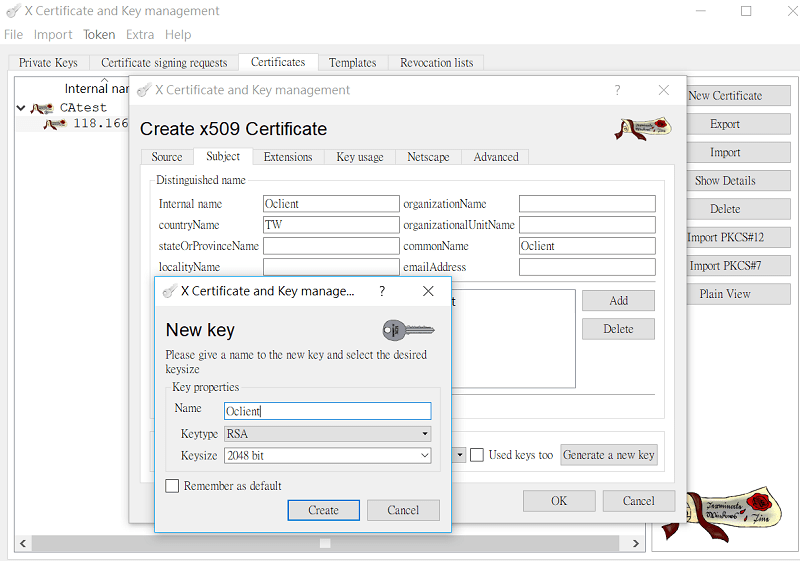
4-2 Go to the Subject page,
- enter distinguishable information for the certificate,
- click Generate a new key, choose "RSA" for Keytype and "2048 bit" for Keysize. Then click Create.
- Click OK to generate the certificate. Now, we have the private certificate for the VPN client as well.
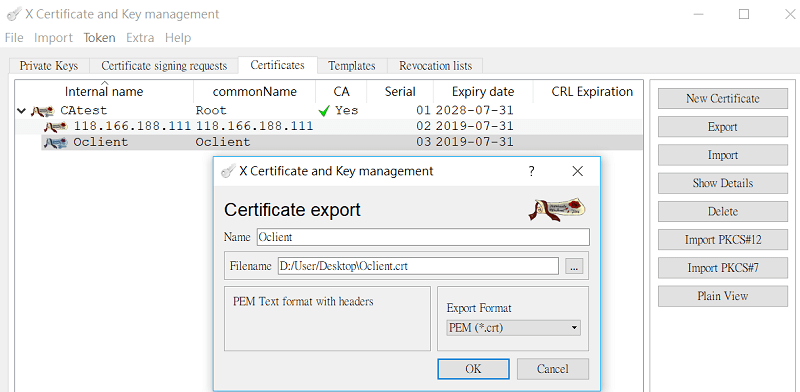
4-3. Go to Certificates, select the certificate we just created. Export it in .crt format and import to the VPN client.
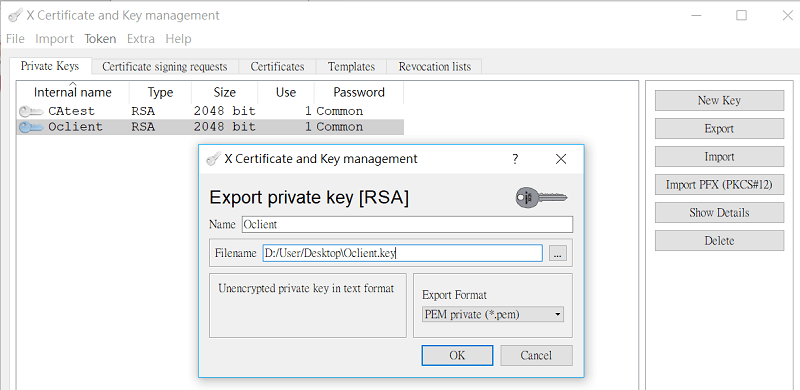
4-4. Go to Private Keys, export the Private Key (Oclient.key), manually change extension name to .key. Then, import it to the VPN client.
Part 5. Router Setup as OpenVPN Server
5-1. Go to VPN and Remote Access >> OpenVPN General Setup, and have the configuration below.

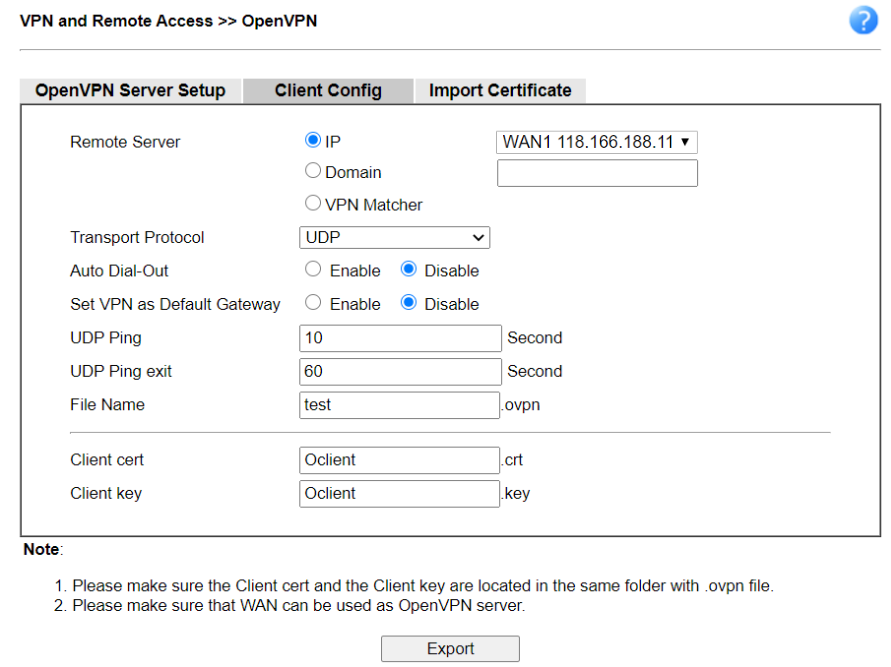
5-2. Go to the Client Config tab, specify the file name of CA Certificate, Client Certificate for OpenVPN client, and Client Key. Then, click Export.
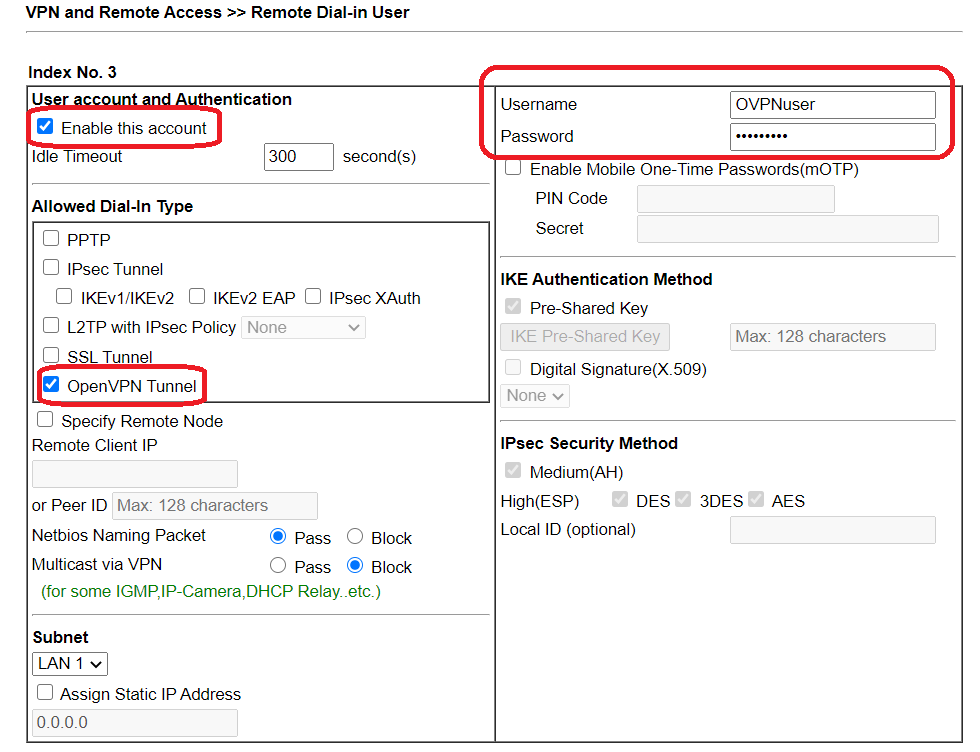
5-3. Go to VPN and Remote Access >> Remote Dial-in User to create user profiles for OpenVPN Dial-in users. Check Enable this account, enter Username/Password, and check OpenVPN Tunnel in Allowed Dial-In Type.
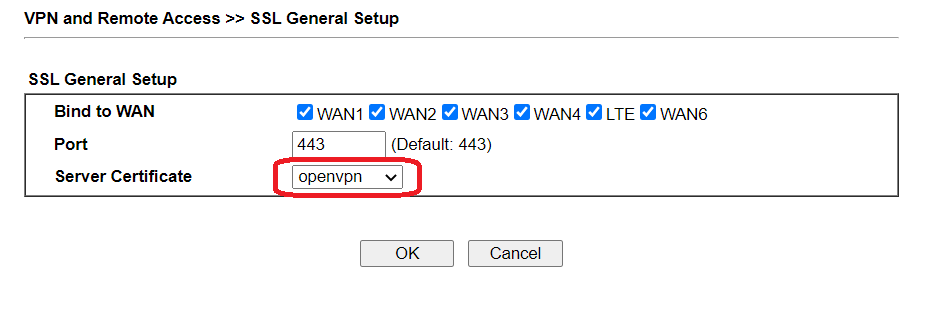
5-4. Go to VPN and Remote Access >> SSL General Setup to change the Server Certificate to the Local Certificate generated in part 2.
Part 6: Client Setup in OpenVPN GUI
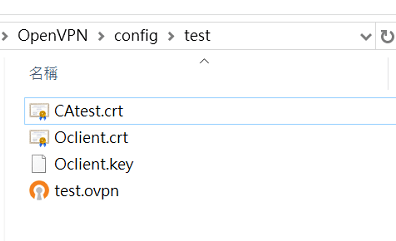
6-1 Import the OpenVPN config (test.ovpn) in OpenVPN GUI. There are three files to put in the OpenVPN config folder:
- Trusted CA Certificate (CAtest.crt)
- Private Certificate (Oclient.crt)
- Private Key (Oclient.key)
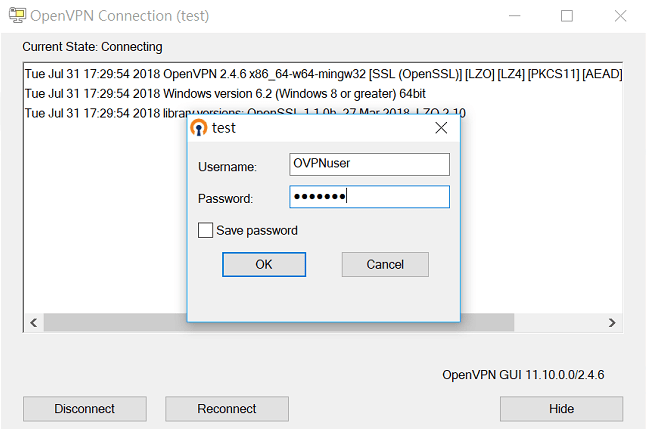
6-2 Click Connect and enter username/password configured in step 5-3.
Client Setup in Smart VPN client
OpenVPN is supported by Smart VPN client since v5.2.0, please install OpenVPN for Windows first.
Following is the setup steps of smart VPN client as an alternative solution apart from OpenVPN GUI.
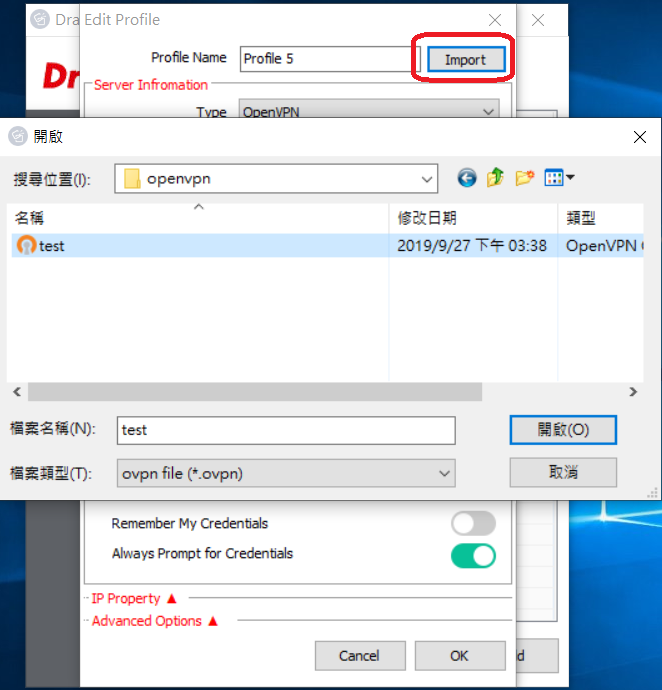
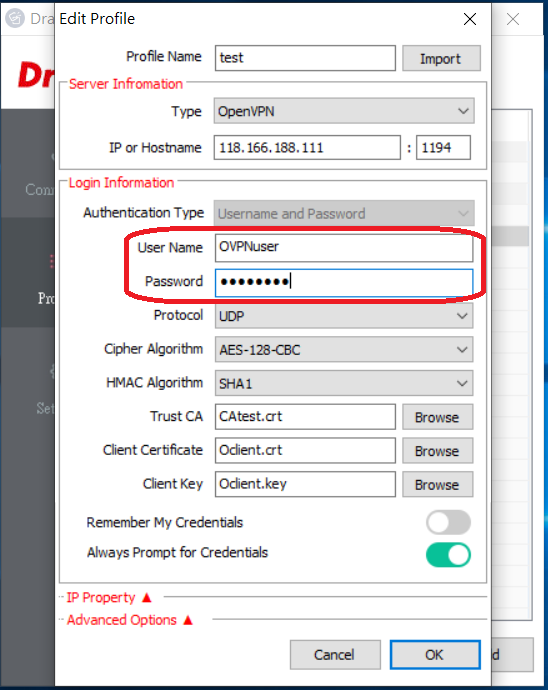
1. Add a VPN profile and choose VPN type OpenVPN, then Import the OpenVPN config (test.ovpn) in Smart VPN client.
2. Enter username/password configured in step 5-3, and click OK to save it.
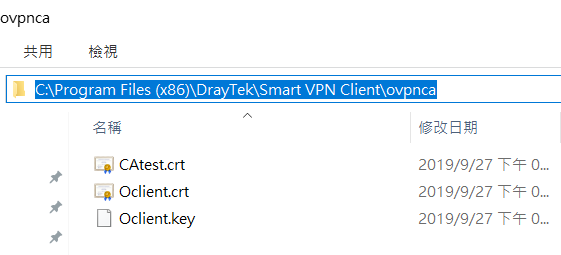
3. There are three files to put in smart VPN client ovpnca folder:
- Trusted CA Certificate (CAtest.crt)
- Private Certificate (Oclient.crt)
- Private Key (Oclient.key)
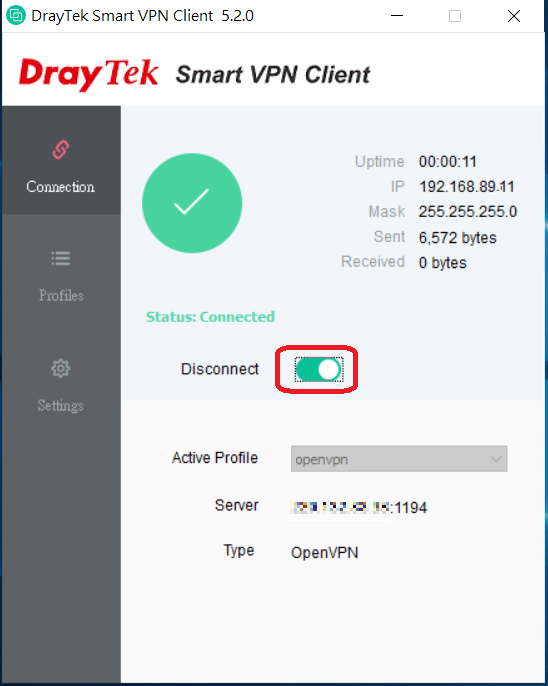
4. Then swtich on Connect.
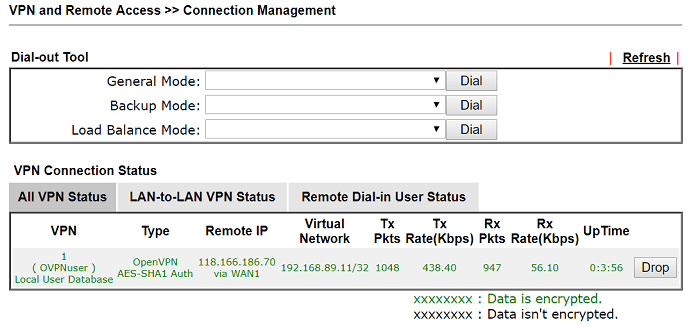
After establishing the OpenVPN tunnels, the VPN status will show in VPN and Remote Access >> Connection Management
Troubleshooting
VERIFY ERROR: error=self signed certificate
The router is using the self-signed certificate for the VPN instead of the certificate we imported. Check the Server Certificate settings at SSL VPN >> General Setup (step 5-4).
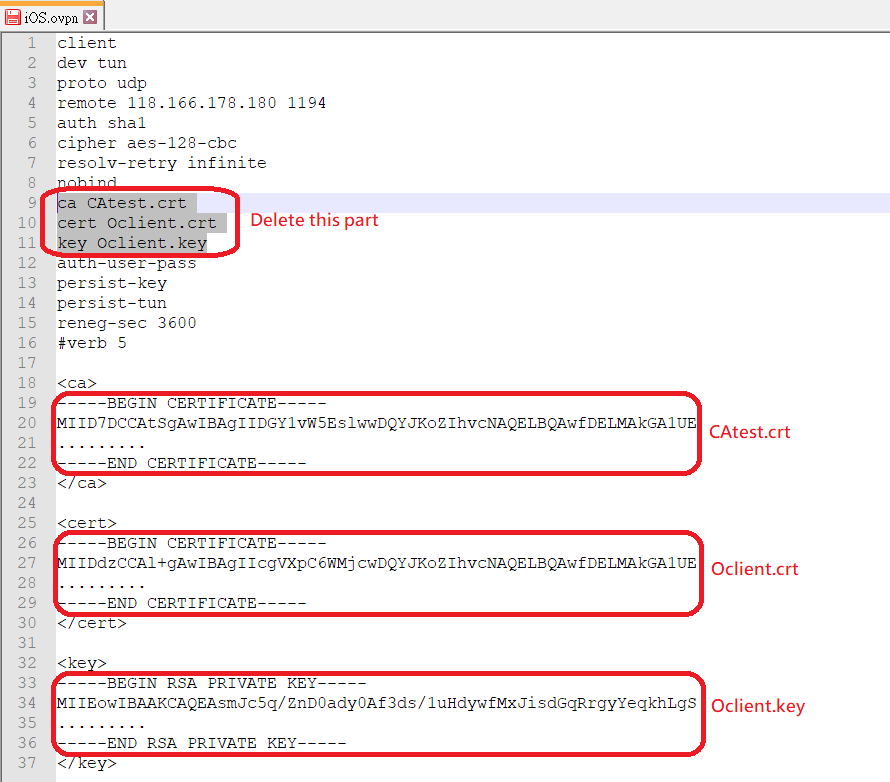
6-1 Edit the OpenVPN config file as follows
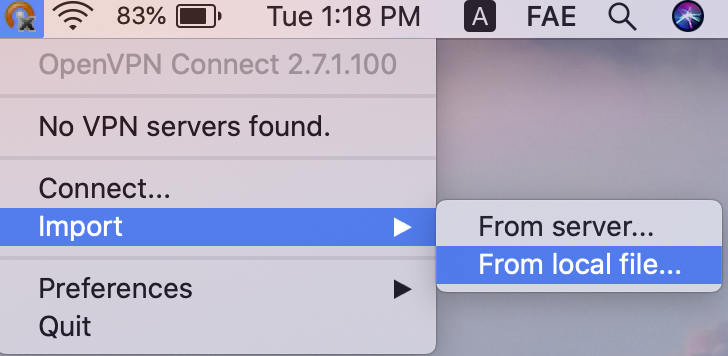
6-2 Install OpenVPN Connect on macOS devices
6-3 Send the OpenVPN config file to macOS devices and run OpenVPN Connect
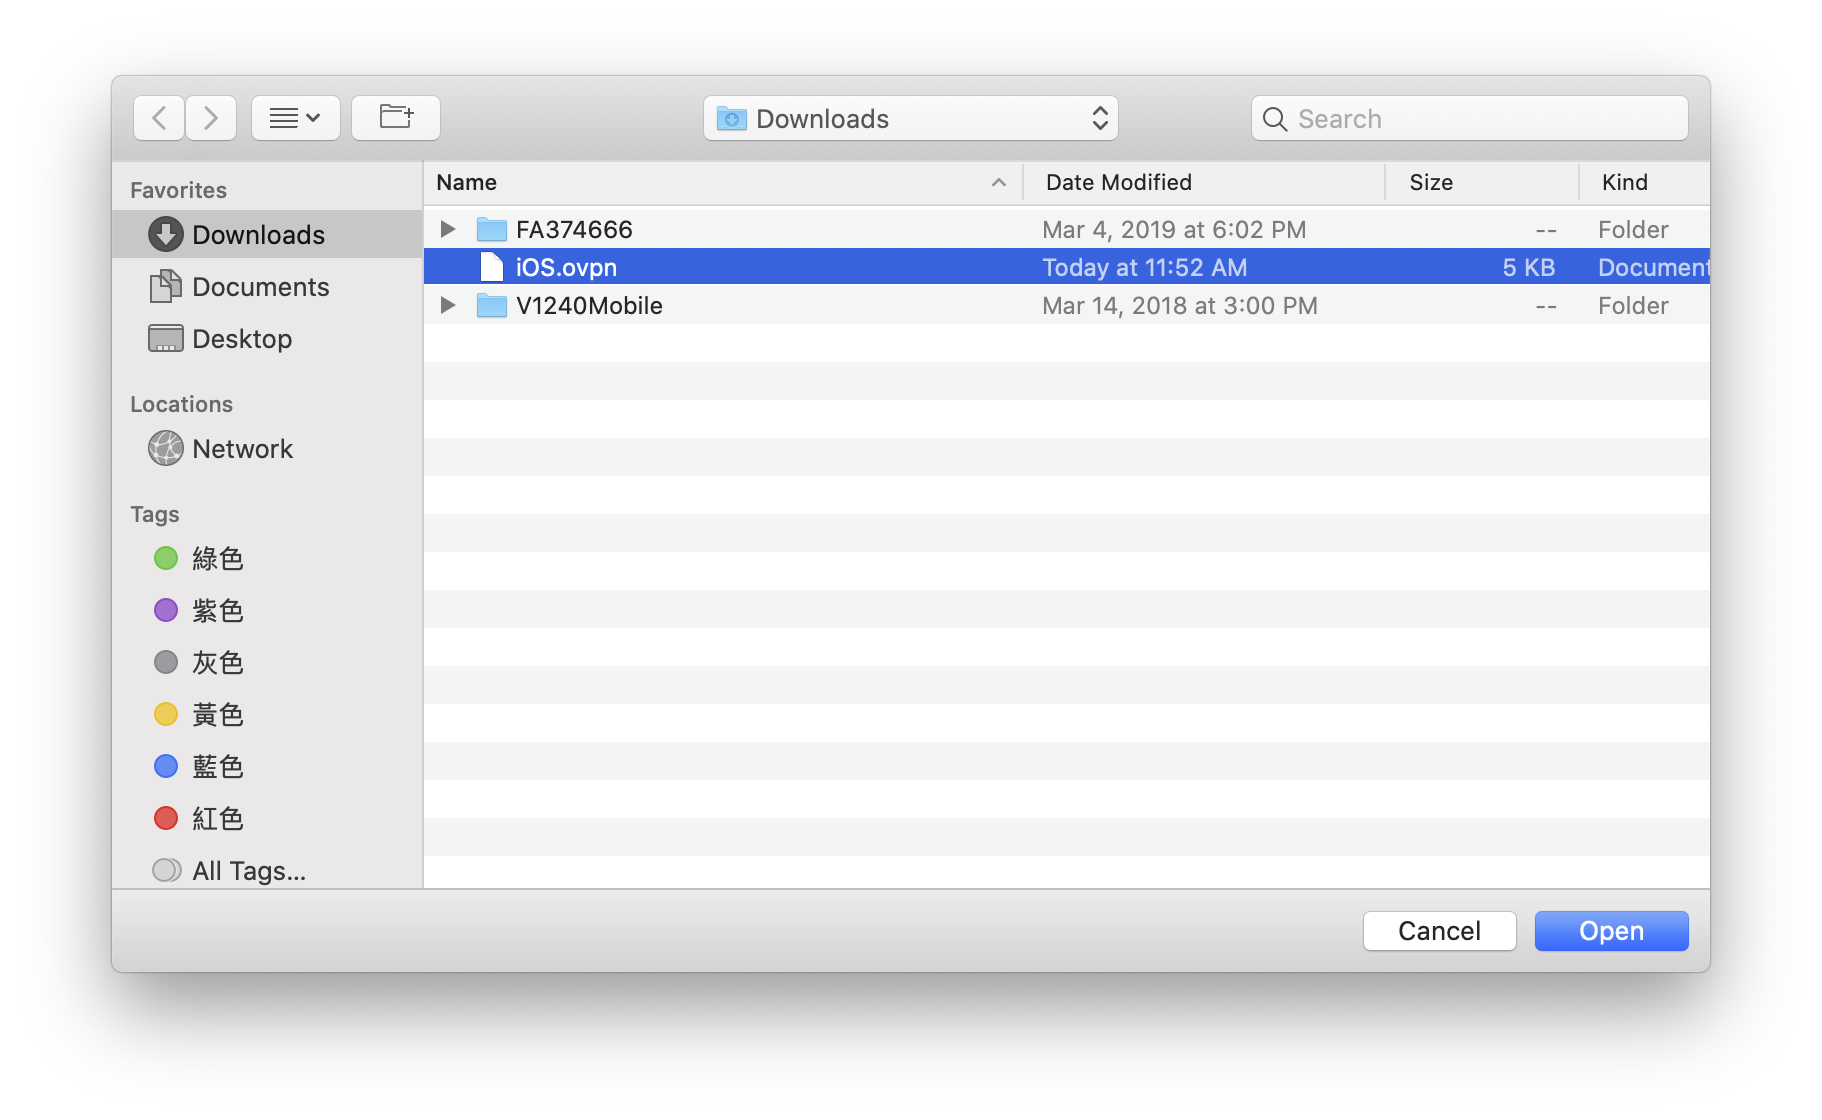
6-4 Import the OpenVPN config from local file
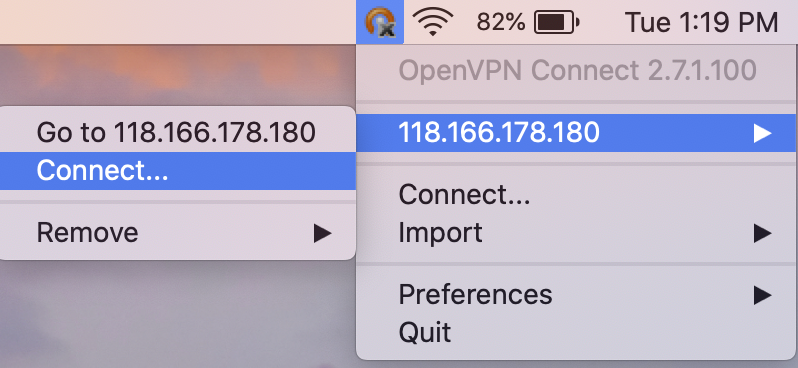
6-5 Select the server address and click Connect
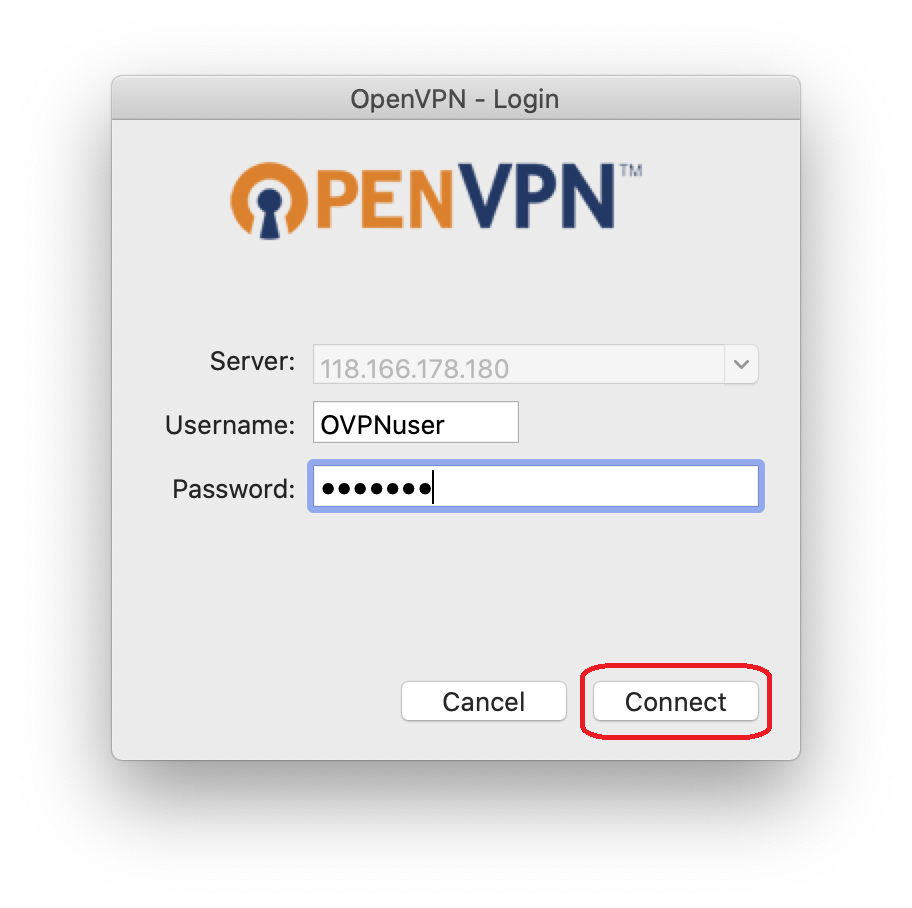
6-6 Enter Username and Password, then click Connect
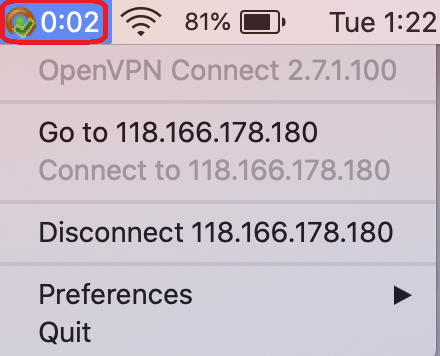
We can see OpenVPN tunnel is up on the toolbar
Troubleshooting
VERIFY ERROR: error=self signed certificate
The router is using the self-signed certificate for the VPN instead of the certificate we imported. Check the Server Certificate settings at SSL VPN >> General Setup (step 5-4).
6-1 Edit the OpenVPN config file as follows
6-2 Install OpenVPN Connect on iOS devices
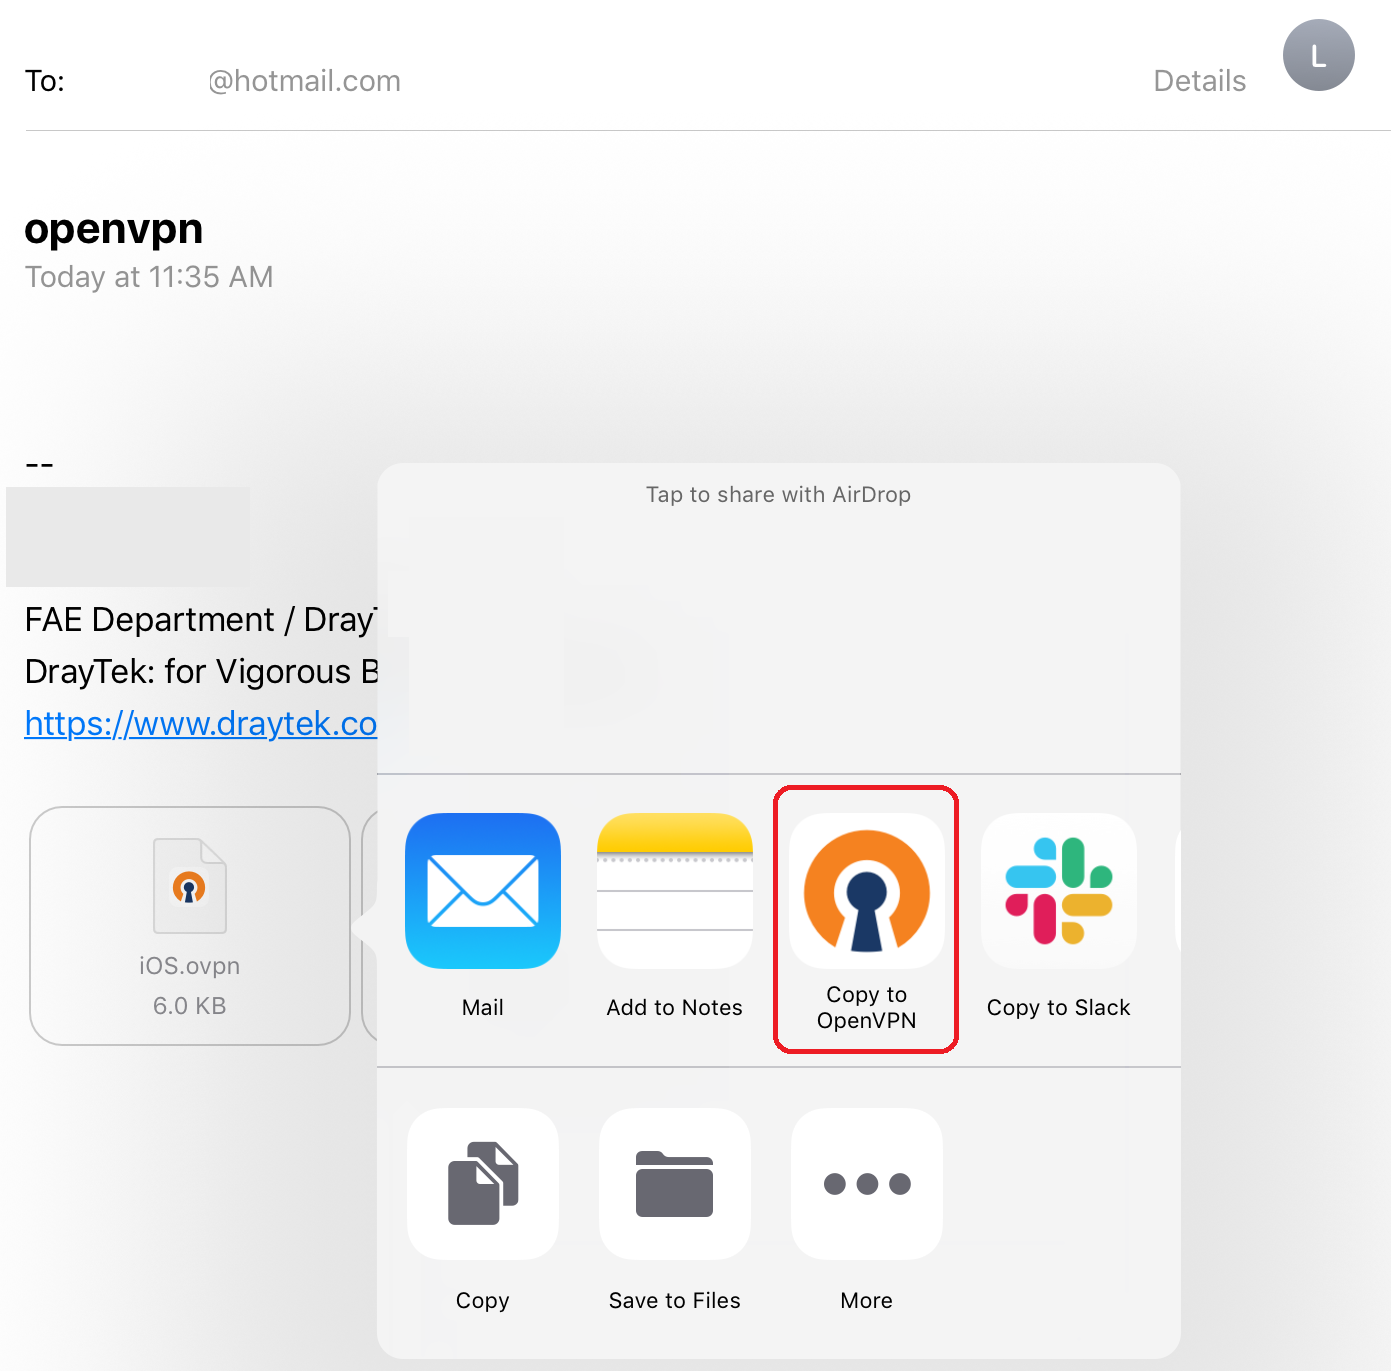
6-3 Send the OpenVPN config file to iOS devices and Copy to OpenVPN
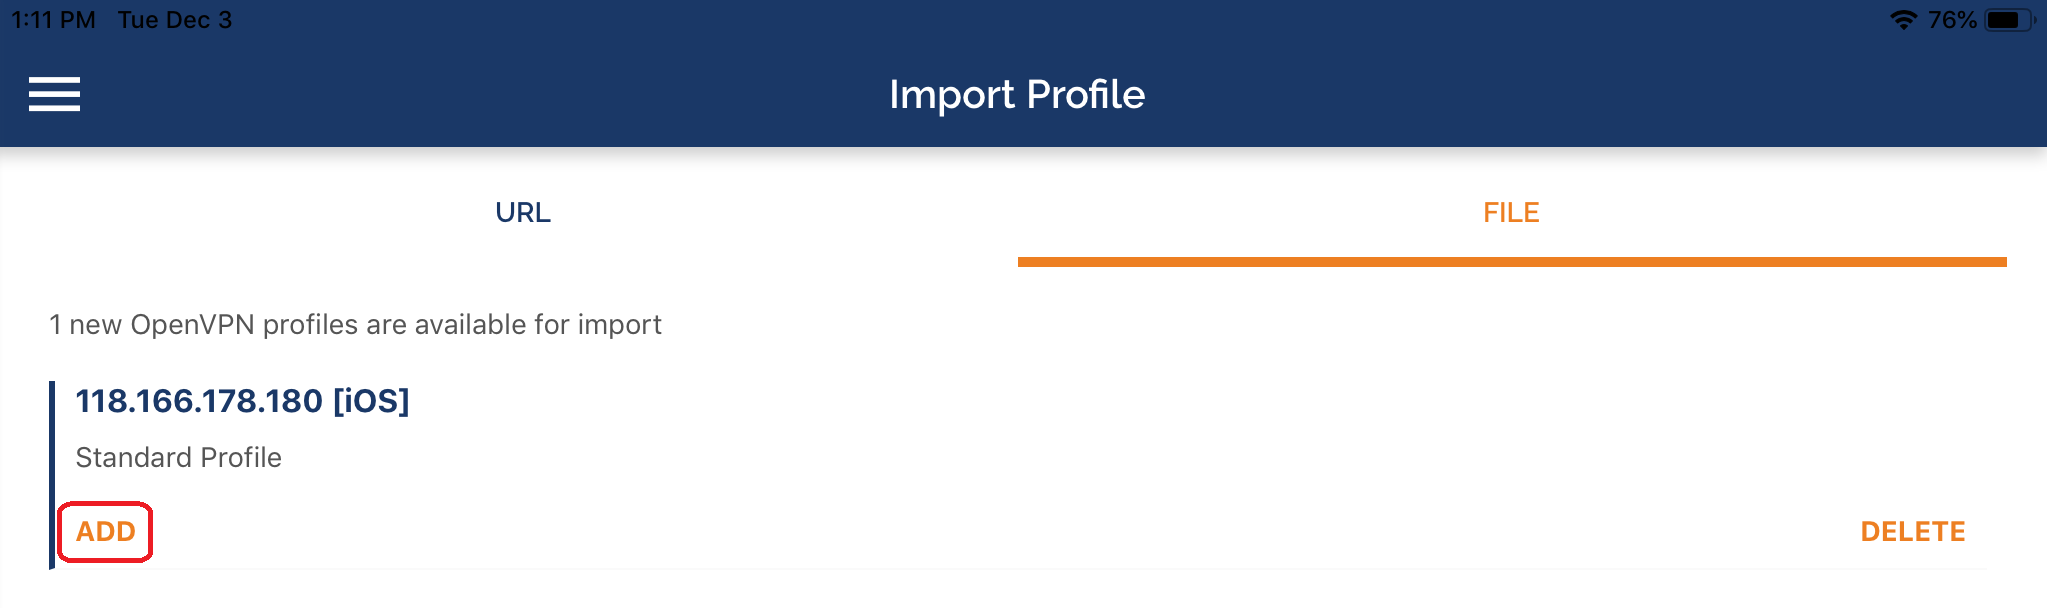
6-4 Tap ADD to import OpenVPN config
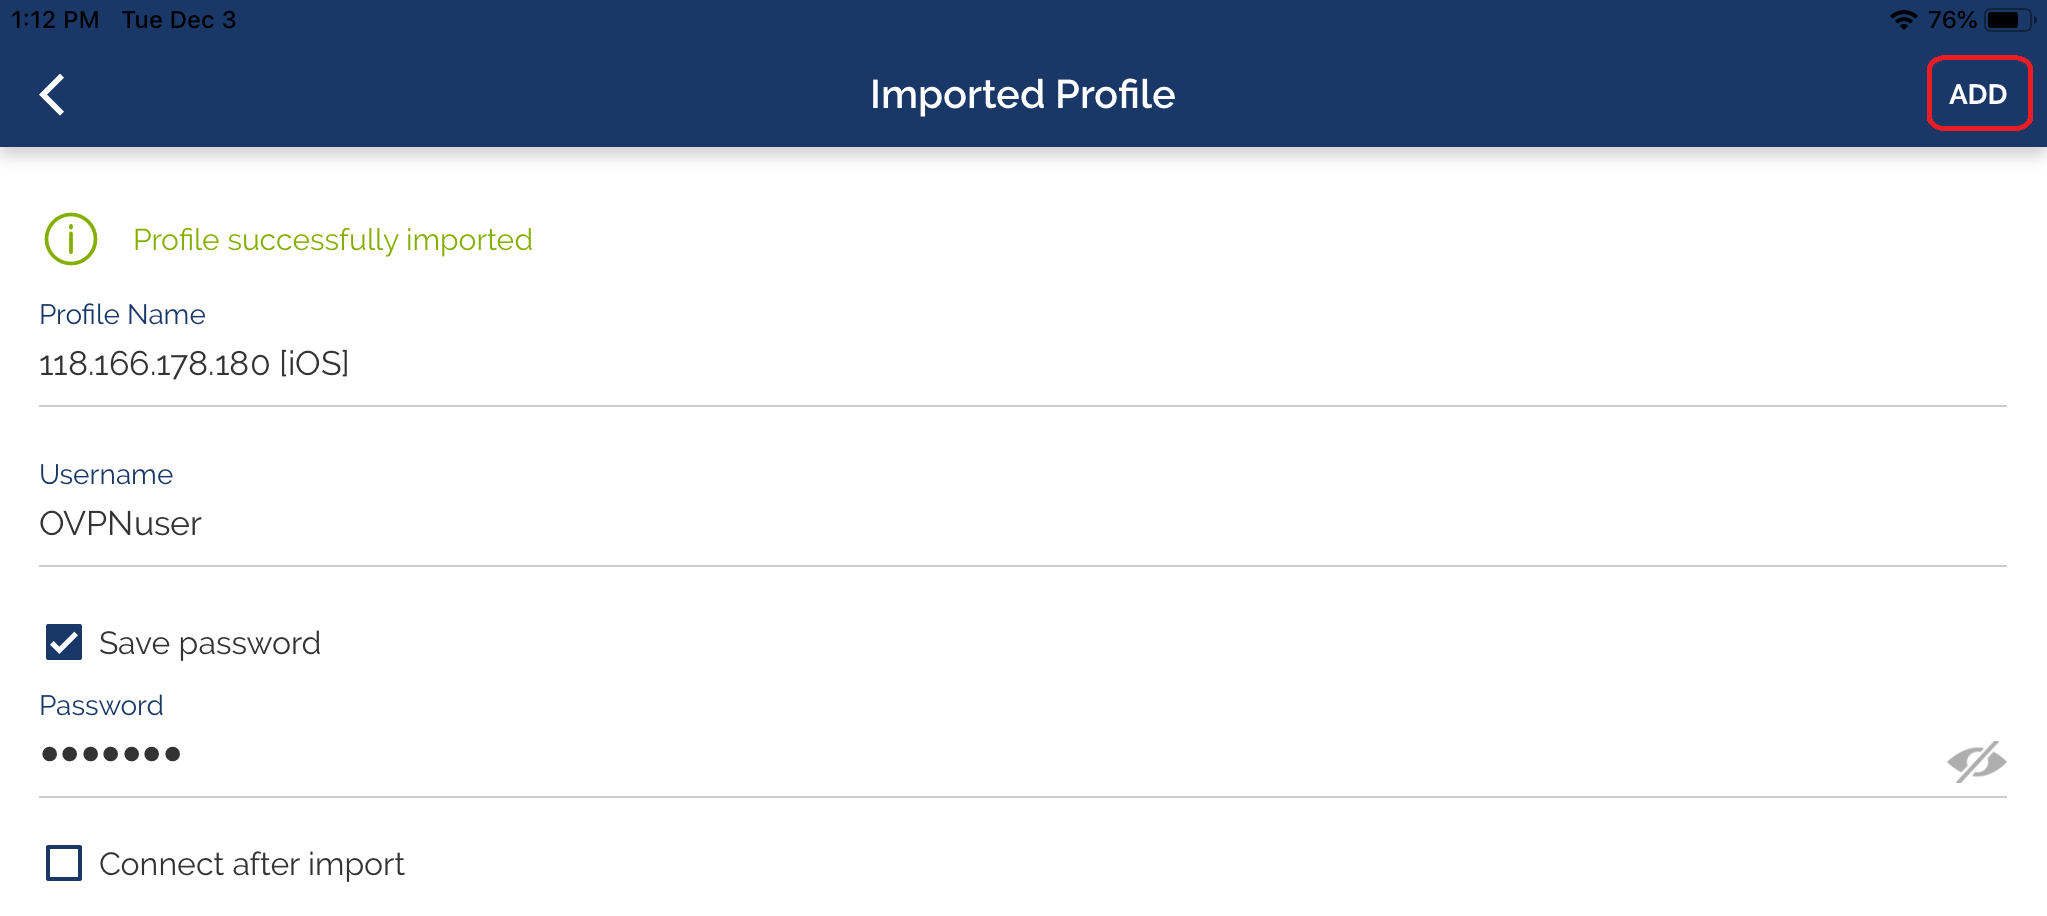
6-5 Enter Username and Password, then tap ADD
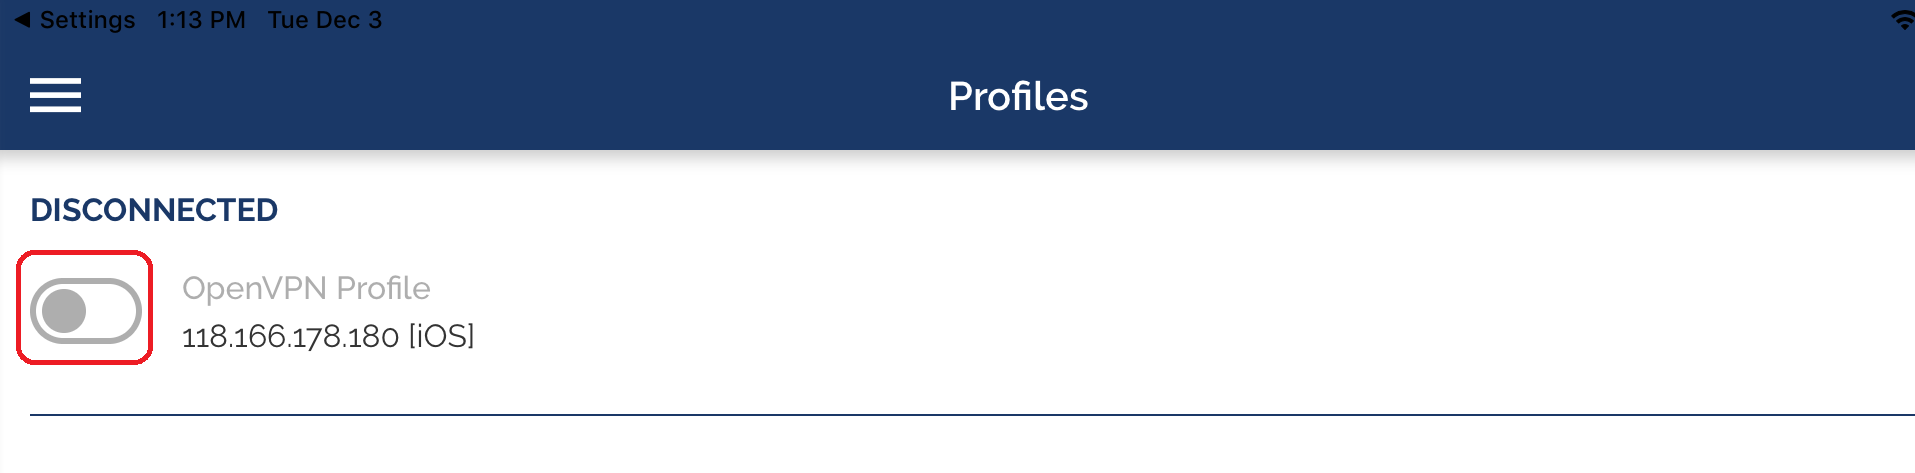
6-6 Tap Connect
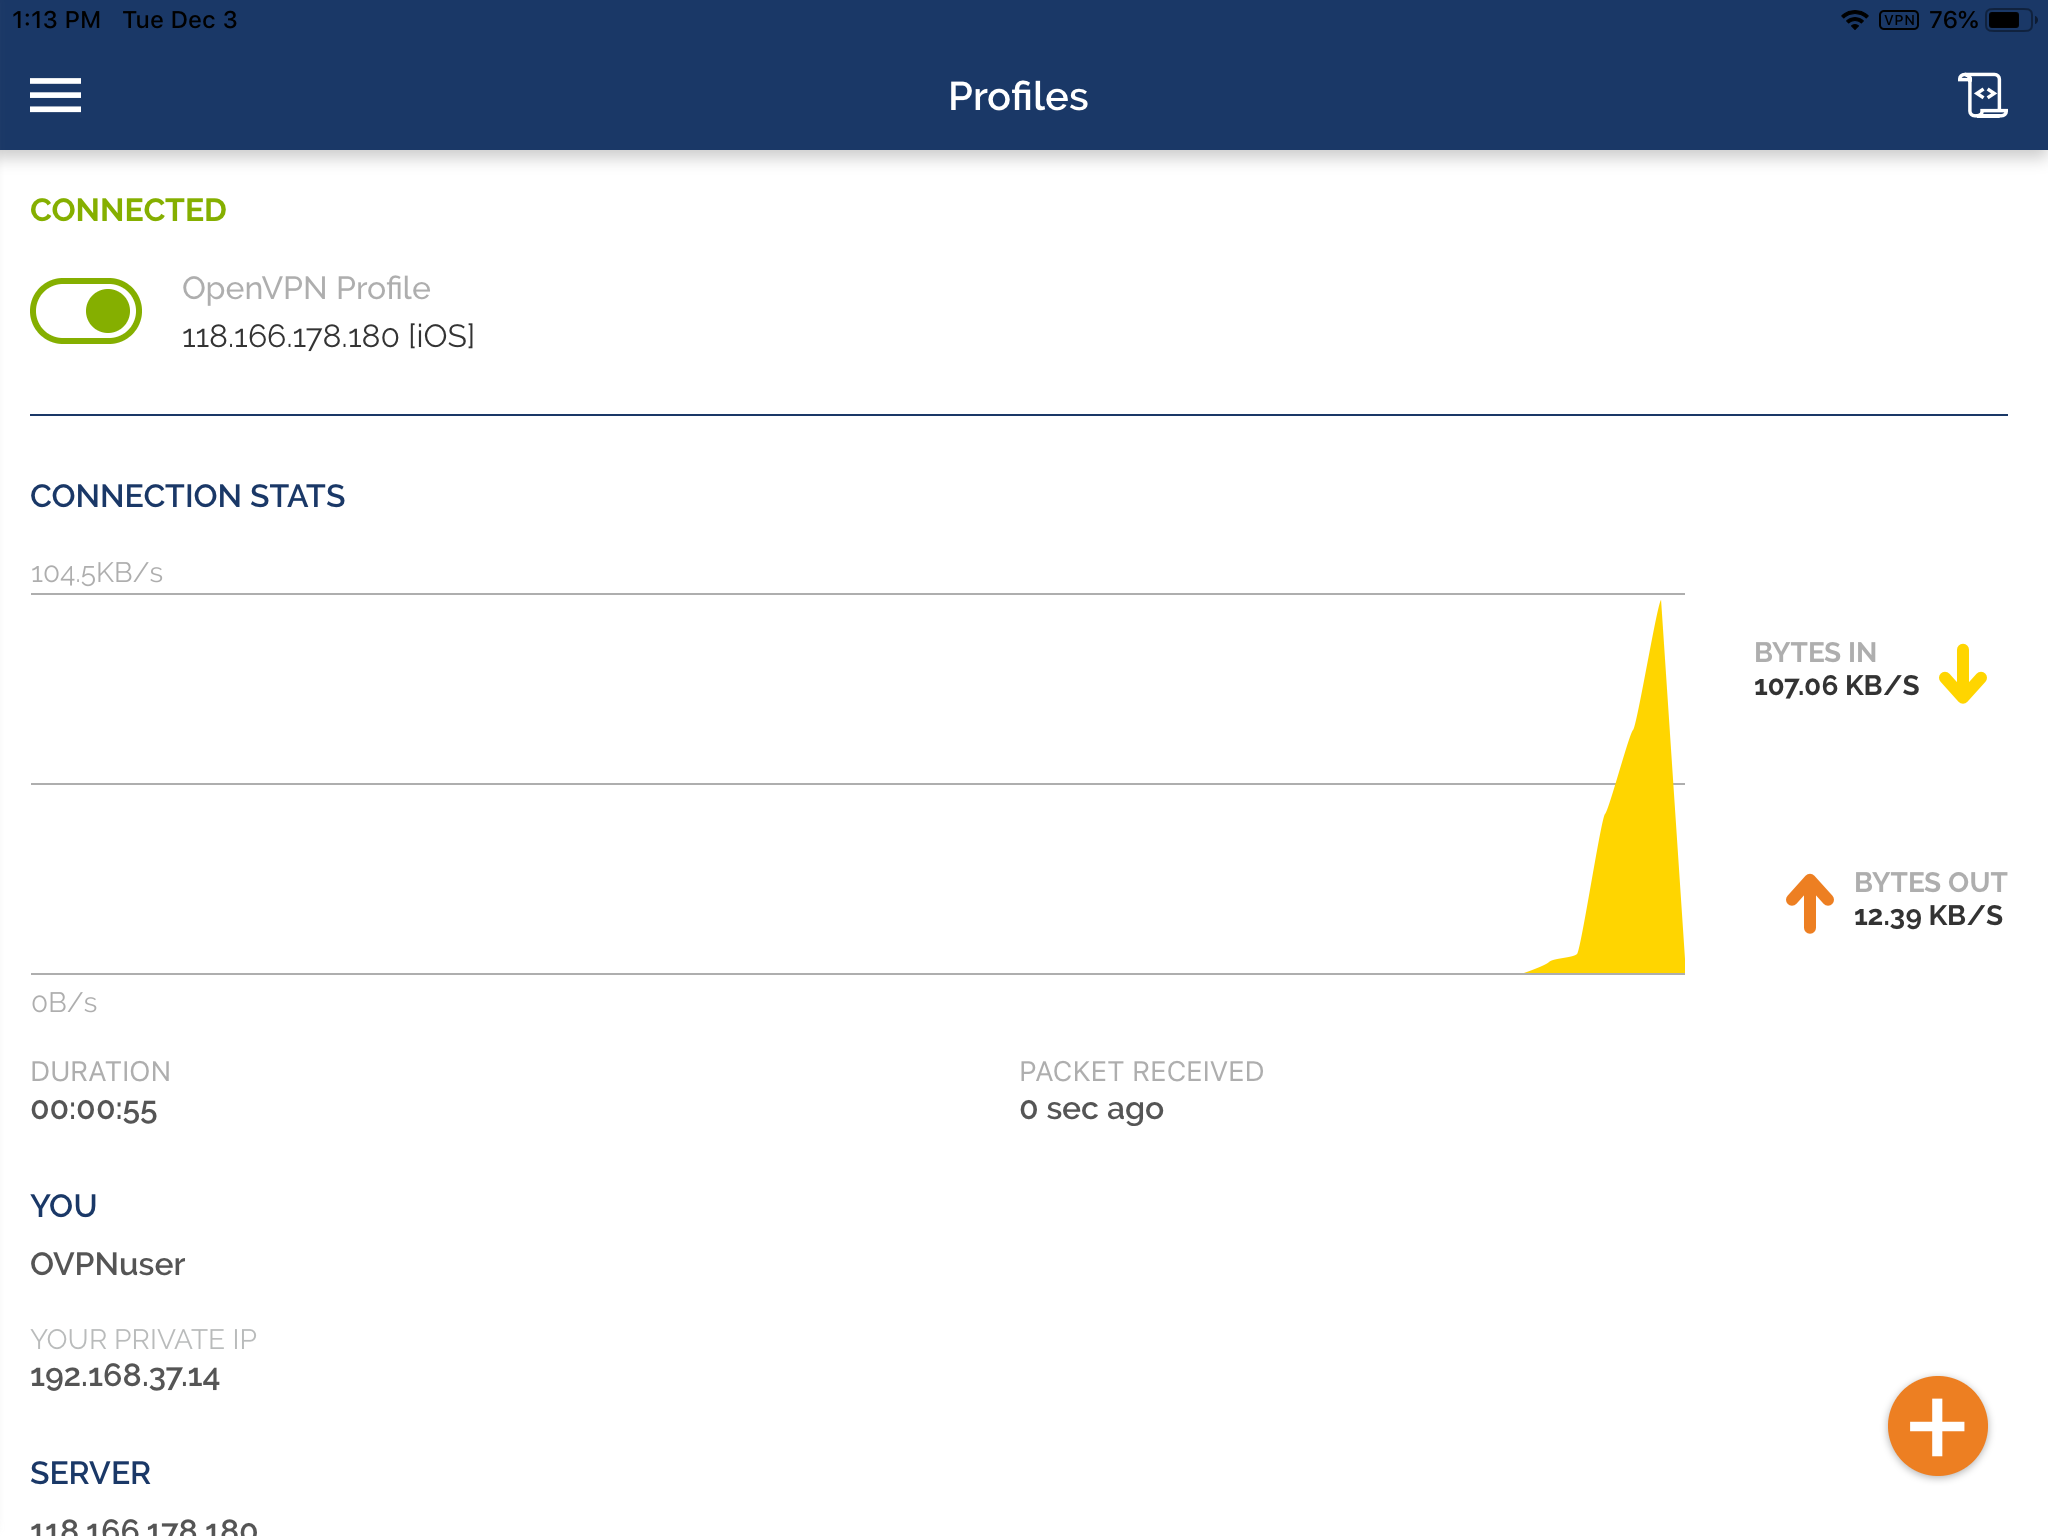
We can see OpenVPN tunnel status after it's established.
Troubleshooting
VERIFY ERROR: error=self signed certificate
The router is using the self-signed certificate for the VPN instead of the certificate we imported. Check the Server Certificate settings at SSL VPN >> General Setup (step 5-4).
Published On:2018-11-27
ShareWas this helpful?