
Deploying VLANs by SWM and VigorSwitch
This article demonstrates how to deploy tag-based VLAN on the network with selected Vigor Router and a VigorSwitch. By using the Central Switch Management (SWM) of the router, Network Administrator can do all the configuration from the router's management page. Furthermore, SWM simplifies the VLAN configuration by providing only the options which match the router's VLAN configuration.
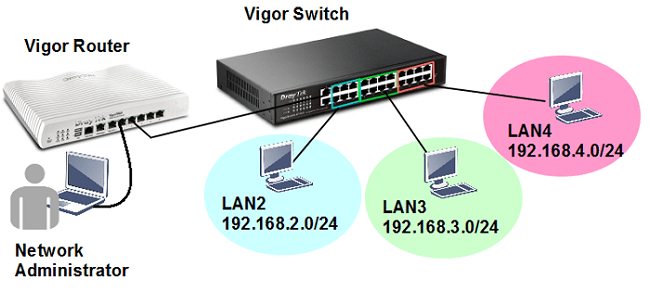
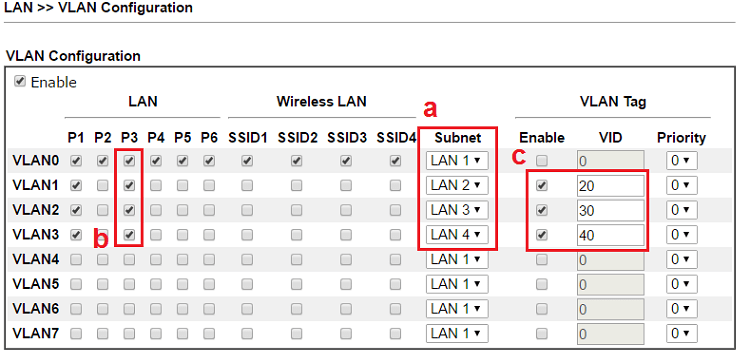
1. Go to LAN >> VLAN, enable VLAN and add the VLANs you need. Remember that the port to which the VigorSwitch is connecting should be the member of every VLAN (which is LAN P3 in this example).
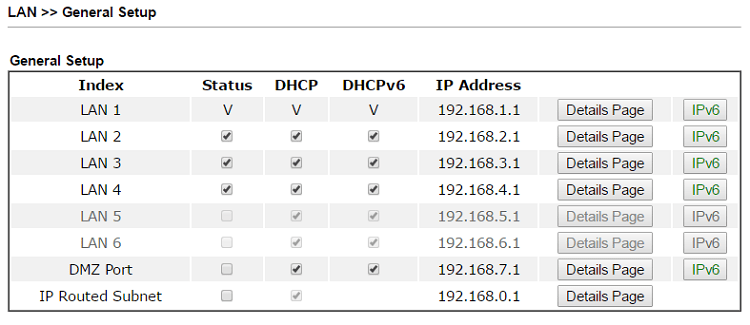
2. Go to LAN >> General Setup to enable the LAN subnet in use.
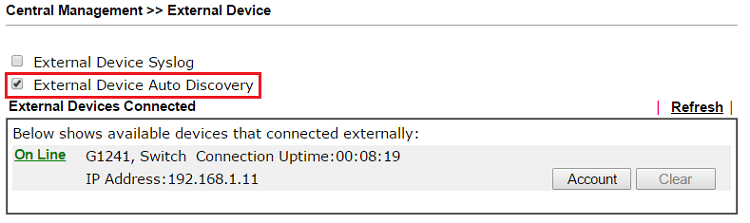
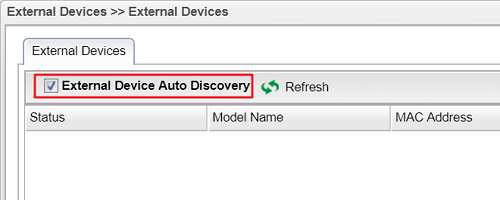
3. Go to Central Management >> External Device, make sure “External Device Auto Discovery” is enabled. You should see the VigorSwitch connecting to the router shows "On Line".
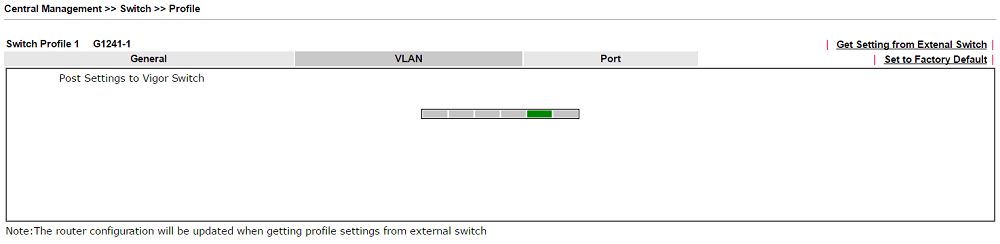
4. Go to Central Management >> Switch >> Profile, you will see the VigorSwitch is in New Switch List, click Add New to put the switch into Profile List.
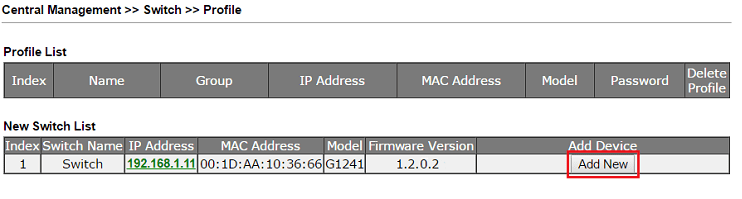
5. The router will create a switch profile for it. Click on Index number to edit the settings.

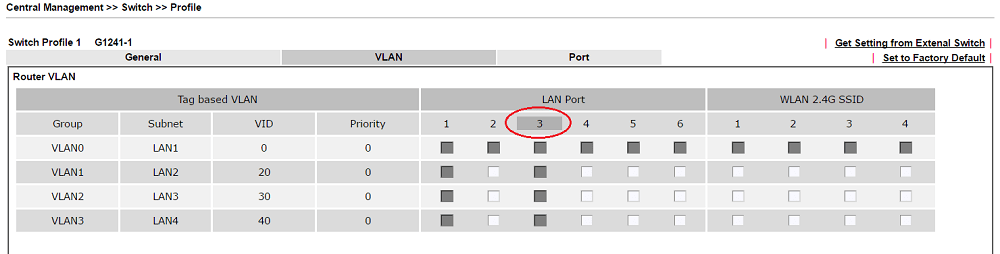
6. Go to the VLAN tab for the VLAN settings. On the top, it shows the Router's VLAN setting for your reference, the LAN Port that marked gray is the router's LAN port that connects to the switch.
7. And below shows the VLAN available based on the router's VLAN settings. In this example, the router's LAN port 3 is a member for VLAN0, VLAN1, VLAN2, and VLAN3; therefore, there are four VLANs available for the switch's VLAN setup. The port that connects to the router will be marked gray and automatically configured as a trunk port.
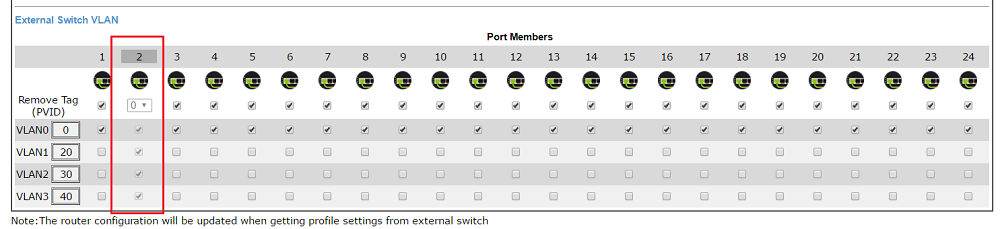
8. For the rest of the ports, select the VLAN to which they should belong. If a port belongs to more than one tagged VLANs, you should also define the PVID.
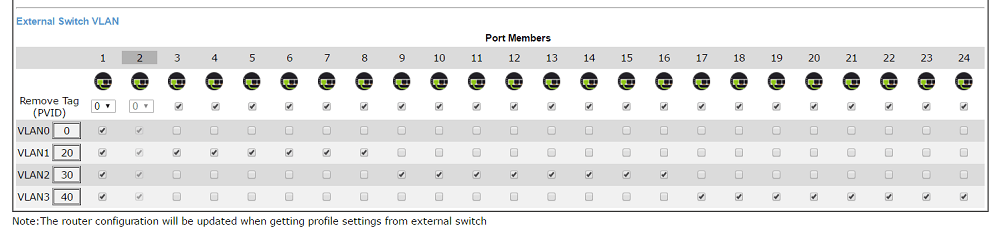
9. Click Send to Device to write the settings to the switch. It might take a few seconds.
10. After the setup, we can connect a computer to the switch on different ports and check which IP address it gets from the router. For example, if we connect to the switch's port number 8, we see the computer obtained the IP 192.168.2.10, which means this port belongs to the router's LAN2.

1. Go to LAN >> Switch >> 802.1Q VLAN to add new VLANs. In this example, we will connect the VigorSwitch to the router's LAN Port 1, so we select "LAN_Port_1" for Member of every VLAN.

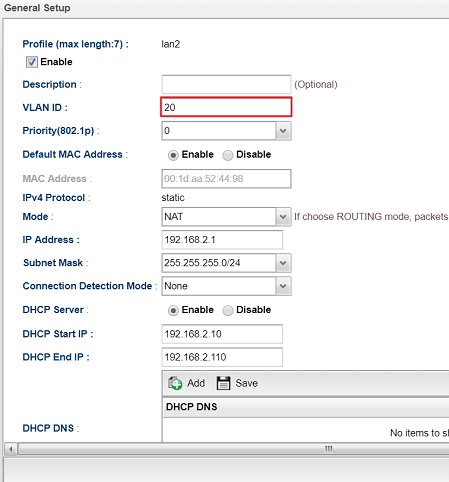
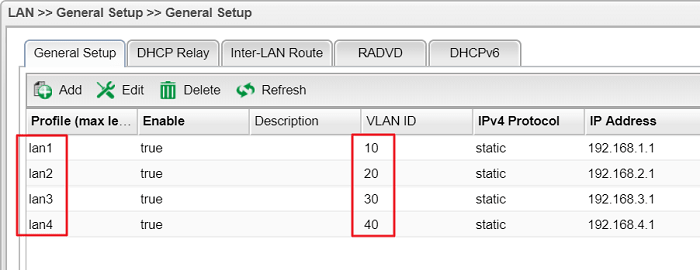
2. Go LAN >> General Setup page, and add the LAN profiles for the new VLANs. Check Enable, input the VLAN ID as the same as the number in the previous step, and modify the IP address and DHCP range you need.
3. Repeat the steps above to create a LAN profile for each VLAN.
4. Go to Central Management >> External Device, make sure “External Device Auto Discovery” is enabled. You should see the VigorSwitch connecting to the router shows "On Line".
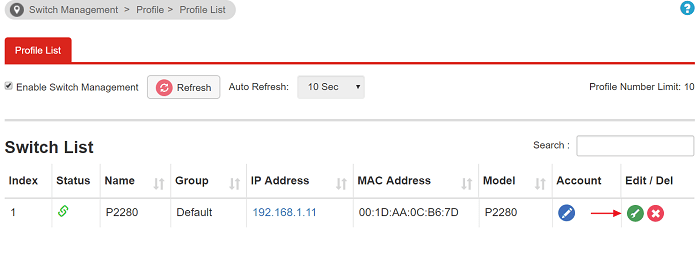
5. Go to Switch Management >> Status, check "Enable Switch Management" and wait for a few seconds.

6. We will see the VigorSwitch appears in New Switch, click + to put the switch into Switch List.

7. Go to Switch Management >> Profile, click Edit to modify the switch settings.
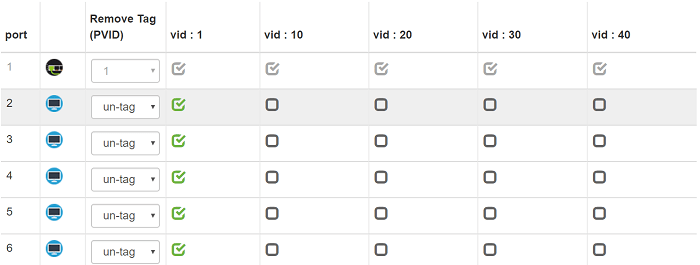
8. Go to the VLAN tab for the VLAN settings. You will see a port that is checked for every VID and greyed out, that is the port connecting to the router, and it is configured as the trunk port automatically.

9. For the rest of the ports, check the VLAN which they should belong. If a port belongs to more than one tagged VLANs, you should also define the Remove Tag (PVID). Then, click Send To Device to write the VLAN settings to the switch.
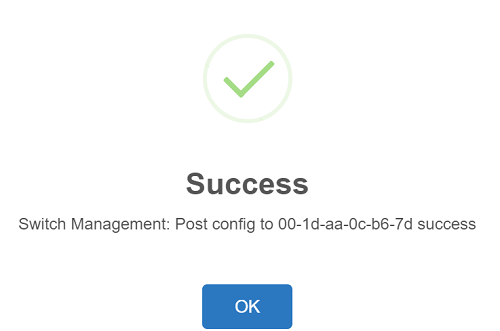
10. Wait for a few seconds until it shows the success message.
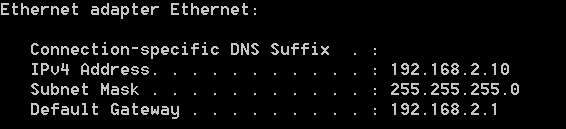
11. After the setup, we can connect a computer to the switch on different ports and check which IP address it gets from the router. For example, if we connect to the switch's port number 12, we see the computer obtained the IP 192.168.2.10, which means this port belongs to the router's LAN2.
Published On:2018-08-30
ShareWas this helpful?