
Connecting Vigor Router and VigorAP wirelessly by WDS
This document will demonstrate how to build a WDS connection between VigorAP and Vigor Router. With WDS mode, we can place the AP at the location where the cable deployment is not easy. Furthermore, the LAN clients can connect to the AP not only through the wireless but also with the wire connection. WDS mode enables the network administrator to construct the network coverage with more flexibility when placing the router and AP.
We will demonstrate the construction of the WDS connection between Vigor2860ac and VigorAP 900 in the following paragraph.
Checking the MAC Address
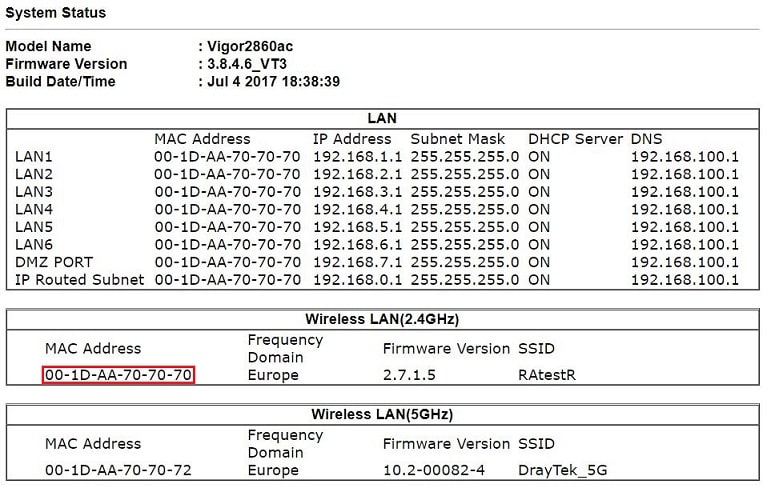
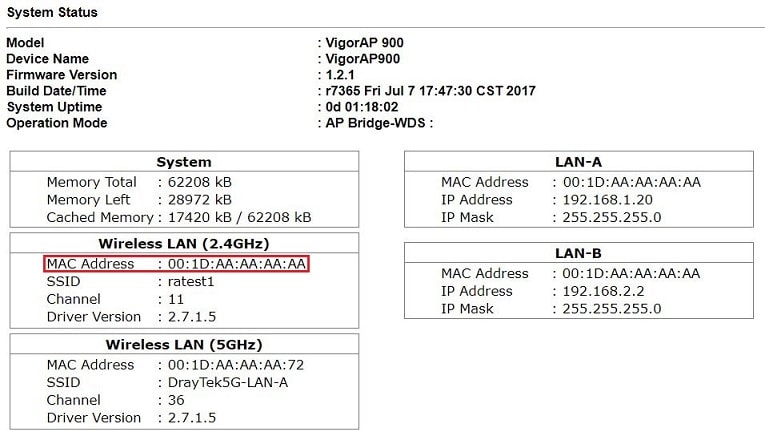
Login to the Vigor Router and VigorAP, go to System Maintenance >> System Status page and keep the MAC address of the router and AP's Wireless LAN in mind. We will use it later.
Configuration on Vigor Router
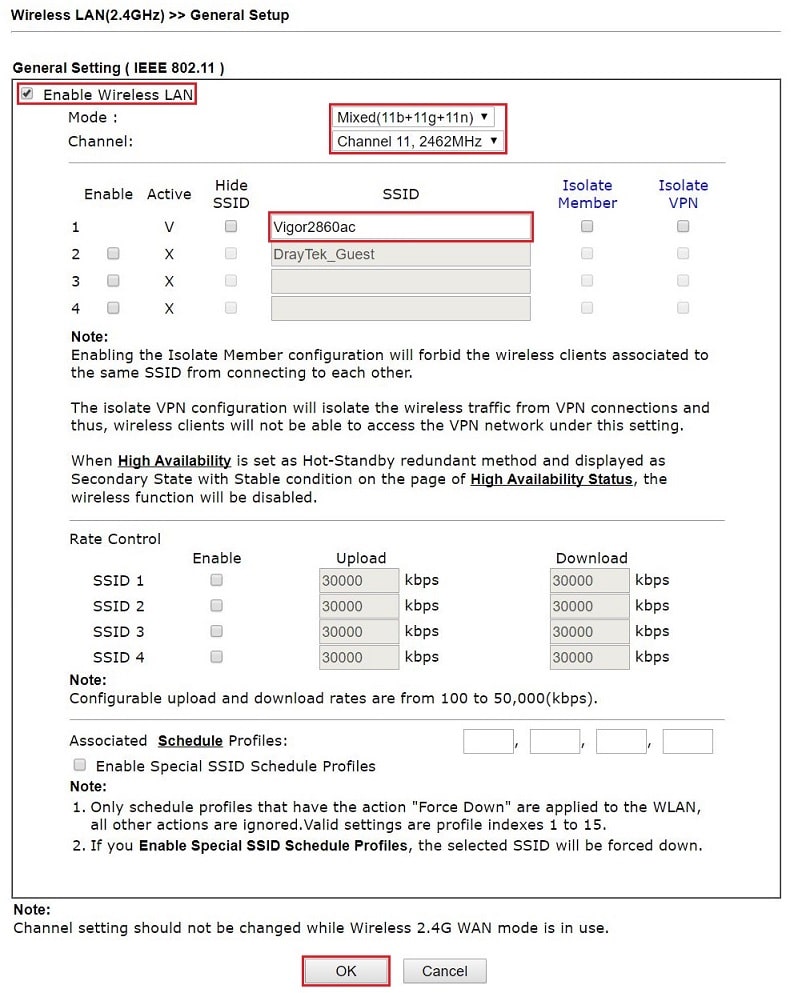
1. Log into Vigor Router's WUI. Go to Wireless LAN >> General Setup page,
- Enable Wireless LAN.
- Type in a name for SSID 1;
- Choose a Channel and keep the channel in mind.
- Click OK to save the settings.
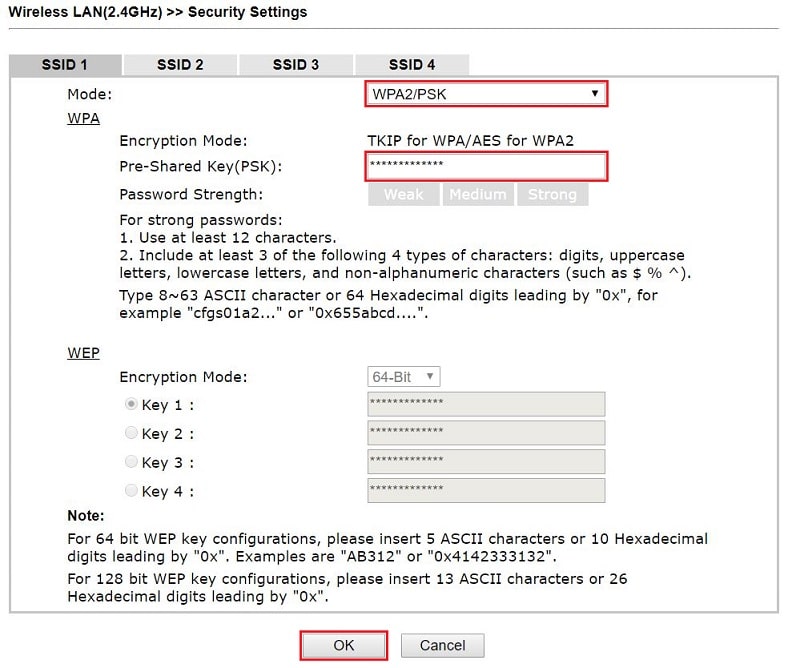
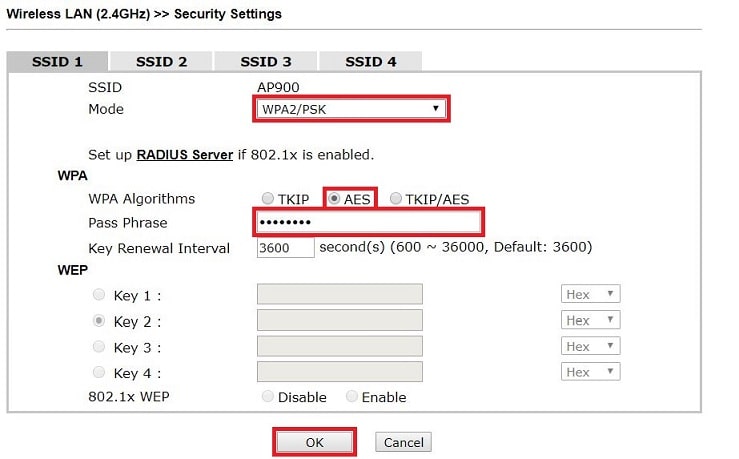
2. Go to Wireless LAN >> Security page to set the security mode.
- Choose "WPA2/PSK" for Mode
- Type in a Pre-shared Key
- Click OK to save the settings.
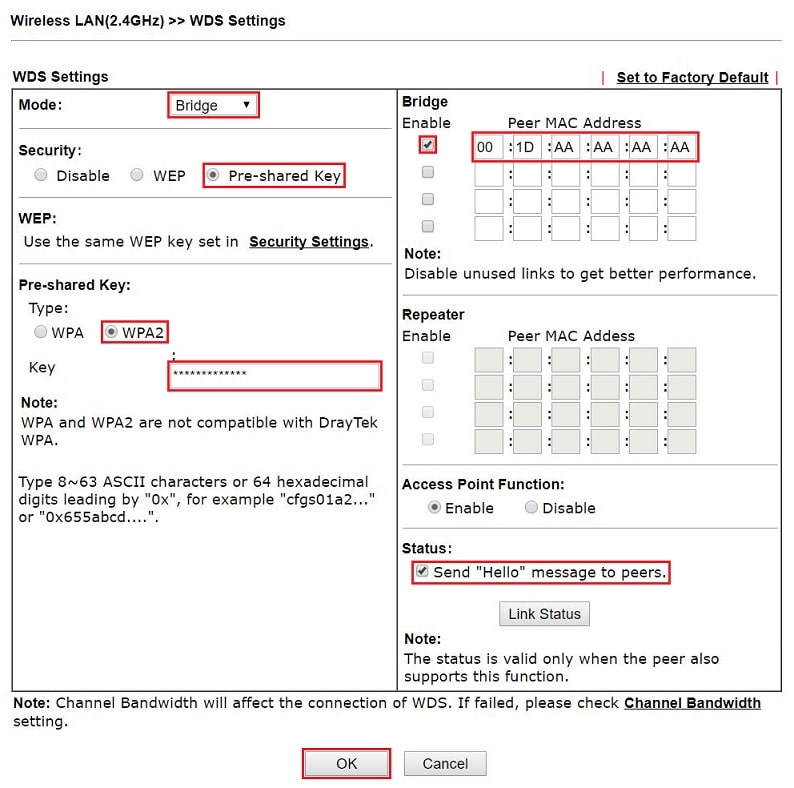
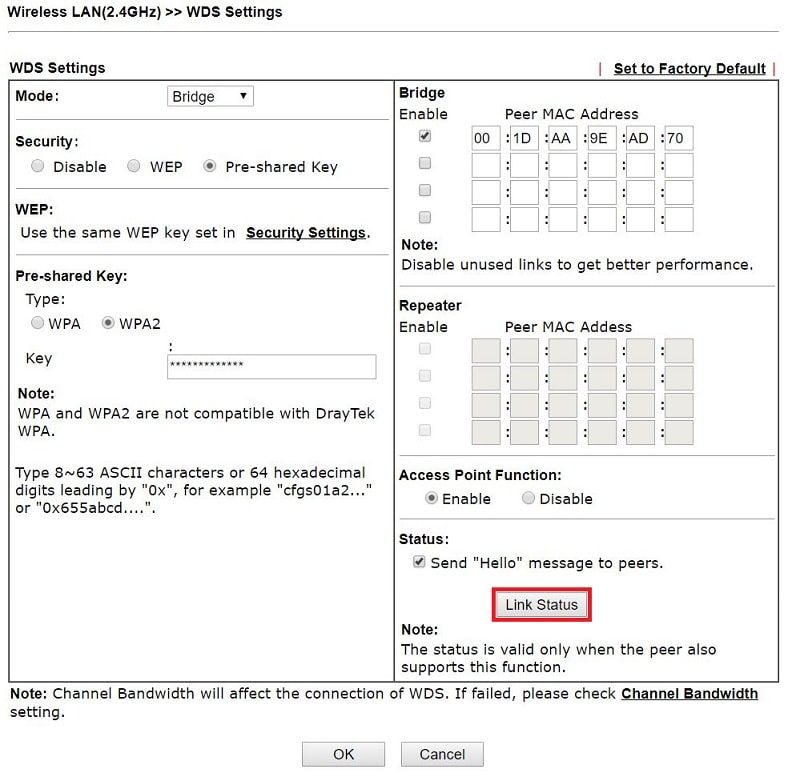
3. Go to Wireless LAN >> WDS page to configure the WDS settings:
- Choose "Bridge" for Mode.
- Choose "Pre-shared Key" for Security.
- Choose "WPA2" for Type and enter the Pre-shared key, which is used for WDS connection independently.
- Type in the MAC address of the AP at Peer MAC Address, then check Enable for this MAC address.
- Enable Send "Hello" Message to peers.
- Click OK to save the settings.
Now, we have finished the configuration on the router. Follow the next paragraph to set up the AP.
Configuration on VigorAP
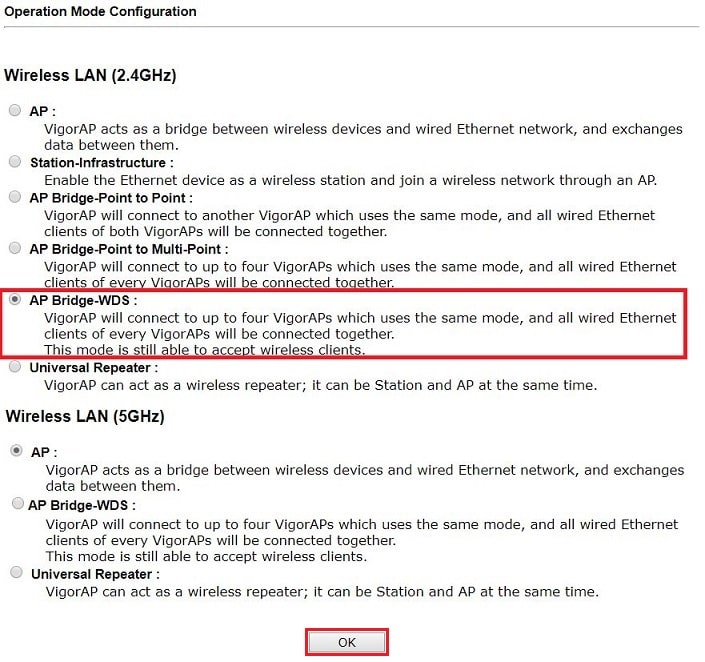
4. Log into the WUI of VigorAP. Go to Operation mode page, choose AP Bridge – WDS and click OK.
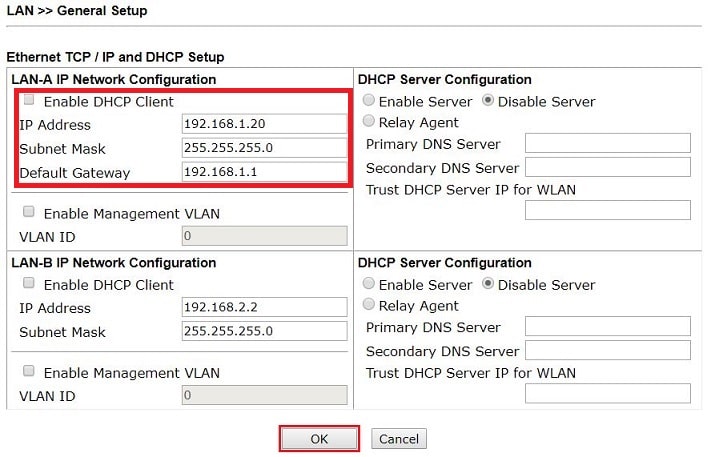
5. Go to LAN >> General Setup page:
- Disable DHCP Client.
- Enter an IP address within the LAN subnet of the router into the IP Address box.
- Enter the Subnet Mask as same as the router's LAN subnet.
- Set the Default Gateway as the IP address of the router.
- Click OK to save the setting.
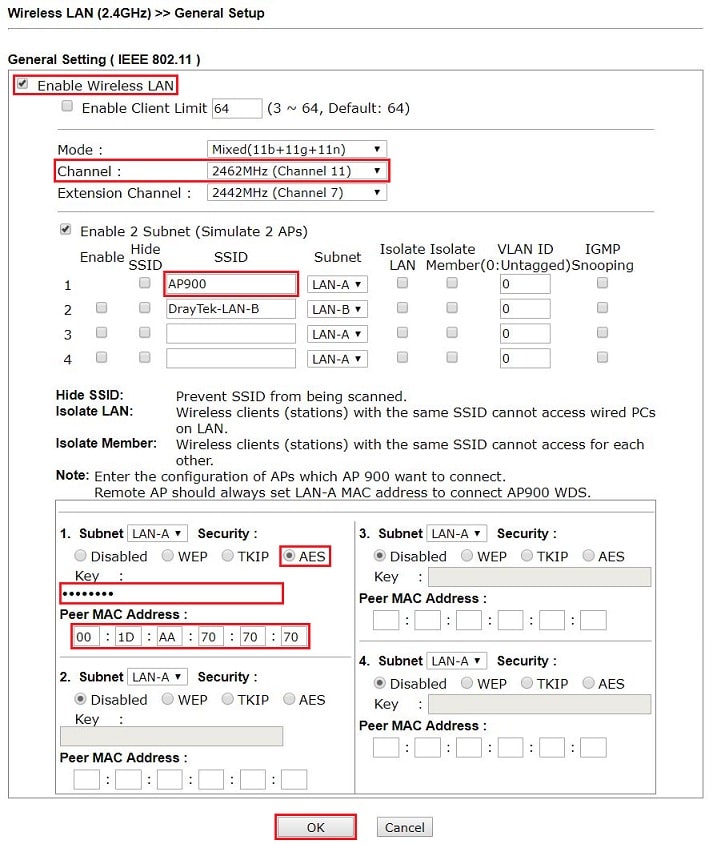
6. Go to Wireless LAN >> General Setup page,
- Enable Wireless LAN
- Choose the same Channel as the router.
- Give a name for the first SSID (it is not necessary to match the name on the router).
- Go to PHY Mode: HTMIX form, choose "AES" for Security.
- Type in the Pre-shared key set on the router in step 3.
- Enter the MAC address of the router at Peer MAC Address.
- Click OK to save.
7. Go to Wireless LAN >> Security page,
- Choose the "WPA2/PSK" for Mode
- Choose "AES" for WPA Algorithm.
- Type the wireless password for Pass Phrase.
- Click OK to save the settings.
8. To check the connection status, we can go to the WUI of Vigor Router, visit the Wireless LAN >> WDS page and click the Link Status button to check whether the WDS connection is up. The status code U in front of the MAC address of VigorAP indicates the connection is active.
Published On:2017-08-08
ShareWas this helpful?