
Register the router to a SIP server
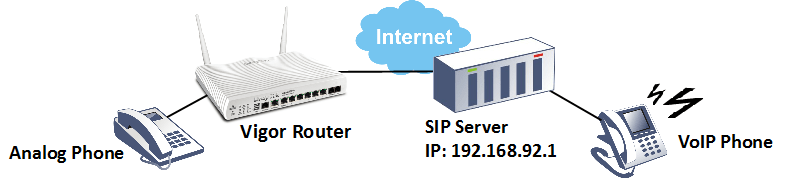
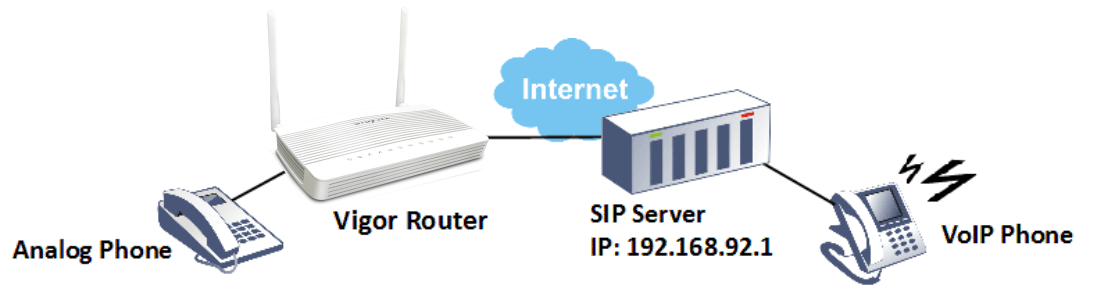
Vigor V models, which are the model with VoIP function and RJ-11 ports for voice, can register to SIP servers and act as the VoIP gateway for the LAN network. This note is going to demonstrate the setup for SIP registration. In this example, the SIP server at IP address 192.168.92.1
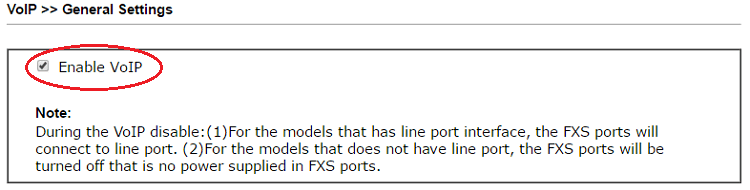
1. Go to VoIP >> General Setting to enable VoIP function. (This menu is available only for the V models)
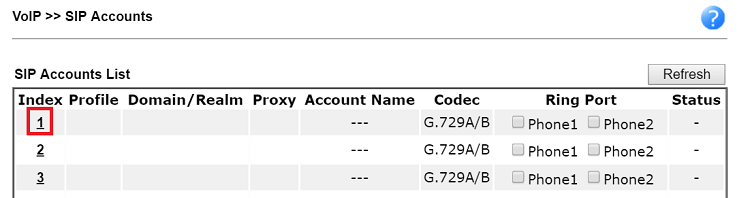
2. Go to VoIP >> SIP Accounts and click an available index to edit.
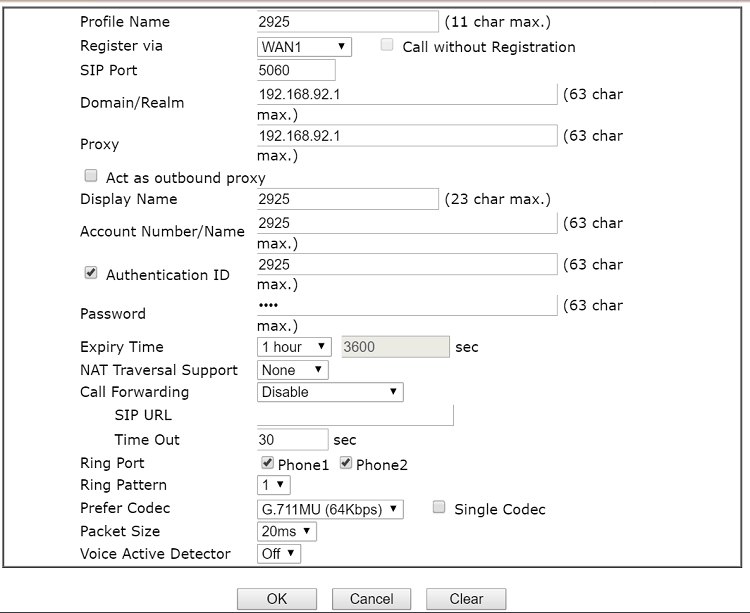
3. Edit the SIP account as follows:
- Give a profile name
- For Register via, select the interface where the SIP server is on, which can be WAN, LAN/VPN or PVC/VLAN.
- Type the SIP Port which SIP server uses. Usually, it's 5060.
- Type the domain name or IP of the SIP server in both Domain/Realm and Proxy
- Type Display Name, Account Number/Name, Authentication ID, and Password as the SIP server provided.
- You can ring the analog phone on the router's FXS port when there is an incoming call to this SIP account. Select the Ring Port for the phone to ring
- Click OK to apply the setting.
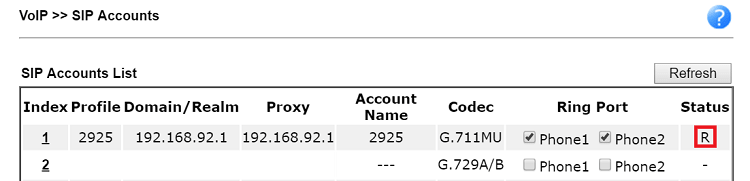
4. After clicking OK, the router will try connecting to the SIP server. If the registration was successful, the status of the account will show R, and the phone on the FXS port will be ready to make VoIP calls.
Featured Products
Vigor V models equipped with VoIP functionality and RJ-11 ports can register with SIP servers and serve as VoIP gateways for the LAN. This article provides a demonstration of how to configure SIP registration on Vigor2767Vax. In this example, the SIP server is located at IP address 192.168.92.1.
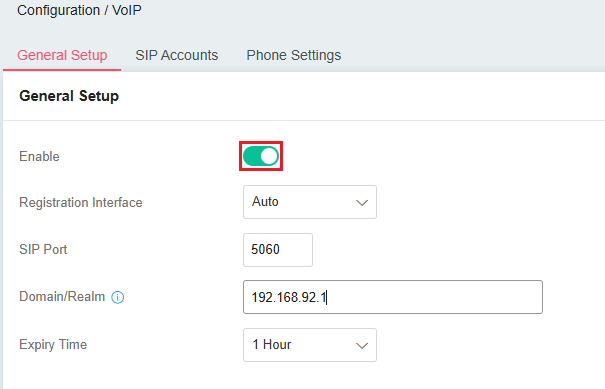
1. Go to Configuration / VoIP. Enable the VoIP function in General Setup menu.
- Switch enabled.
- Select the interface where the SIP server is on. Here we set it as Auto.
- Type the SIP port the SIP server uses. Usually, it's 5060.
- Type the domain or IP address of the SIP server.
- Click Apply to save the settings.
2. In SIP Accounts menu, click +Add to create a SIP account profile.
- Enter the profile name.
- Enter display name, account number, and password in Authentication Field.
- Select the ring port the analog phone is connected.
- Click Apply to save the settings.
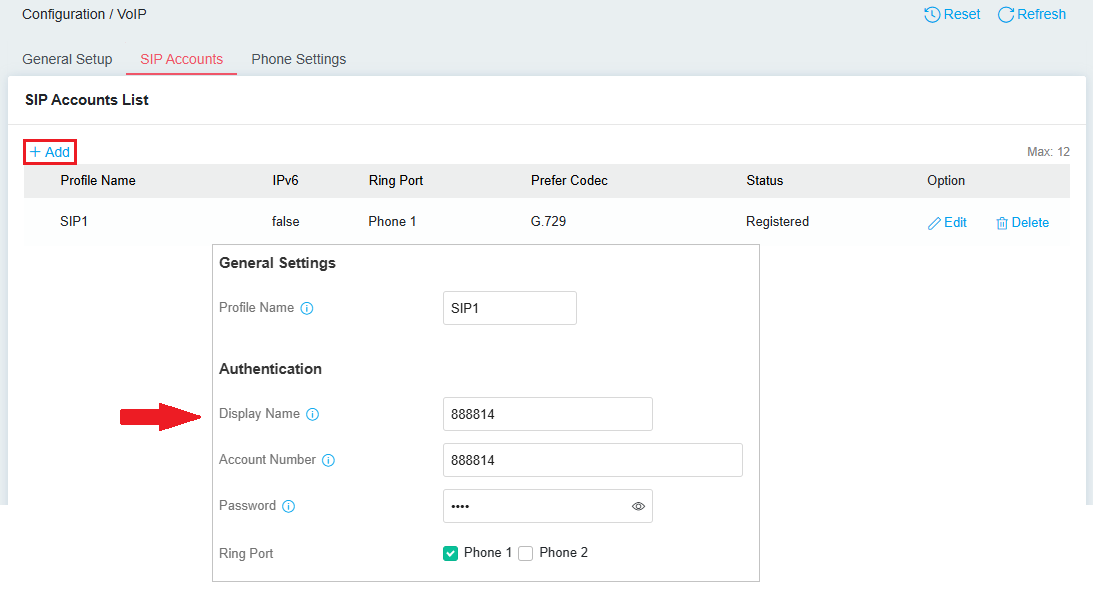
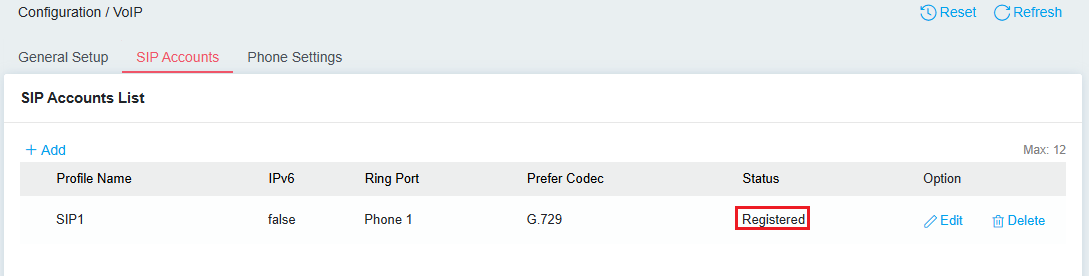
After applying the settings, the router will try connecting to the SIP server. If the registration is successful, the status of the account will show Registered, and the phone on the ring port will be ready to make VoIP calls.
Published On:2016-04-25
ShareWas this helpful?