
IKEv2 VPN from macOS to Vigor Router
This article demonstrates how to set up the Vigor router as a VPN gateway for Remote Dial-in IKEv2 VPN connections, especially from macOS. We will show the necessary configuration of the router and the IKEv2 VPN setup on macOS as well.
Setup on Vigor Router
1. Make sure the router is connected to the Internet and has a public WAN IP address so that VPN clients on the Internet can reach it.
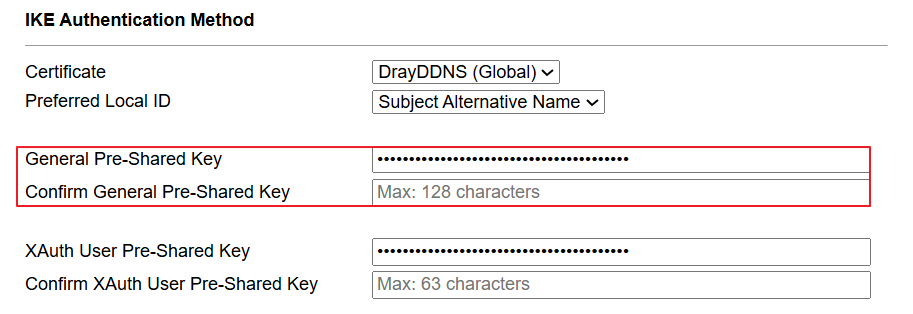
2. Go to VPN and Remote Access >> IPsec General Setup, enter a Pre-Shared Key and Confirm. Then click OK to save. This step can be ignored if the VPN user will use a specific Pre-Shared Key configured in the VPN profile.
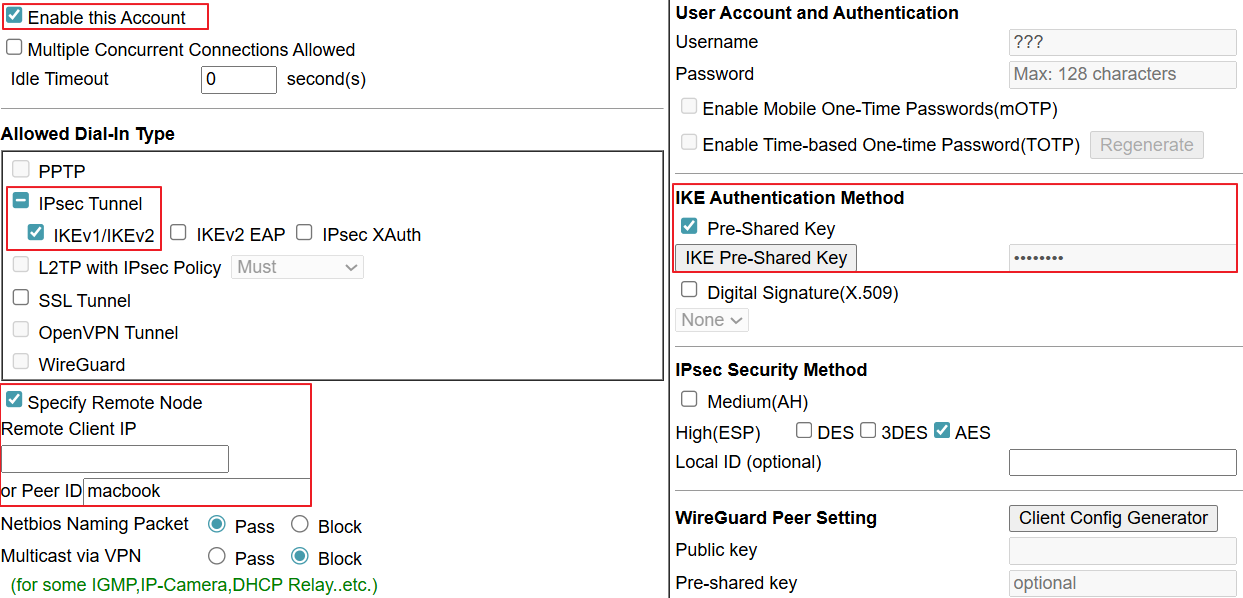
3. Go to VPN and Remote Access >> Remote Dial-in User and click on an available index,
- Check Enable this account
- At Allowed Dial-In Type, check "IPsec Tunnel" and "IKEv1/IKEv2"
- At Specify Remote Node, enter "macbook" as the Peer ID
- At IKE Authentication Method, click "IKE Pre-Shared Key" button, then enter the Pre-Shared Key.
- Click OK to save the profile.
Vigor Router Setup
1. Make sure the router is connected to the Internet and has a public WAN IP address so that VPN clients on the Internet can reach it.
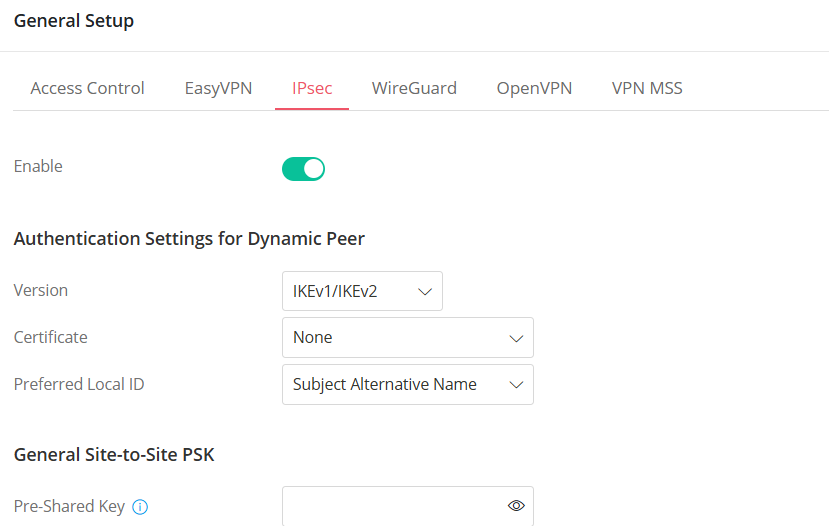
2. Activate the IPsec VPN service.
Go to VPN > General Setup,
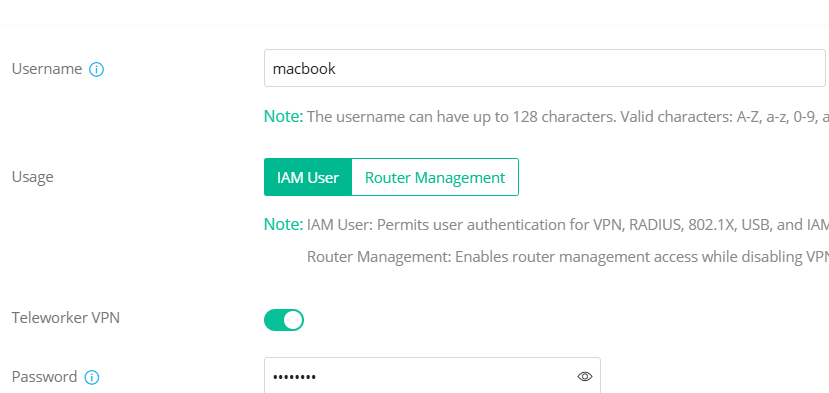
3. Create a Teleworker VPN User Profile.
Go to VPN > Teleworker VPN, click Add. Enter the Username, toggle Teleworker VPN and enter Password.
In General Tab,
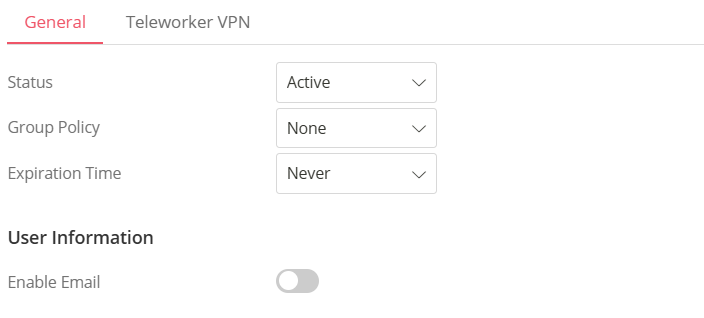
In the Teleworker VPN tab,
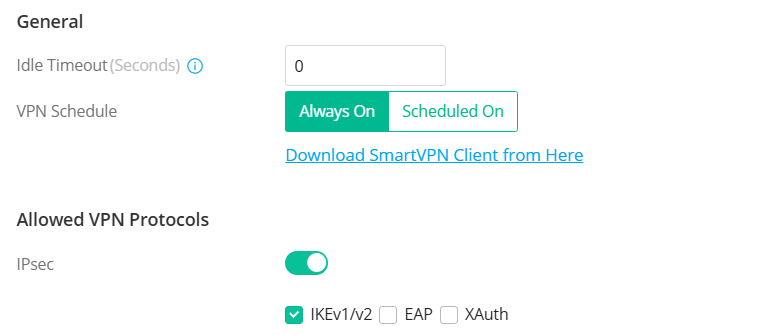
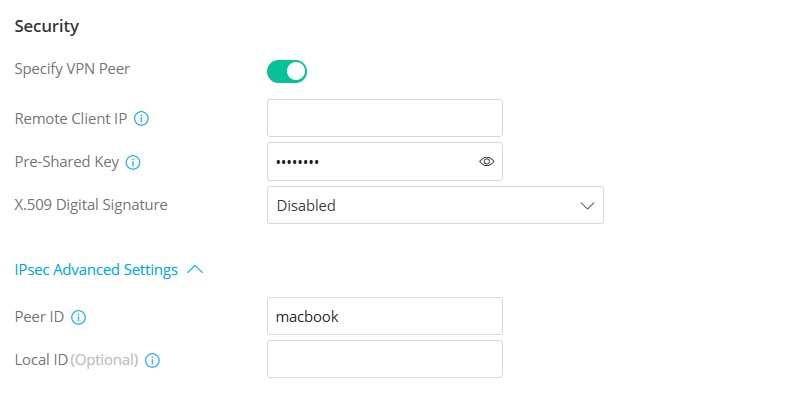
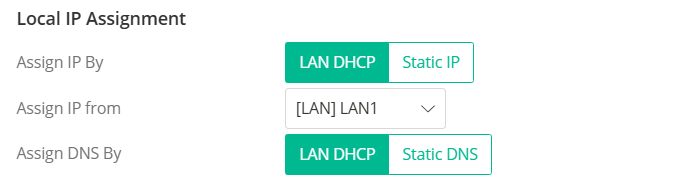
The Peer ID setting allows different IKEv2 remote dial-in users to authenticate using different Pre-Shared Keys.
1. Make sure the router is connected to the Internet and has a public WAN IP address so that VPN clients on the Internet can reach it.
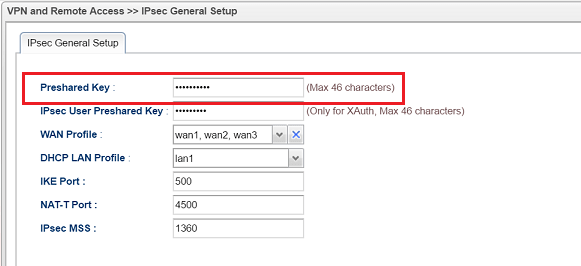
2. Go to VPN and Remote Access >> IPsec General Setup, type Pre-Shared Key. Then, click Apply to save.
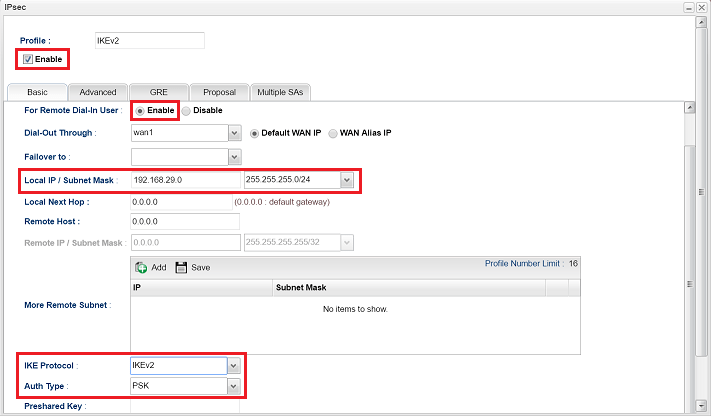
3. Go to VPN and Remote Access >> VPN Profiles to add a profile as follows:
- Check Enable
- Select "Enable" for Remote Dial-in User
- Type the LAN network you want the remote host to join at Local IP/Subnet Mask
- Select "IKEv2" for IKE Protocol
- Select "PSK" for Auth Type
- Click Apply to save the profile
IKEv2 VPN Setup On macOS
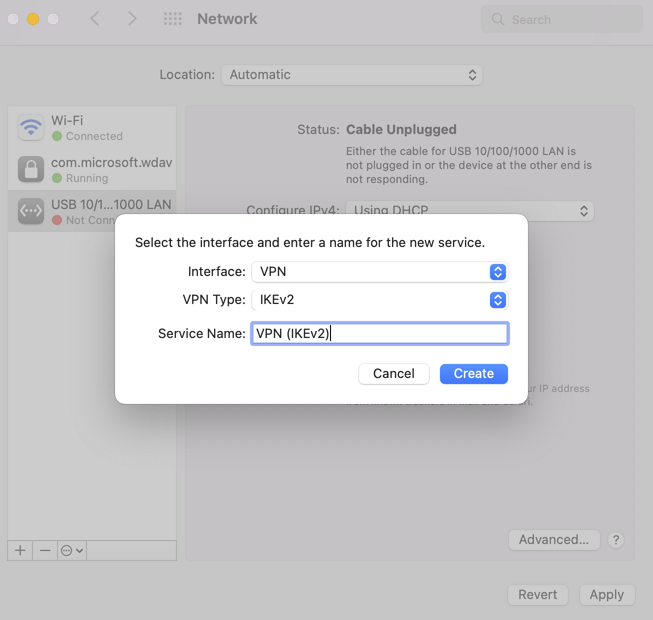
- Go to System Preferences >> Network and click '+'
- Select VPN for Interface.
- Select IKEv2 for VPN Type.
- Give a Service Name and click Create.
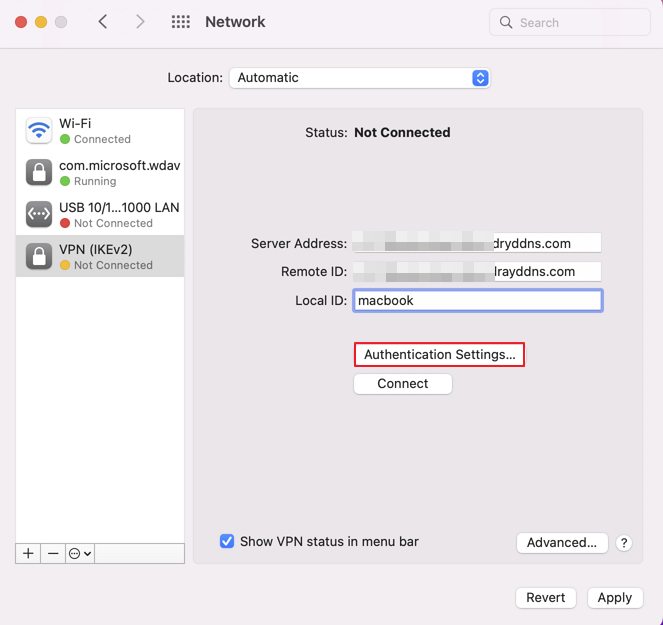
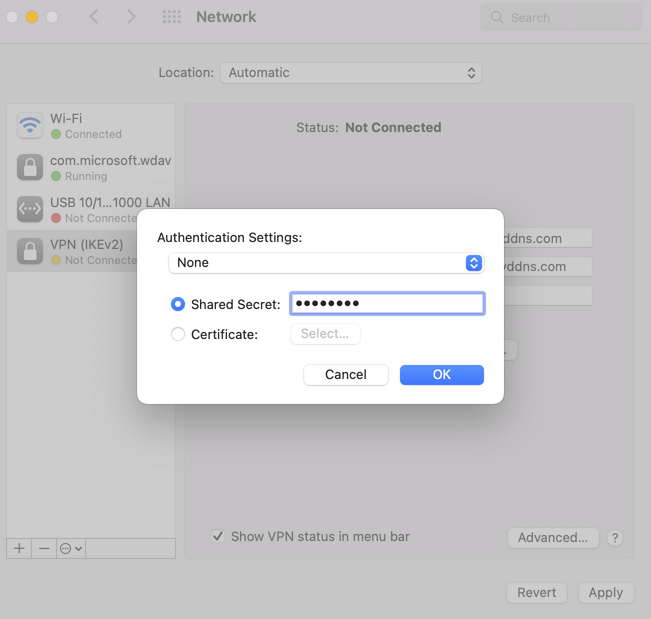
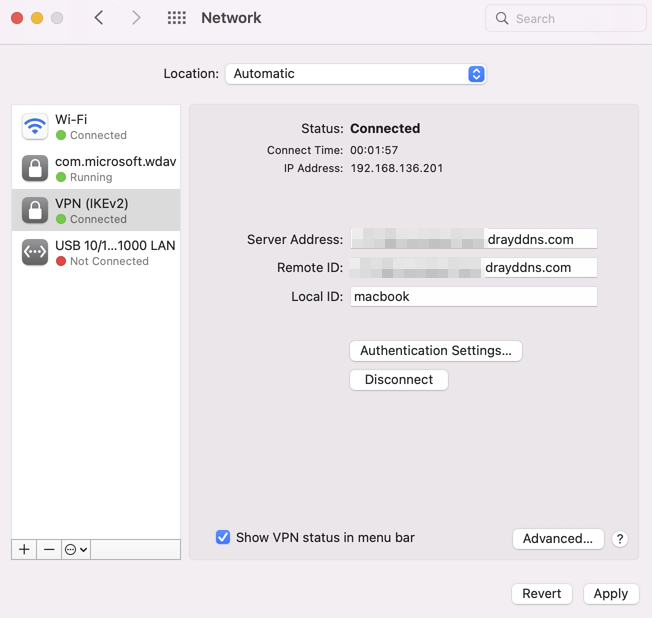
- Type the WAN IP or hostname of the router at both Server Address, Remote ID and Local ID, then click Authentication Settings.
- In the pop-up window:
- Select "None" for Authentication Settings.
- Type the Pre-shared key configured in the VPN profile for Shared Secret.
- Click OK to save and close the window.
- Click Apply. Then, click Connect to establish the IKEv2 VPN to Vigor Router.
Published On: Aug 08, 2017
ShareWas this helpful?