
VigorAP Manual Provisioning by VigorACS
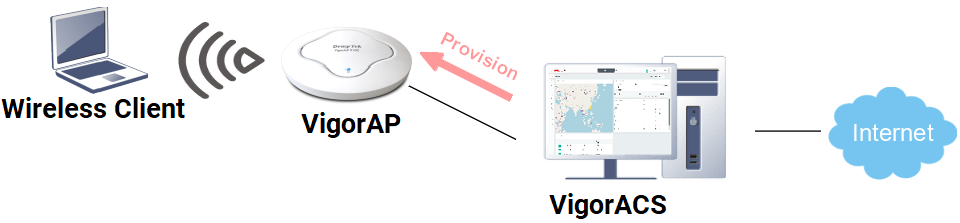
VigorACS is a centralized management tool for not only Vigor Router, but also Vigor Access Point. This article introduces how to provisioning VigorAPs by VigorACS.
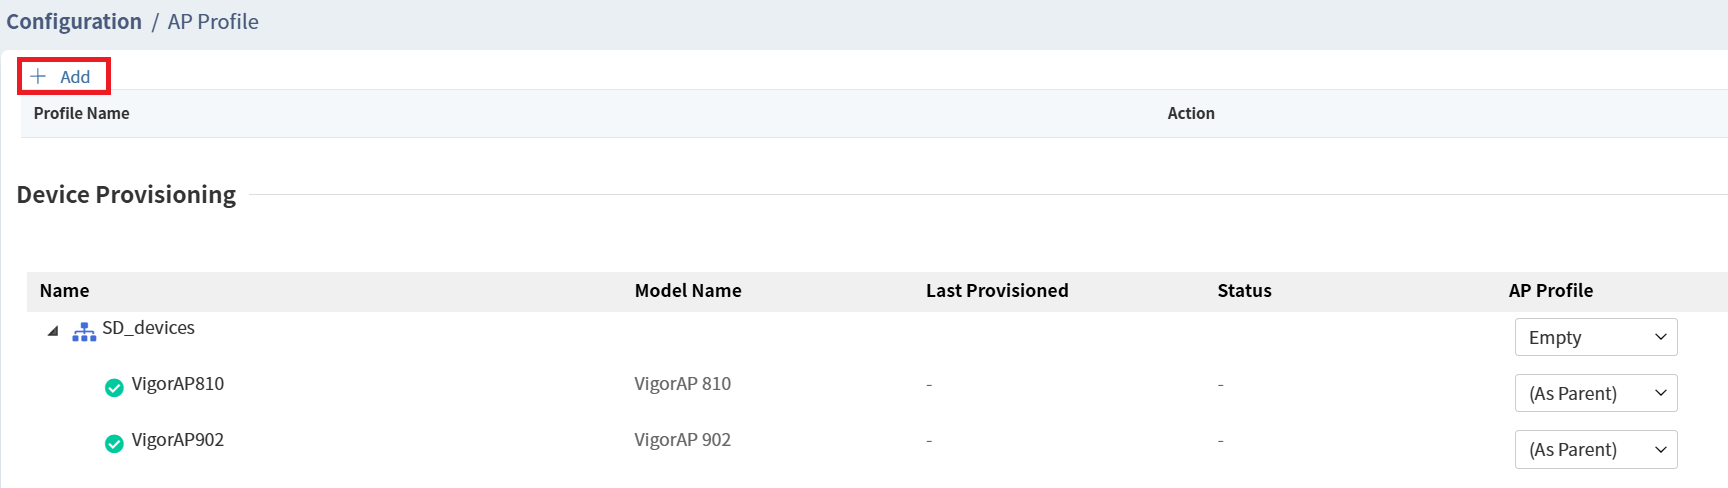
1. Go to NETWORK MENU >> Configuration >> AP Profile page, click + Add New Profile on the top-left.
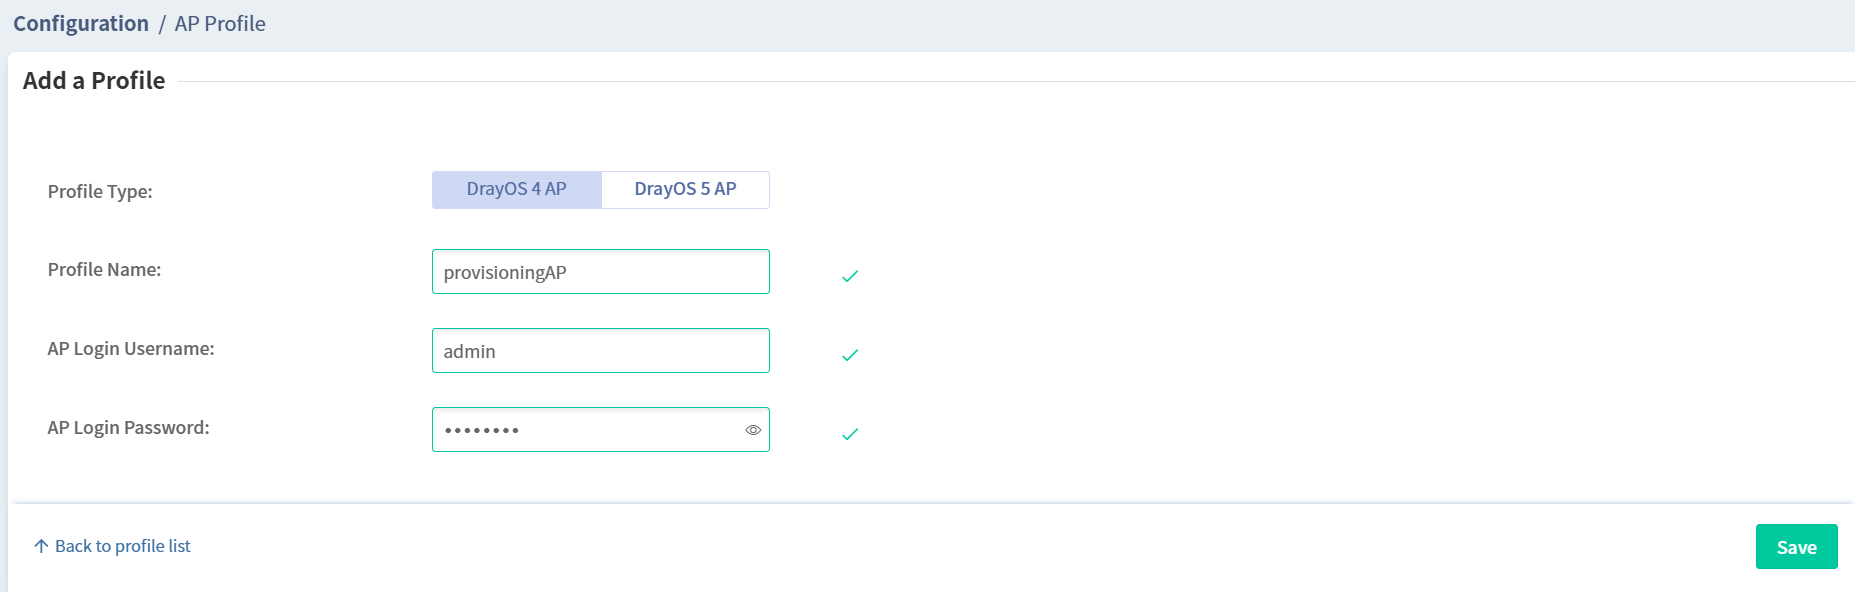
2. Enter a Profile Name,the username and password for logging the VigorAP. Then, click Save.
Note: DrayOS4 AP profile only applies to DrayOS4 AP, so does DrayOS5 AP; you can tell the OS by firwmare version, v1.x.x is DrayOS4; v5.x.x is DrayOS5.
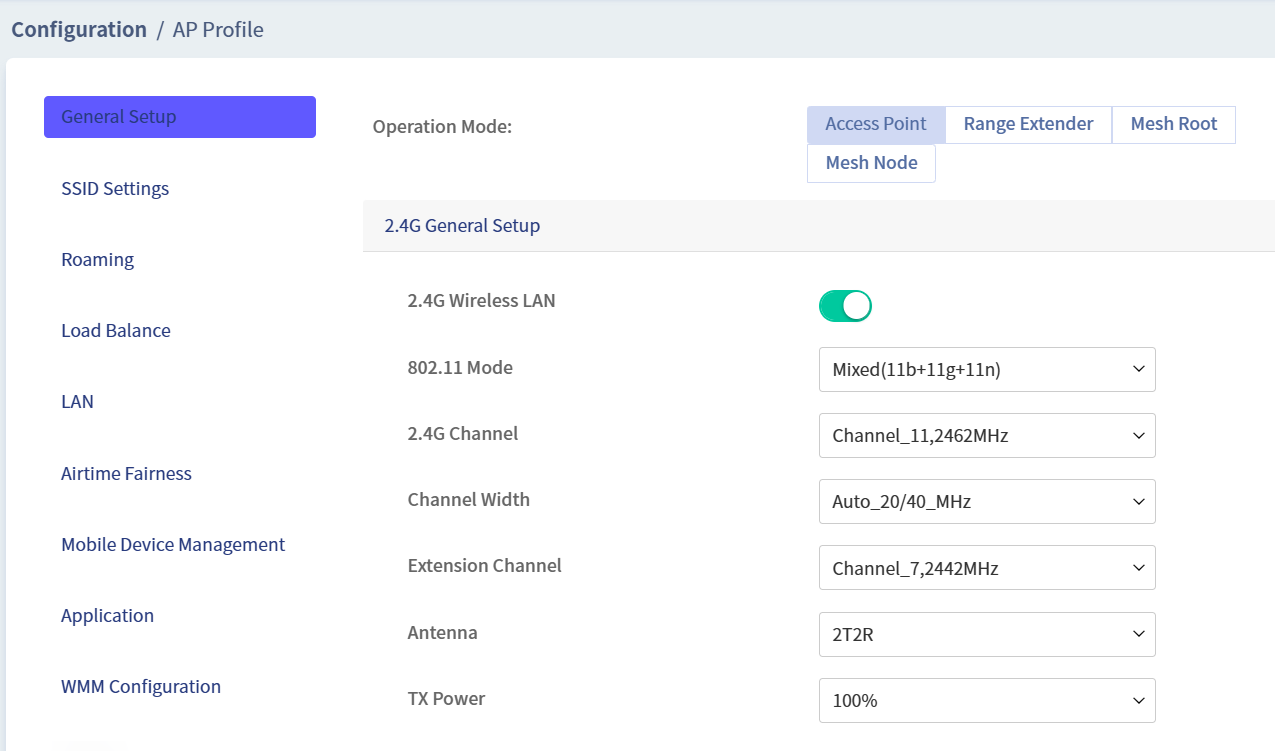
3. Choose the profile created in the previous step, click Edit.

4. Configure the settings you need.
5. After finishing the configuration, go back to Configuration >> AP Profile page, from the device list, associate the AP (or the network) you would like to do provisioning with the AP Profile created in the previous step. The provisioning process will start after you click Save.
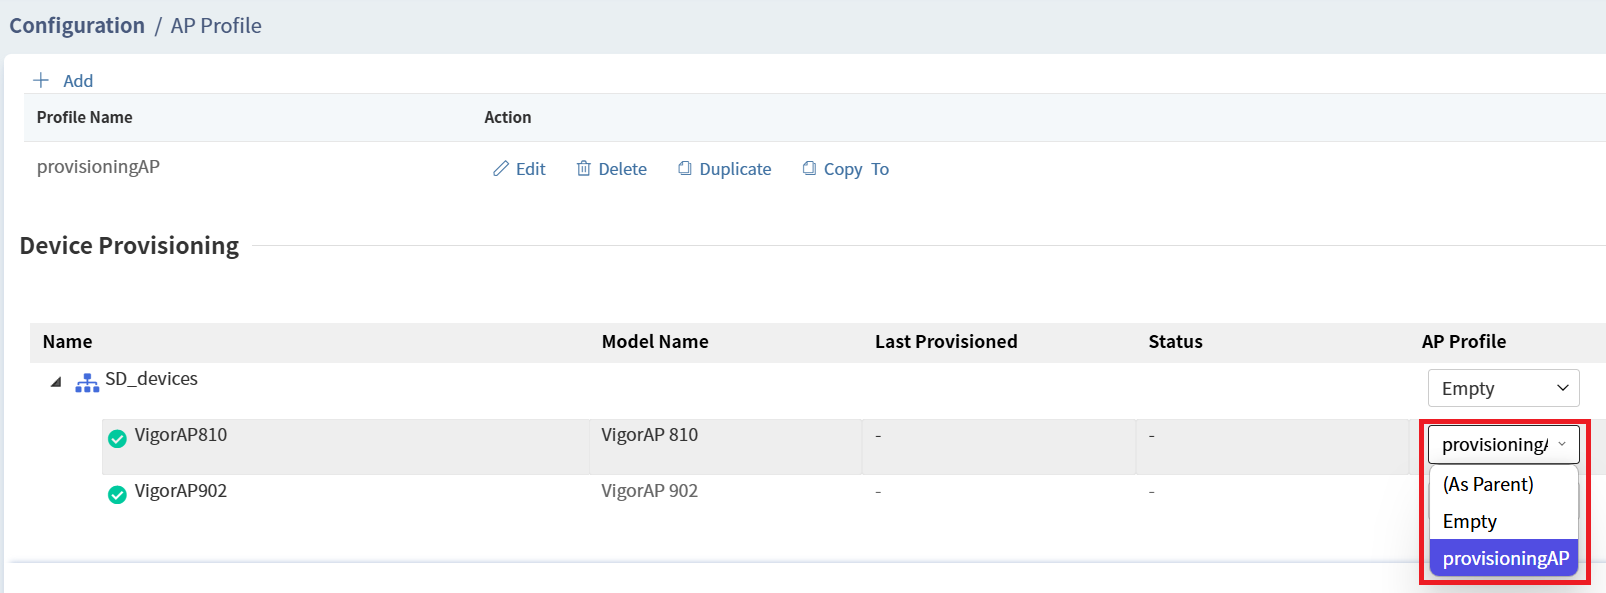
Tips: Set AP profile to Empty for the AP which you want to skip the provisioning, set to (As Parent) will use the same AP profile as the one used for its parent network.
Published On:2017-10-24
ShareWas this helpful?