
How to use Digital Signature (X.509) to authenticate IPsec VPN between a Vigor3900/2960 and Vigor Router?
Vigor3900 can act as a CA server and we can use the feature to create a certificate that can be used to authenticate the IPsec tunnel between a Vigor3900 and another Vigor router to enhance the security. Below shows an example of building an IPsec VPN tunnel with X.509 certificate between a Vigor3900 and a Vigor2920.
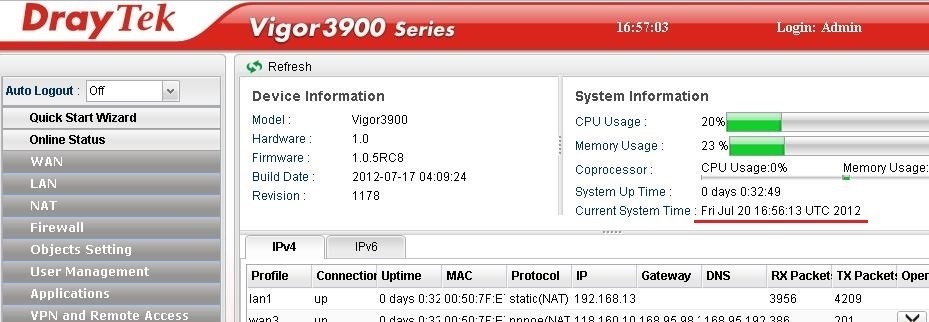
1. Make sure the time setting on Vigor3900 and Vigor2920 are the same.
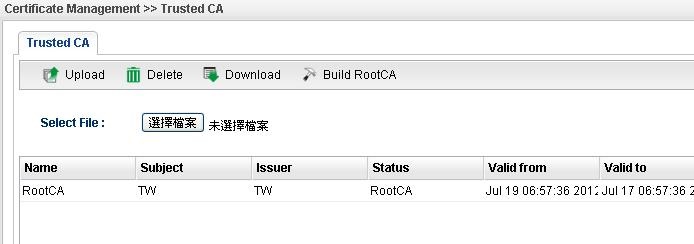
2. On Vigor3900, go to Certificate Management >> Trusted CA Certificate. Choose Build RootCA, enter the required information, click Apply.

3. Download the RootCA file.
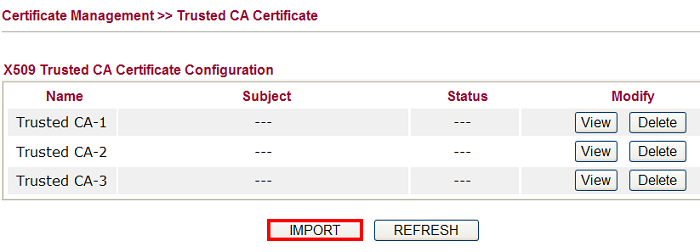
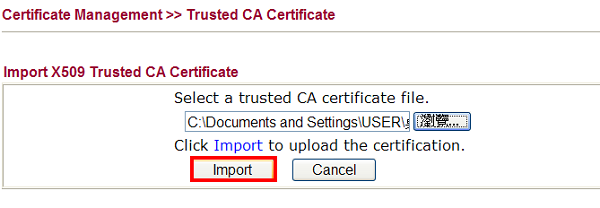
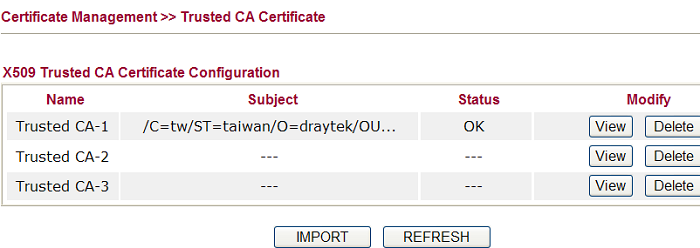
4. On Vigor2920, open Certificate Management >> Trusted CA Certificate, click IMPORT to upload the RootCA.
5. Choose the certificate downloaded from Vigor3900 and click Import.
6. After finishing importing, make sure the certificate has been imported successfully. If yes, it will be shown as follows:
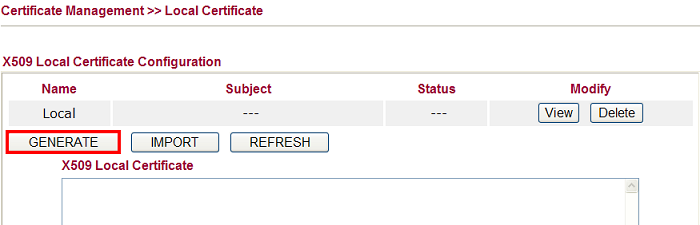
7. Open Certificate Management >> Local Certificate and click GENERATE to create a certificate request.
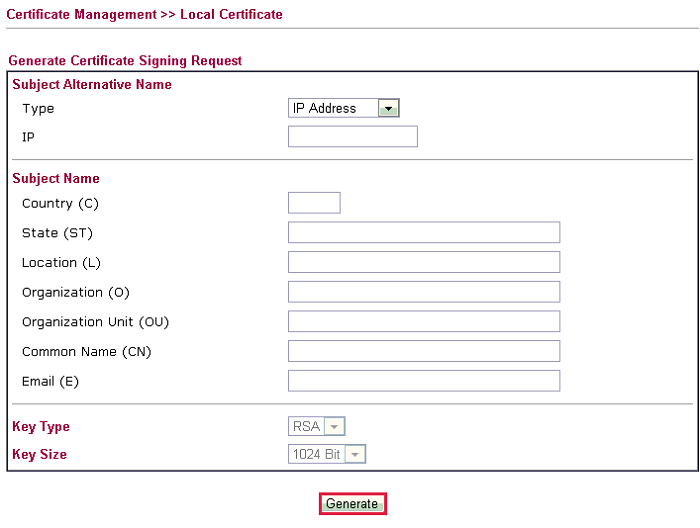
8. Enter the required information and click Generate.
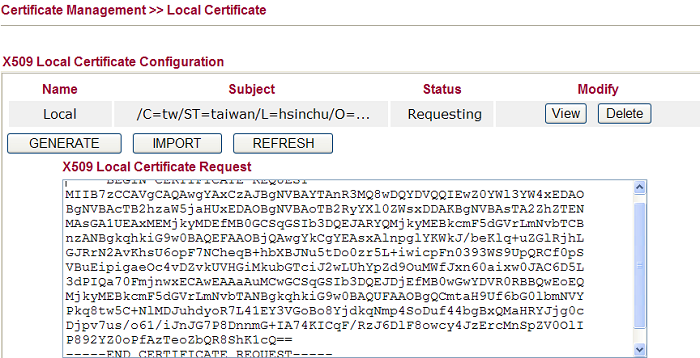
9. Copy the content in X509 Local Certificate Request and save it as a .crt file..
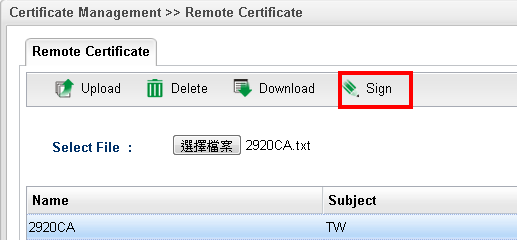
10. Now, go back to Vigor3900. Open Certificate Management >> Remote Certificate, in the field of Selected File, choose the certificate request generated by Vigor2920 and click Upload.
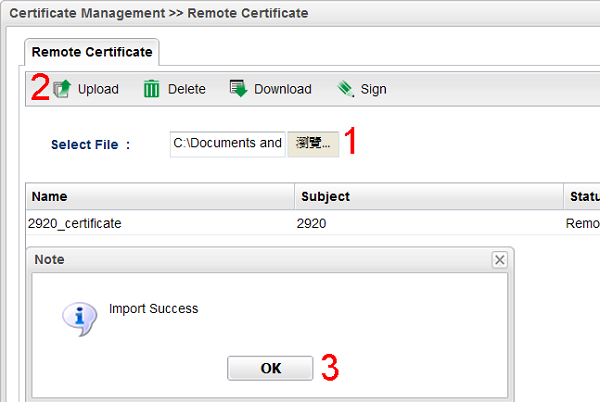
11. Click Sign
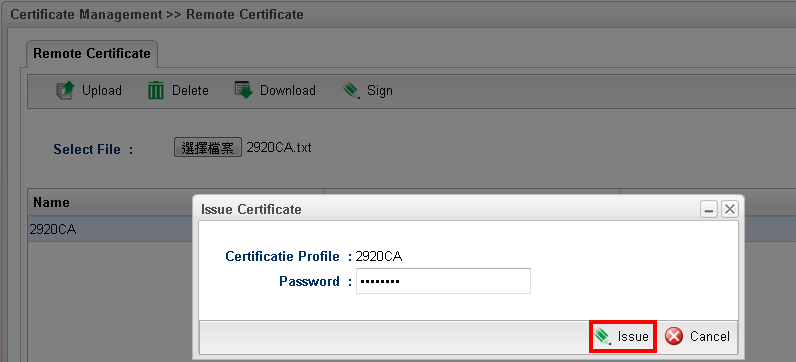
12. In the Issue Certificate dialog, type a key in the field of Password. Click Issue to approve the certificate request from Vigor2920.
13. Download the approved certificate from Vigor3900 by clicking Download.

14. Go back to Vigor2920 and import the issued certificate. Open Certificate Management >> Local Certificate, click IMPORT.

15. Select the file downloaded from Vigor3900, Click Import.

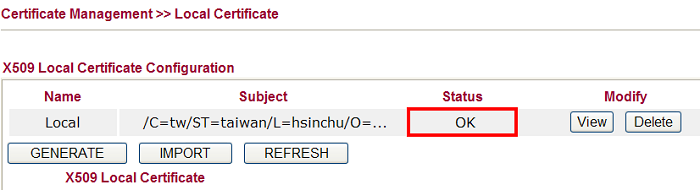
16. When it is finished, the message displayed in Status will changed from "Requesting" into "OK". You may also can click View to review the status of issued certificate.
17. Now, Vigor3900 must have issued a certificate for itself and use the certificate to build a VPN tunnel with Vigor2920. Open Certificate Management >> Local Certificate and choose Generate. Type the required information and enable Self Sign. Type the same key as the Passphrase that set for issuing the Root CA certificate with Vigor2920 (step 12)
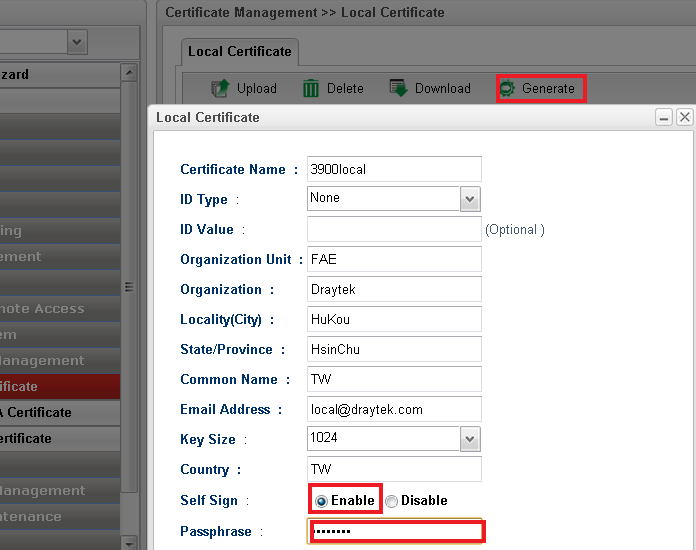
18. Now, local certificate of CA for Vigor3900 has been configured. You can find that the status will display “OK”.

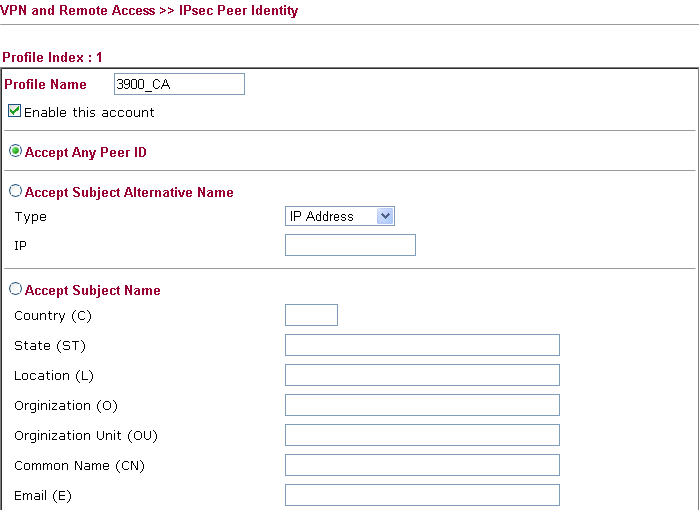
19. Go back to Vigor2920, open VPN and Remote Access >> IPsec Peer Identity to add a new VPN profile for IPsec Peer Identity.
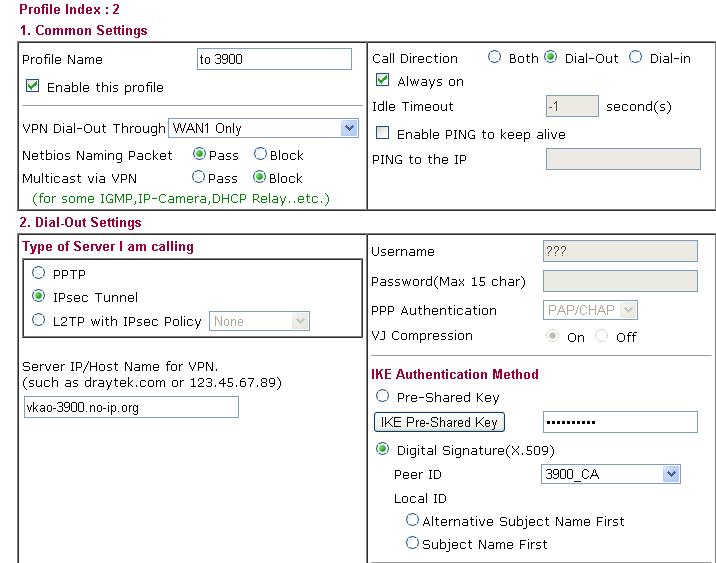
20. Set a Dial-out IPsec VPN profile. Open VPN and Remote Access >> LAN to LAN. Select Digital Signature (X.509) for IKE Authentication Method. And select the peer ID profile created in the previous step.
21. Return to Vigor3900 to configure VPN Policy. Open VPN and Remote Access >> IPSec to add a new Dial-in VPN profile. Set Auth Type to RSA, and choose the certificate created in step 17.

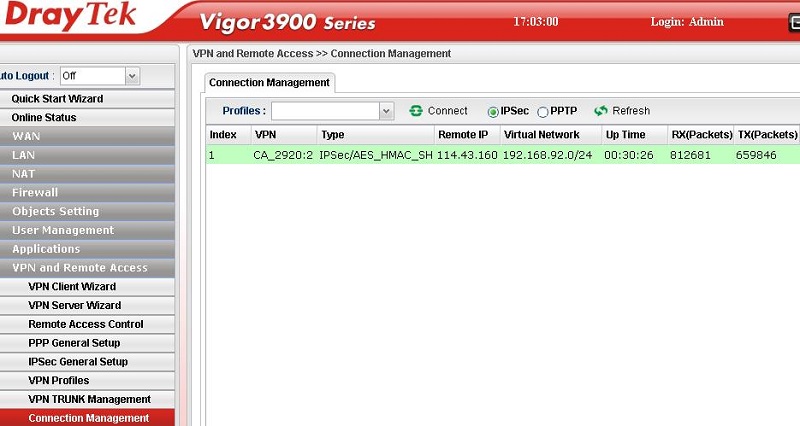
22. Finally, we can check if the VPN has established successfully.
Published On:2019-11-21
Was this helpful?