
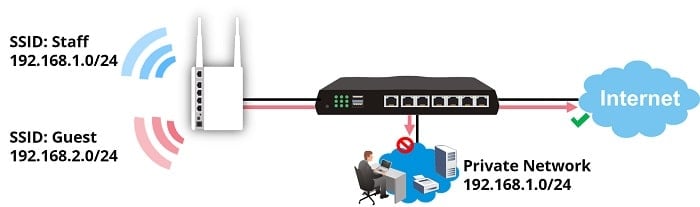
Add a Separate Wireless Network for Guests
This article demonstrates how to set up a separate Wi-Fi network for guests so that you can isolate the visitors from your private network while providing them Wi-Fi service. It requires deploying tag-based VLANs on your local network, enabling a second SSID on the wireless AP and linking it to the guest's VLAN.
Setup on Vigor Router
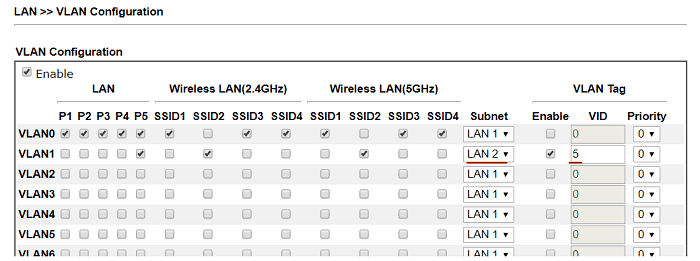
1. Go to LAN >> VLAN, check Enable, and configure the VLAN as follows:
- VLAN 0 is for the main network:
- Include all the LAN ports,
- use the default Subnet,
- leave VLAN tag disabled,
- VLAN 1 for the guest network:
- Include the LAN port which AP is going to connect
- Include SSID 2 if your router has Wi-Fi built-in
- select "LAN 2" for Subnet,
- enable VLAN Tag, and enter a number for VID.
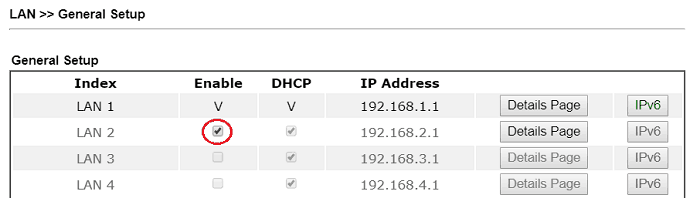
2. Go to LAN >> General Setup, check "Enable" for LAN 2. You may edit the IP range in Details Page.
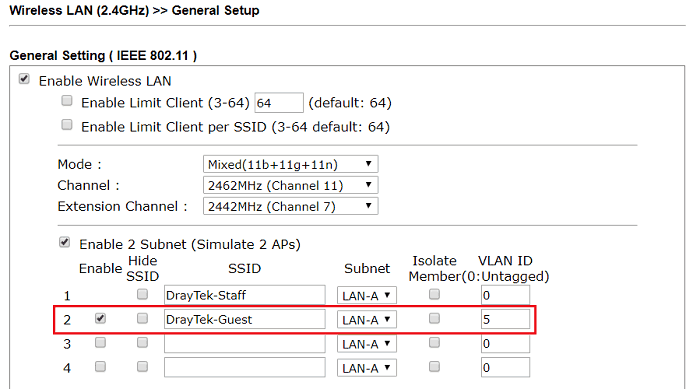
3. (Optional) If your router has built-in Wi-Fi, go to Wireless LAN >> General Setup to enable SSID 2.
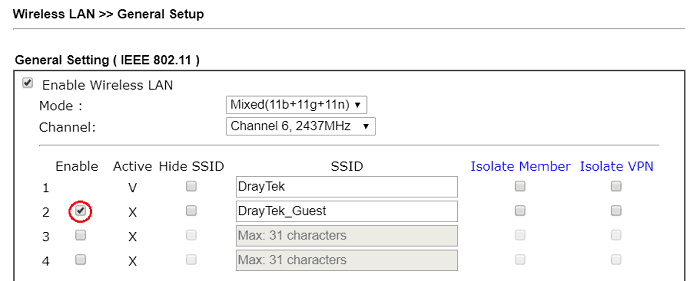
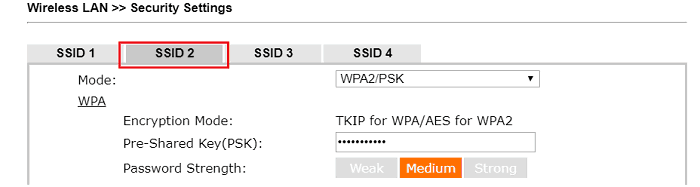
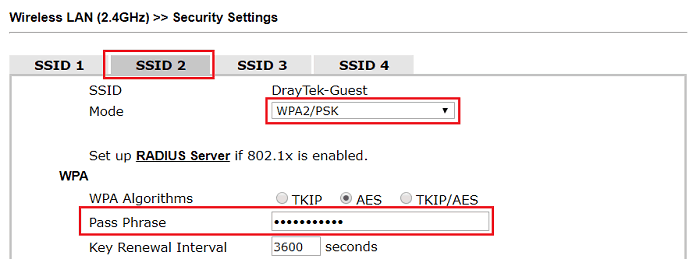
And set up the password for the guest Wi-Fi at Wireless LAN >>Security
The Configuration of the Router
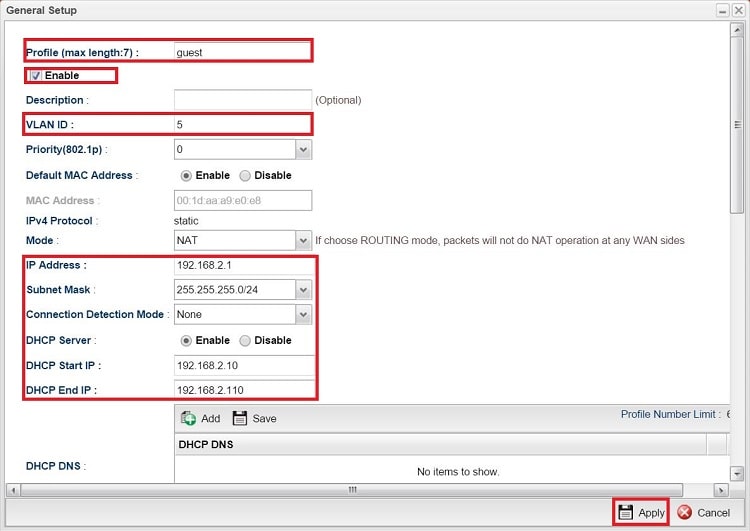
1. Go to LAN >> General Setup to add a new LAN profile for guests.

2. Set up the LAN profile as follows:
- Enter the profile name
- Check Enable
- Enter a number for VLAN ID
- Set up the IP Address and Subnet Mask
- Select "Enable" for DHCP Server and enter the IP range for guests at DHCP Start IP and DHCP End IP
- Click Apply to save the profile
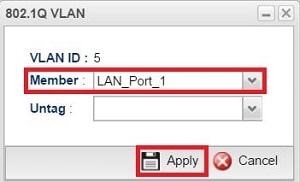
3. Go to LAN >> Switch to add a VLAN for guests.
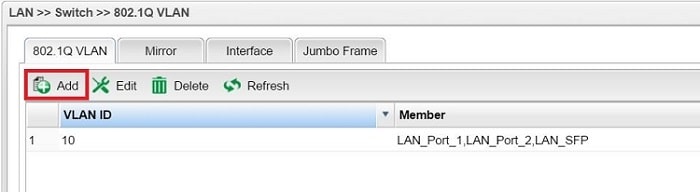
4. Enter VLAN ID as the same number as in the LAN profile, add the port to which the Wireless AP will be connecting into Member.
The Configuration of the AP
1. Go to Wireless LAN >> General Setup, enable for a second SSID, customize the SSID, and enter the VLAN ID as the same number as we use in LAN profile settings.
2. Set up a password for the Guest SSID at Wireless LAN >> Security.
Verify the Configuration
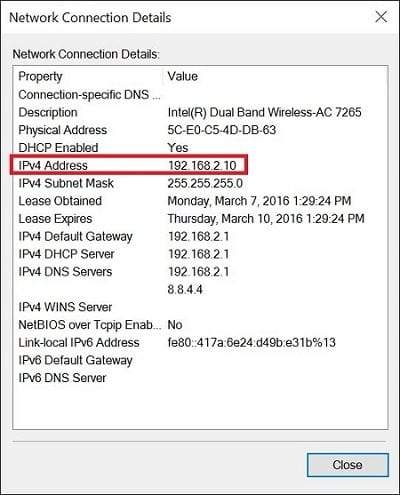
Connect the AP to the router. Now, clients connecting to the guest SSID should get an IP in the range in the new LAN profile.
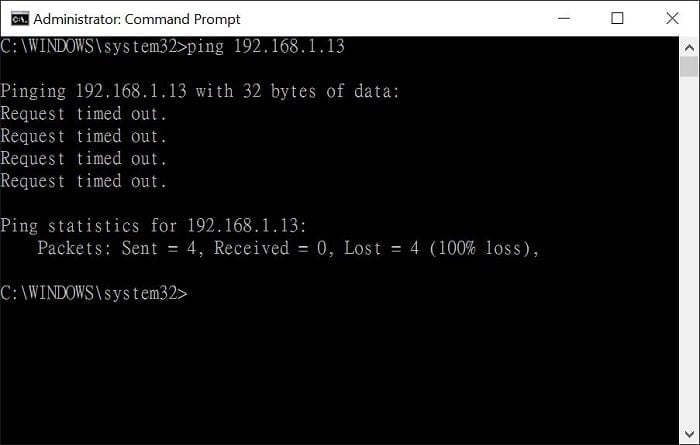
And they should not be able to ping a host on the main network.
Published On: Nov 16, 2018
Was this helpful?