
Secure the NAT Port Redirection connections by Port Knocking
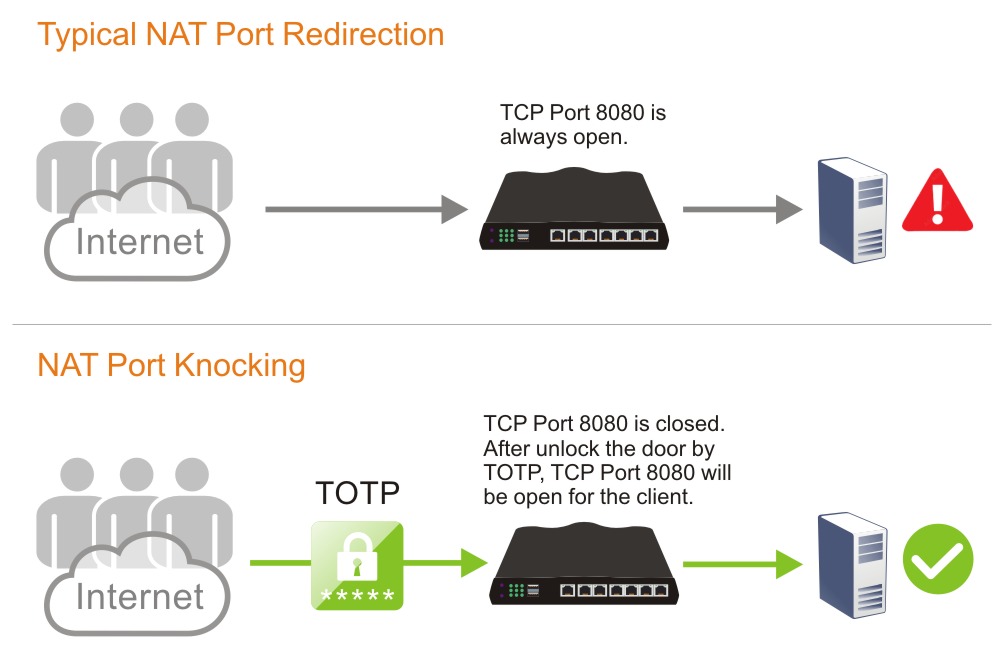
Configuring NAT Port Redirection rules is the typical way to allow the internal servers to be accessible from the Internet. However, once the port opens, it is exposed to the Internet and can be scanned by the malware.
Port knocking is a technology that can add an extra layer of protection to the internal servers. Its basic idea is that only open ports are at risk of being attacked, so it allows all ports to be closed at the beginning. Do not open them, and then set a password based on the port combination. Only those who know the password can open the ports and connect.
Vigor Router will support Port Knocking with TOTP. The supported models are:
Below are the configuration for using the Port Knocking feature.
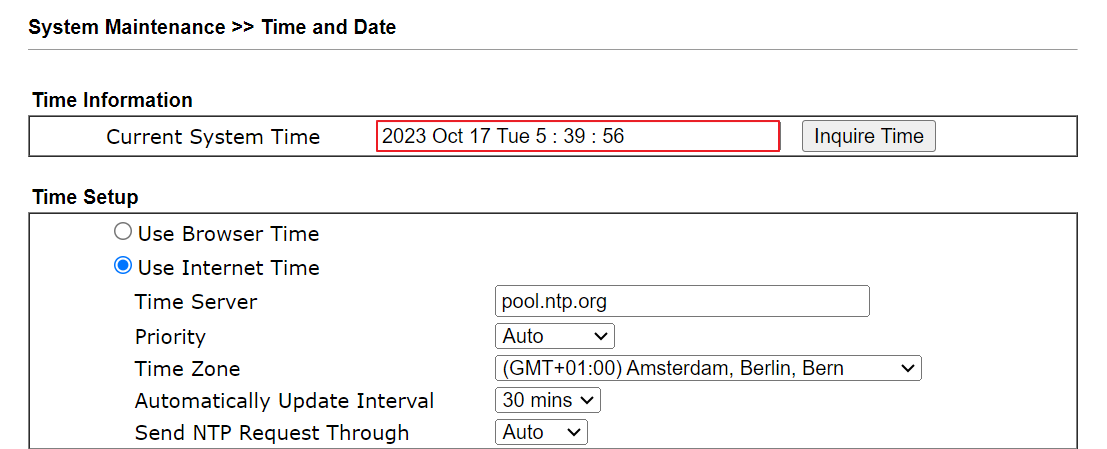
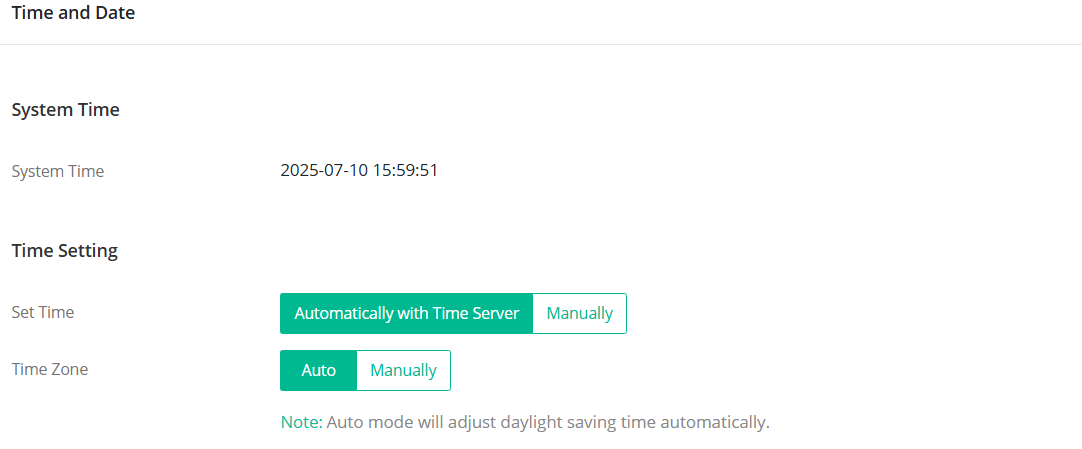
1. Ensure the router gets the correct system time.
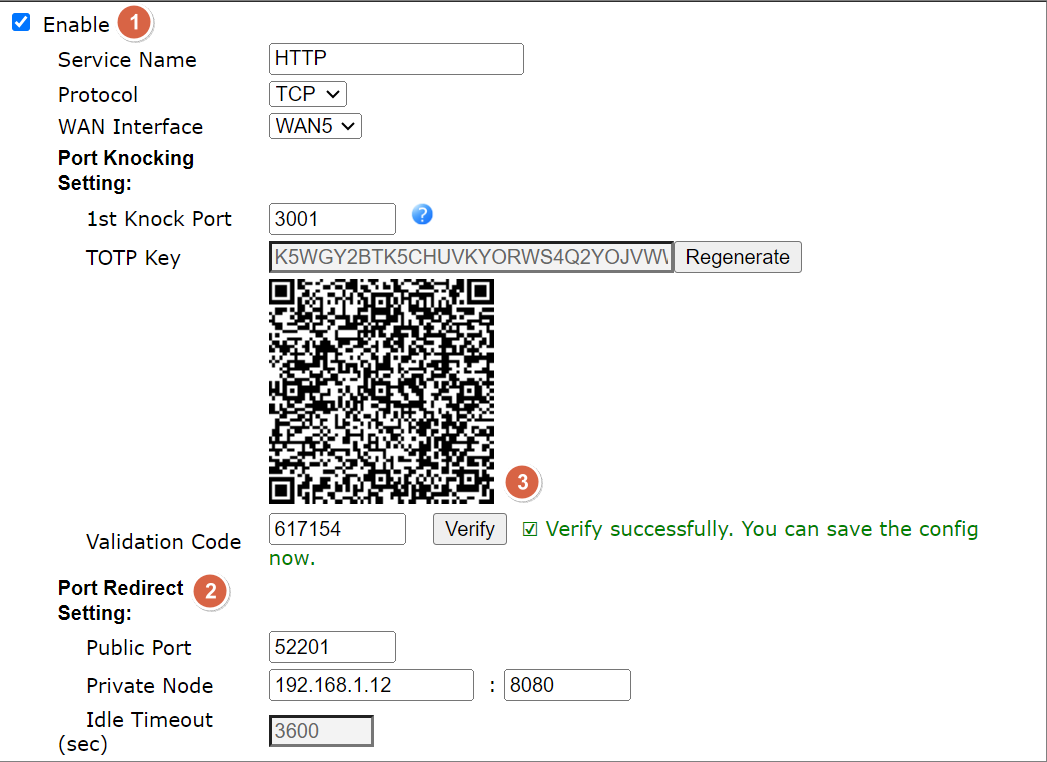
2. Configure a Port Knocking rule via NAT >> Port Knocking.
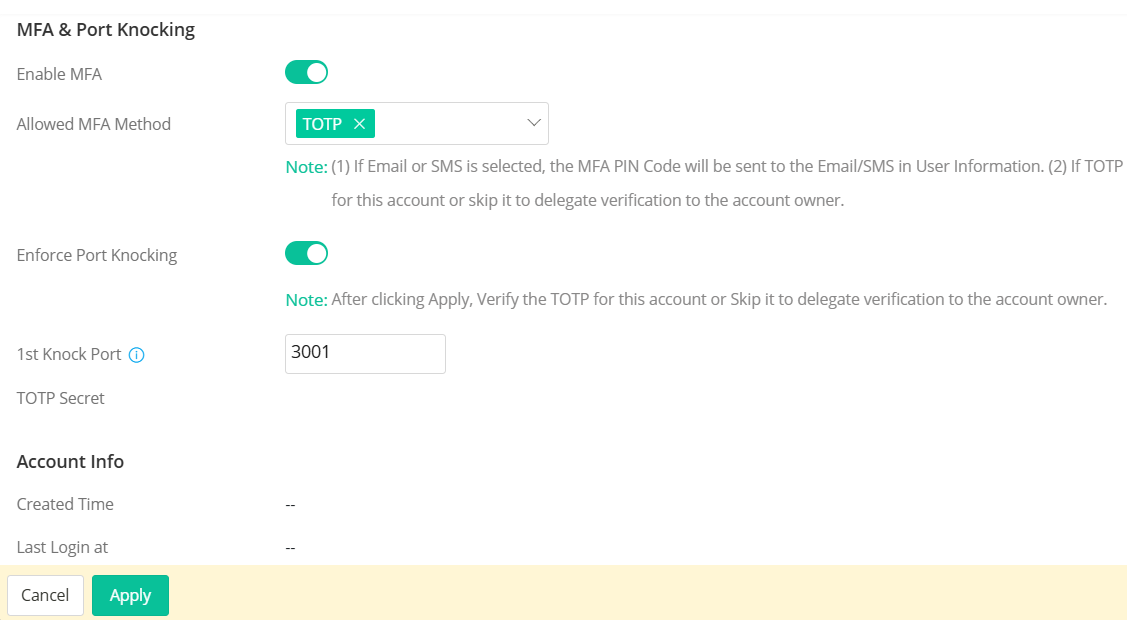
• Enable the profile
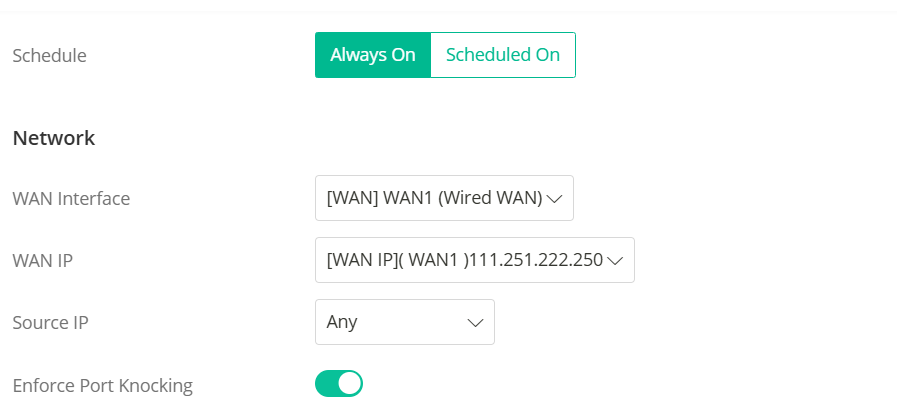
• Select the WAN interface and the Protocol
• Enter the Server IP, the Public Port and the Private Port
• Configure the first Port Knock Port
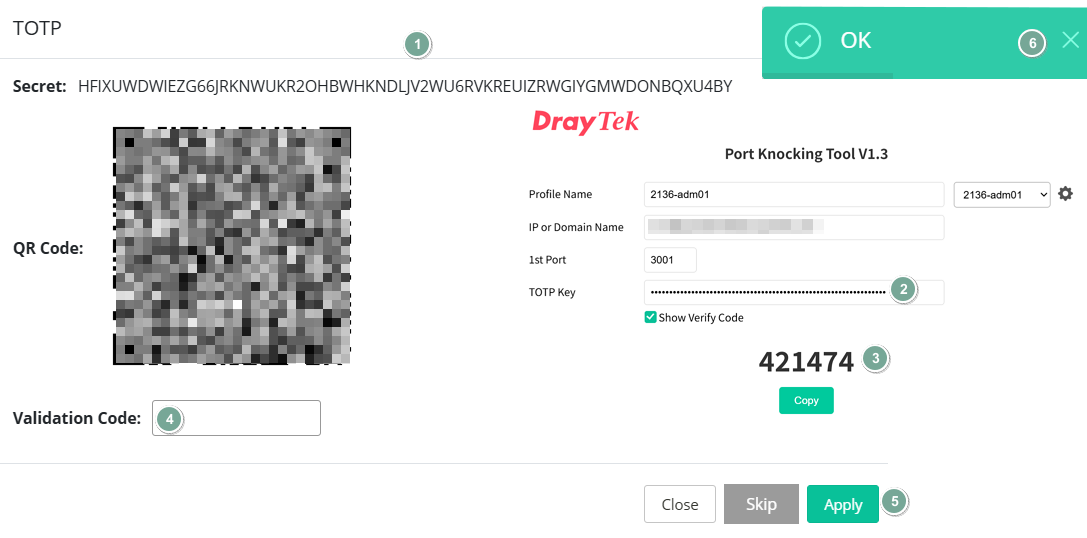
• Scan the Qrcode by a phone with the Google Authenticator installed or copy the TOTP secret then paste it to the DrayTek PortKnocking Tool.
• Enter the 6 digit code from the phone to the Validation Code field in the router’s Web, then click Verify.
• When seeing the Verify successfully message, please click OK to save the profile.
• The Port Knocking timeout setting is locked to 3600 seconds and cannot be changed.
3. Try to access the server by Vigor Router’s WAN IP and TCP Port 52201. The connection cannot be established because the port is not open.
4. Download the and execute it on the client's computer.
Then the tool starts knocking the door of the Vigor Router.

5. After unlocking the ports successfully, the client can access the server. The established connection will not be interrupted even if the port locks again. When there is no packets or new session from the client IP and the idle timeout time 3600 seconds passes, the client needs to use the tool to unlock the connection again.
We can see which IP tried to unlock the NAT Port Redirection profile successfully via the Status Table. (available in firmware version 4.4.3.)
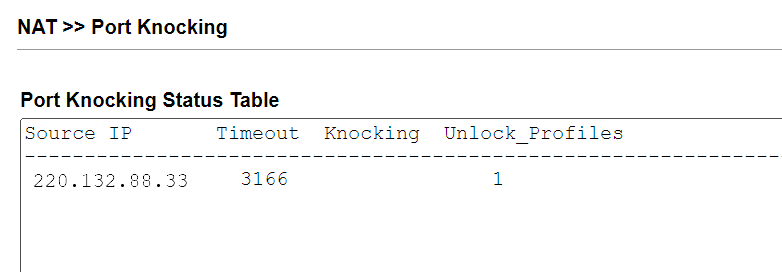
The Syslog will show the following logs when the port is unlocked successfully.
2023-10-17 05:36:54 [Port Unlock] P:6 220.132.88.33:42829->111.251.222.116:52201 #192.168.1.12:8080
6. If multiple internal servers require Port Knocking protection, select Port Knocking as the Source IP option and assign the appropriate Port Knocking profile in the NAT Port Redirection or NAT Open Ports settings. The servers will then be accessible after the correct ports have been knocked using a port knocking tool.

Configuring NAT Port Redirection rules is the typical way to allow the internal servers to be accessible from the Internet. However, once the port opens, it is exposed to the Internet and can be scanned by the malware. Port knocking is a technology that can add an extra layer of protection to the internal servers. Its basic idea is that only open ports are at risk of being attacked, so it allows all ports to be closed at the beginning. Do not open them, and then set a password based on the port combination. Only those who know the password can open the ports and connect.
Vigor Router supports Port Knocking with TOTP. The supported models are:
Below are the configuration steps for using the Port Knocking feature on Vigor Router.
1. Browse DrayTek Portknock Tool
2. Login to the router’s Web, and navigate to System Maintenance / Device Settings / Time. Ensure the router gets the correct system time.
3. Navigate to IAM / Users & Groups / Users, click +Add to create an IAM user profile.

4. Navigate to Configuration / NAT / Port Forwarding, and click +Add to create a Port Forwarding profile for the local server that will be accessed from the Internet after successful Port Knocking. In this example, we use an RDP server.

6. Go to the Port Knocking Tool web page and click Knock Ports. The tool will knock the router’s ports by sequence.

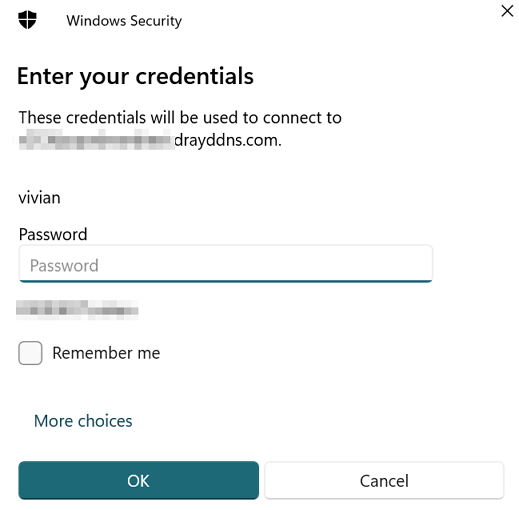
7. Try accessing the RDP server. We should now be able to see the login windows that requires the username and password. Once the client successfully unlocks the ports, that client - or any other client using the same public IP will be able to access the router. The established connection will remain active for an hour. After the session expires, the client will need to use the Port Knocking tool again to regain access.

8. Navigate to Utility / Web CLI, login with the username and password, and enter the command “exec portkncok”. The IP address passing the PortKnock checking will display here.

Note:
1. The first knock port of each user profile must be unique and should not overlap with others.
2. Once a user with Port Knocking permission successfully completes the knock sequence, the public IP he uses will gain access to all NAT Port Redirection (Port Forwarding) rules that have Port Knocking enabled, as well as the Router Management interface.
Published On:2025-07-30
ShareWas this helpful?