This article demonstrates how to set up Vigor Router as a PPTP VPN server for Windows with Smart VPN Client, and how to establish a PPTP VPN from Windows client to the private network of Vigor Router.
This article demonstrates how to set up Vigor Router as a PPTP VPN server for Windows with Smart VPN Client, and how to establish a PPTP VPN from Windows client to the private network of Vigor Router.
The Configuration of Vigor Router
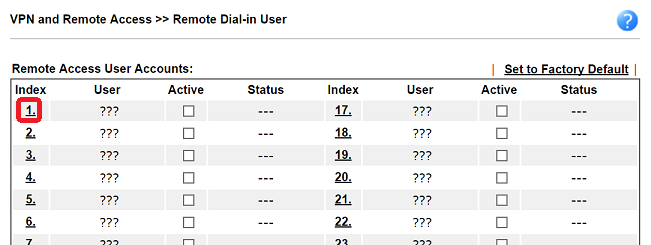
1. Go to VPN and Remote Access >> Remote Dial-In User, and click an available index number to edit the profile.
2. Check Enable this account, enter username and password, make sure you have enabled "PPTP" in Allowed Dial-in Type.

And the router is ready for VPN connections.
Establish the VPN from Windows Smart VPN Client
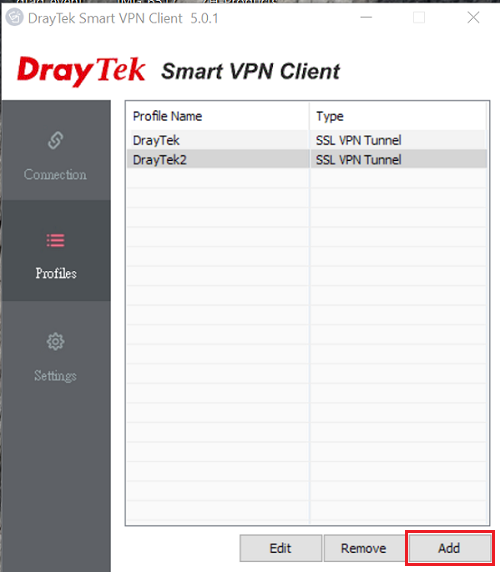
3. Launch Smart VPN Client, go to Profiles and click Add.
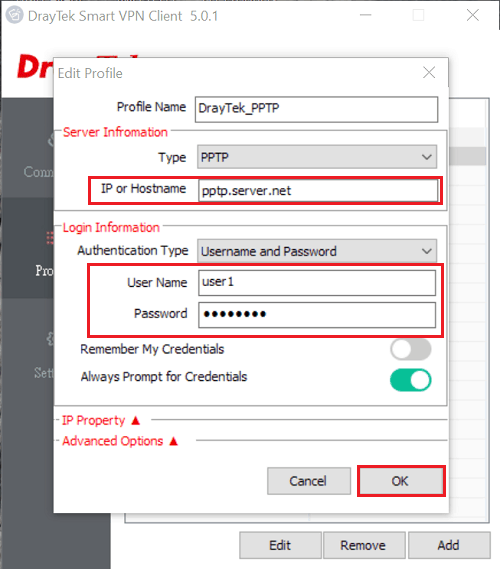
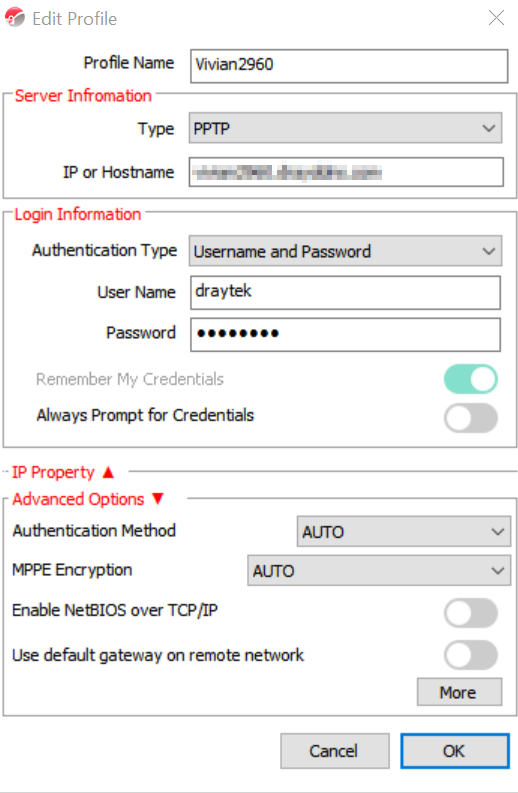
4. Edit the profile as follows:
- Input Profile Name
- At Server Information, select PPTP for type
- Input the router's WAN IP or hostname at IP or Hostname
- At Login Information, select Username and Password for Authentication Type
- (optional) Input username and password as the same as in step 2.
- Click OK to save.
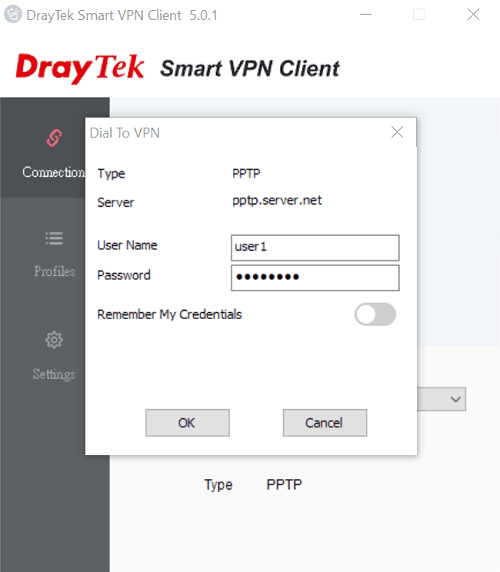
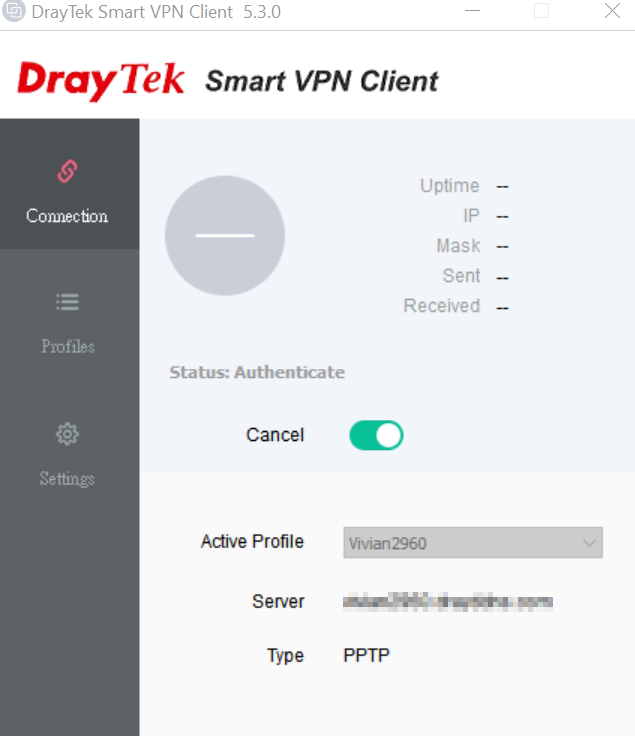
5. Go to the Connection tab, select the profile we just created at Active Profile, and switch on Connect. It will ask for credentials, input the username and password in step 2, then click OK to start the connection.
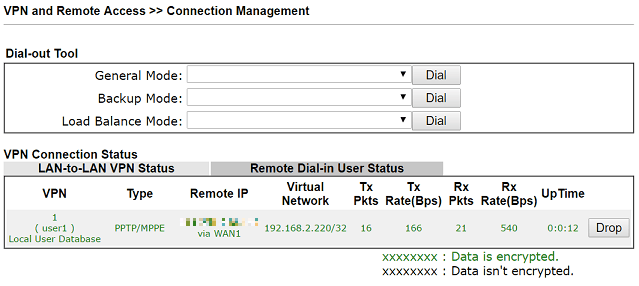
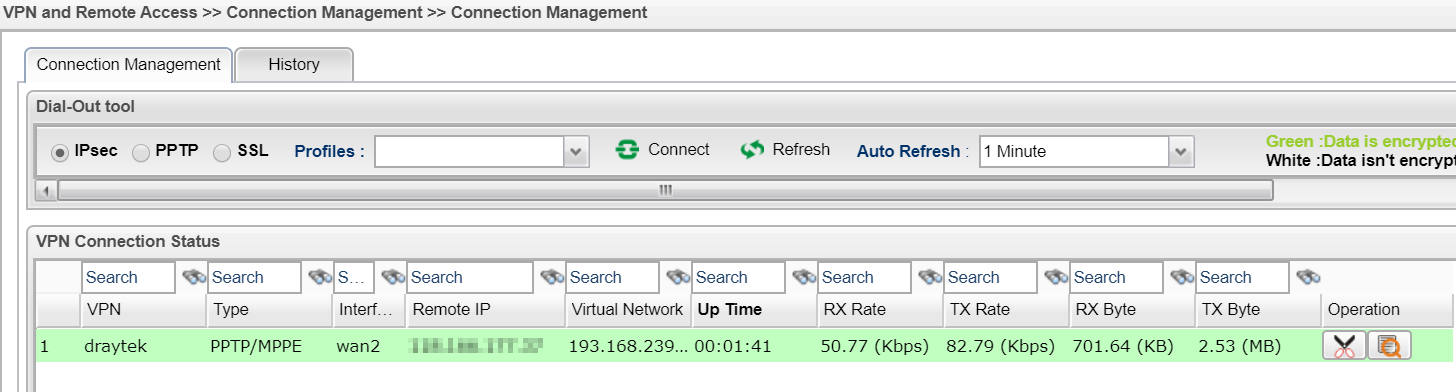
After VPN is successfully connected, we can check VPN status form the router at VPN and Remote Access >> Connection Management.
VPN Server Setup
1. Go to User Management >> User Profile, click Add to add a new profile, and configure as followings:
- Check Enable
- Change the Idle Timeoutfrom 300 seconds to 0 second. 0 second means VPN server will not disconnect VPN because of the idle.
- Select lan profile for assigning DHCP IP to the VPN client. If the DHCP server on this lan is not enabled, please configure the static ip for this user in the Static IP Address field.
- Enter Username and Password
- Select Enable for PPTP Dial-In
- Then click Apply to save the User profile.
- Input Profile Name
- At Server Information, select PPTP for type
- Input the router's WAN IP or hostname at IP or Hostname
- At Login Information, select Username and Password for Authentication Type
- Input Username and password as the same as in step 1.
- (optional) Click Advanced Options and Enable Use default gateway on remote network if you want to access Internet through this VPN connection.
- Click OK to save.

Establish PPTP VPN from Windows Smart VPN Client
2. Launch Smart VPN Client, go to Profiles and click Add.Edit the profile as follows:
3. Go to the Connection tab, select the profile we just created at Active Profile, and switch on Connect.
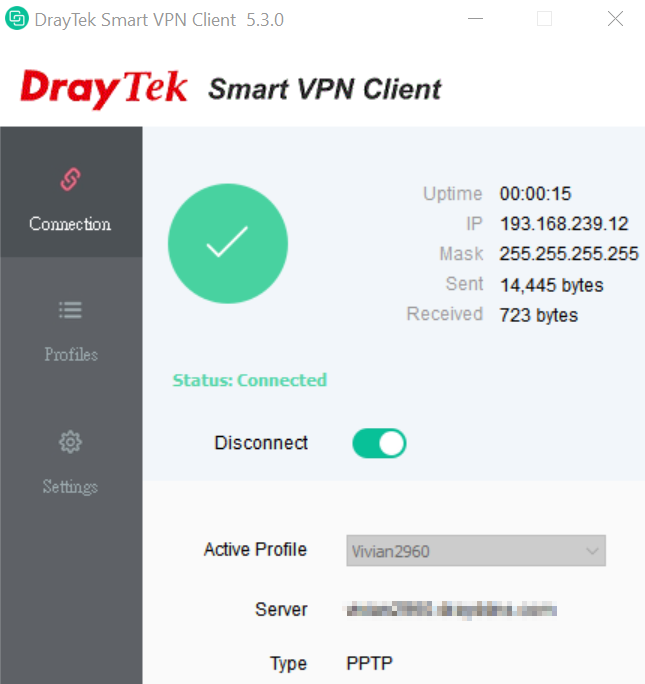
4. PPTP VPN connection is created successfully.
5. After VPN is successfully connected, we can check VPN status form the router at VPN and Remote Access >> Connection Managementpage.
Published On: 2016-02-03
Was this helpful?
