
IKEv2 VPN with EAP authentication from iOS to Vigor Router
DrayOS support IKEv2 with EAP authentication since firmware version 3.9.0, Vigor3900 and Vigor2960 support it since firmware version 1.4.0. It can make IKEv2 VPN even more secure by additional username and password authentication and certificate verification. This article demonstrates how to create a self-signed certificate for server authentication, set up Vigor Router an IKEv2 VPN server, and how to establish a connection from iOS.
Setup on Vigor Router
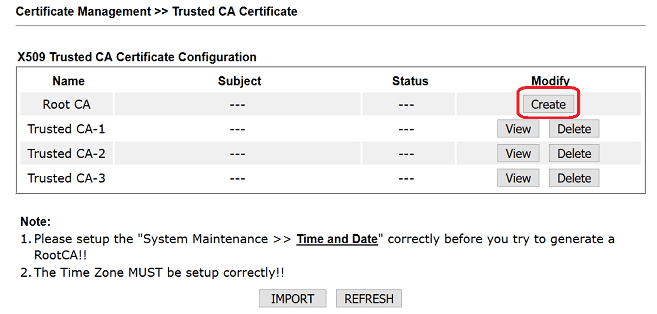
1. Go to Certificate Management >> Trust CA Certificate, and click Create.
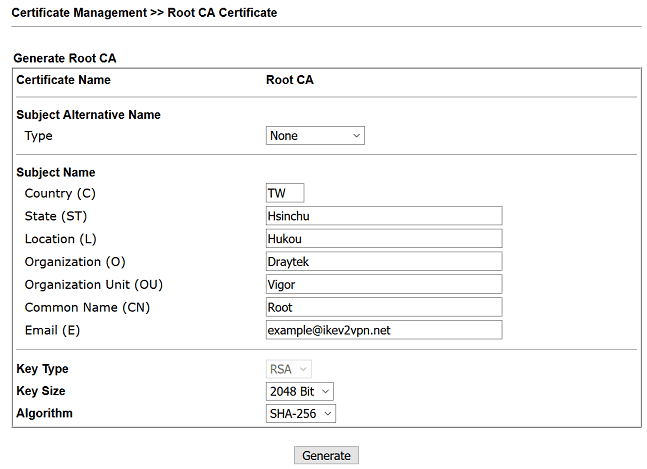
2. Enter certificate information, select "2048 Bit" for Key Size. Then click Generate.
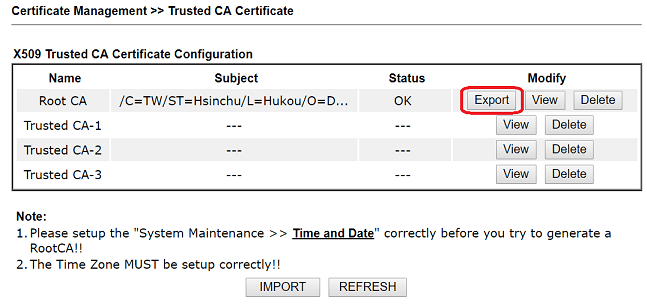
3. Click Export to download the RootCA
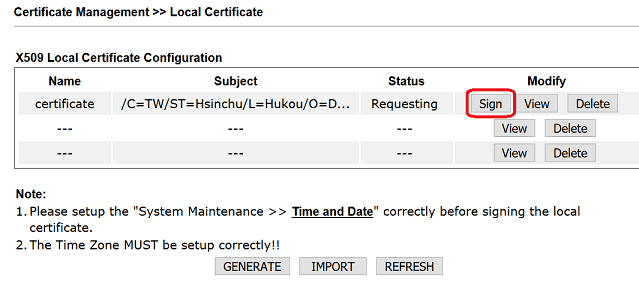
4. Go to Certificate Management >> Local Certificate, and click Generate.
- Select "Domain Name" for Subject Alternative Name Type
- Enter router's domain for Domain name and Common Name(CN)
- Fill out the all the other information for the certificate
- Select "2048 Bit" for Key Size
- Click Generate

5. Click Sign for the certificate created.
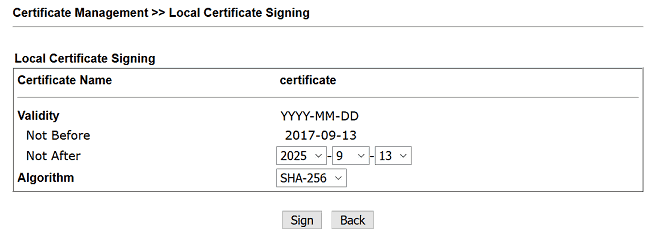
6. Specify the valid date then click Sign
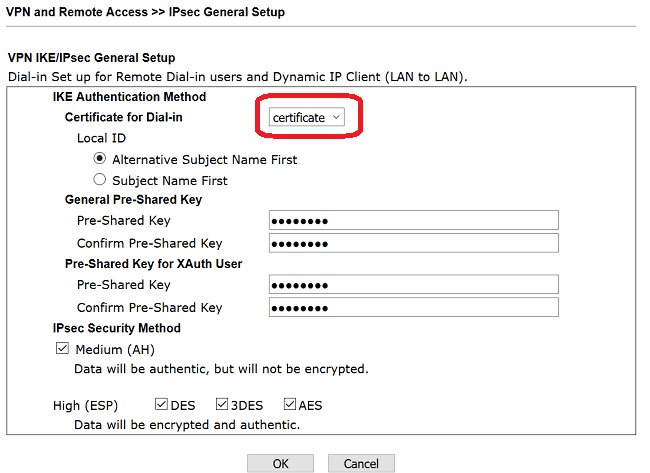
7. Go to VPN and Remote Access >> IPsec General Setup select the local certificate created in the previous steps for Certificate for Dial-in
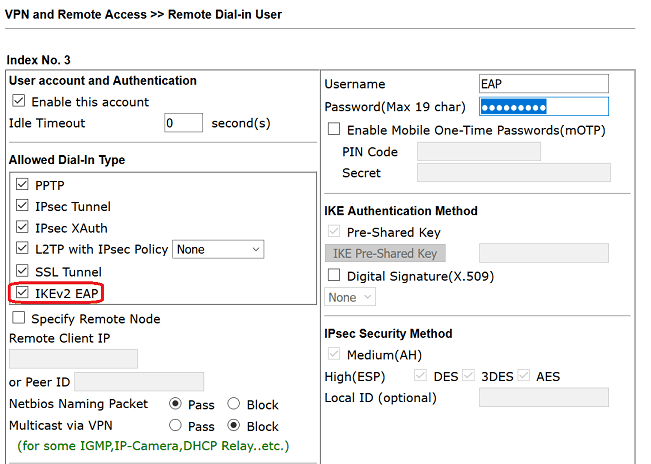
8. Go to VPN and Remote Access >> Remote Dial-in User, click an available index number and edit the profile as follows.
- Check IKEv2 EAP at Allowed Dial-In Type
- Give Username and Password
- Click OK to save.
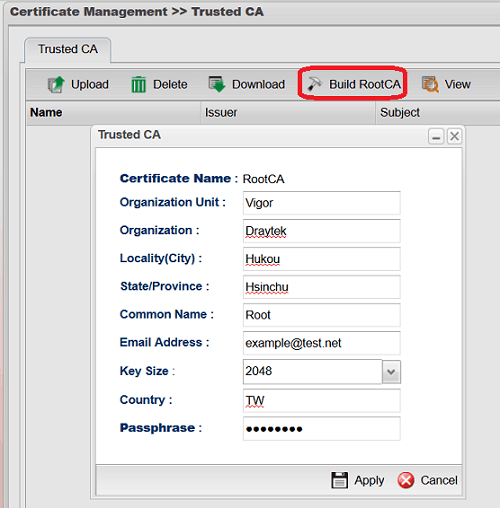
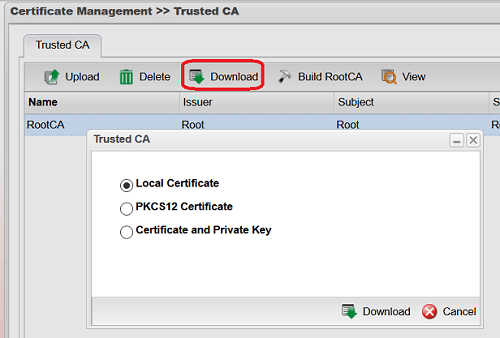
1. Go to Certificate Management >> Trusted CA, click Build RootCA
- Enter all the information
- Select "2048" for Key Size
- Enter the Passphrase to sign the local certificate
- Click Apply to save
2. Click Download to export the Root CA, which will need to be installed to the VPN client.
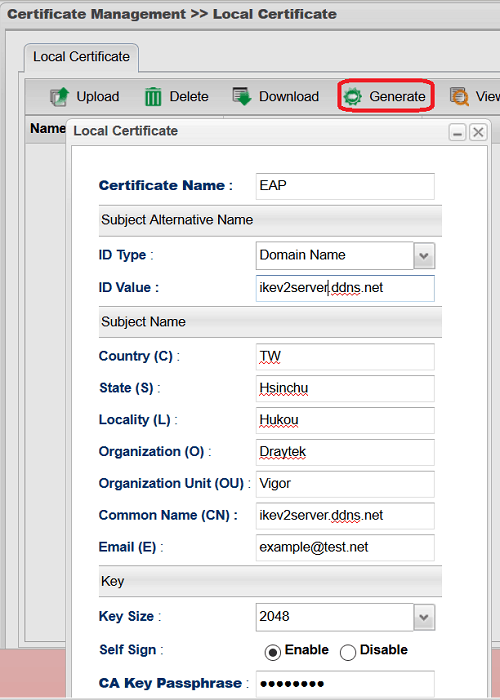
3. Go to Certificate Management >> Local Certificate, click Generate:
- Select "Domain Name" for ID Type and enter the domain of router for ID Value
- Enter all the information
- Enter the domain of router for Common Name (CN)
- Select "2048" for Key Size
- Select "Enable" for Self Sign
- Enter the Passphrase of Root CA at CA Key Passphrase
- Click Apply
4. Go to User Management >> User Profile to add a user profile:
- Check Enable
- Enter Username and Password
- Select "Enable" for Xauth/EAP at PPTP/L2TP/SSL/OpenVPN Server

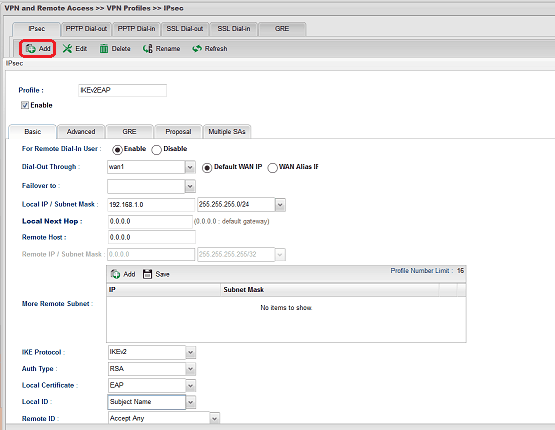
5. Go to VPN and Remote Access >> VPN Profiles >> IPsec to add a profile:
- Give a profile name and check Enable
- Select "Enable" for Remote Dial-In User
- Enter router's LAN network for Local IP / Subnet Mask
- Select "IKEv2" for IKE Protocol
- Select "RSA" for Auth Type and choose the certificate created in previous steps for Local Certificate.
Connecting from macOS
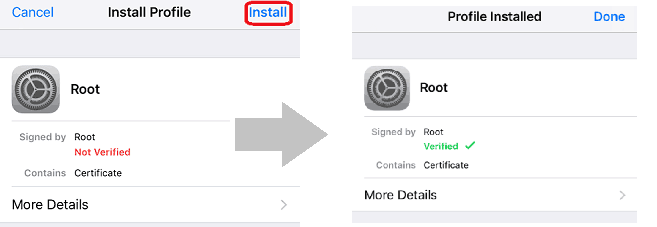
1. Send the RootCA file downloaded from the router to the iOS device.
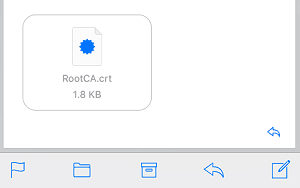
2. Install the CA on the iOS device by opening the file and tap Install. Make sure the RootCA has been verified then tap Done
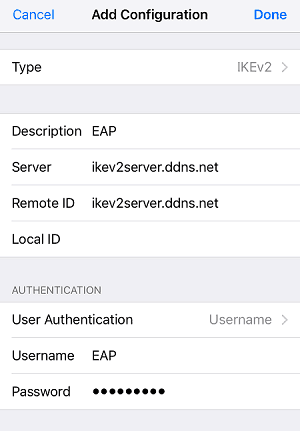
3. Go to General >> VPN and add a configuration.
- Select "IKEv2" for Type
- Enter the domain of the router for Server and Remote ID
- Enter Username and Password
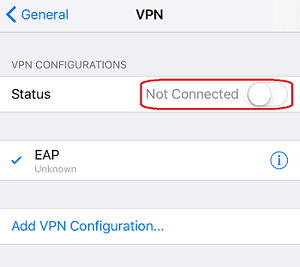
4. Start the VPN by switching on the VPN.
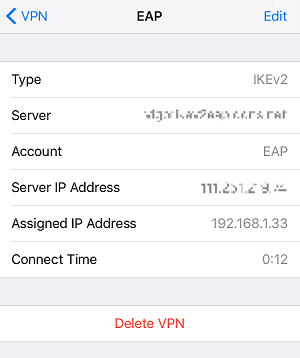
5. It shows the VPN status if the connected successfully.
Published On: Jan 11, 2021
Was this helpful?