
Set Time Quota and Data Quota for LAN clients in User-Based Mode
In User-based mode, Network Administrator can restrict Internet access to users with a user account only. Network Administrator may also set a time quota or data quota for the user account. In this article, we're going to demonstrate how to set a time quota and data quota for a user account separately in the following paragraphs.
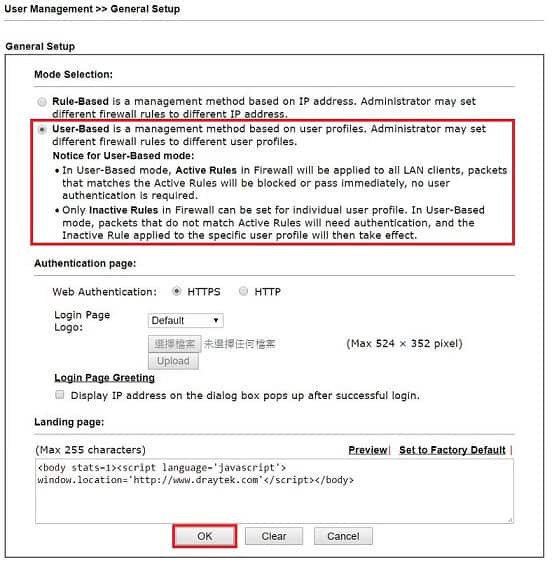
Set Router to User-Based Mode
Go to User Management >> General Setup, select User-based mode then click OK to save.
Create a User Account and Set Time Quota
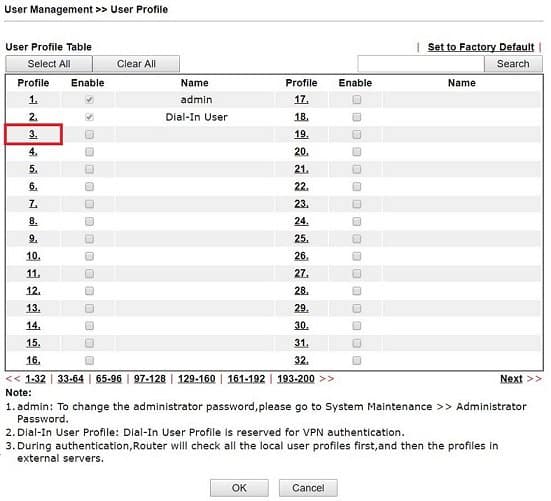
1. Go to User Management >> User Profile, click an available profile.
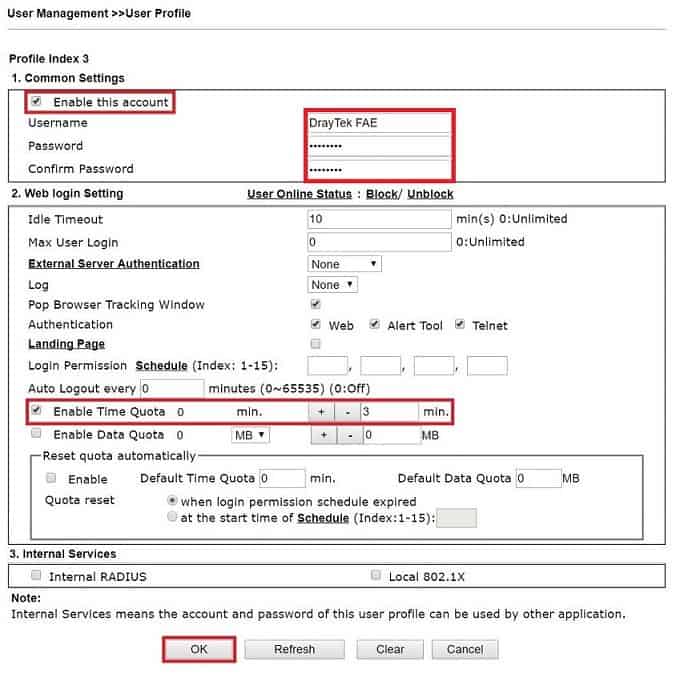
2. Edit the profile as follows:
- Enable this account
- give Username and Password
- confirm the password
- Enable Time Quota, enter a period (minutes) in the box and click “+” to add Time Quota.
- You should see the Time Quota changed from 0 to the number you set, click OK to apply the changes.
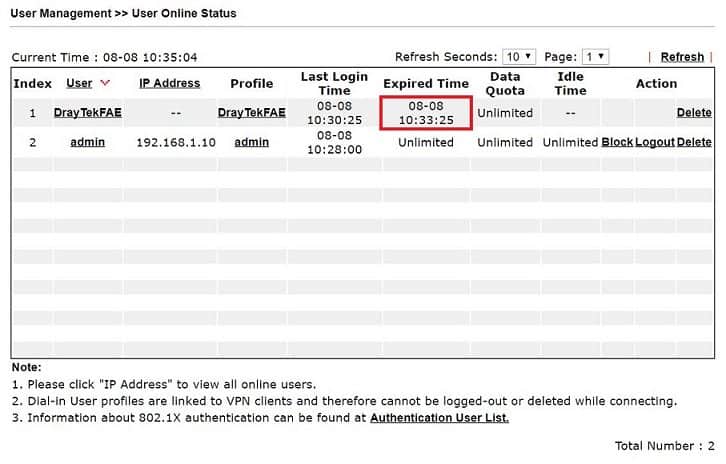
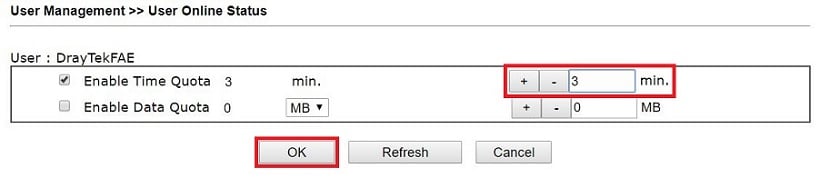
3. After the user logged in, from User Management >> User Online Status, there will be an expired time for such user account.
4. Click on the username will lead to a page that can give the user more time immediately.
5. After the user runs out of the assigned quota, the user will not have Internet access and not able to log in with this account anymore.
Pause the Timer when the User Idles
Network Administrator could setup idle timeout in the user profile. Then if the user lost connection for the timeout period, the router would pause the timer.
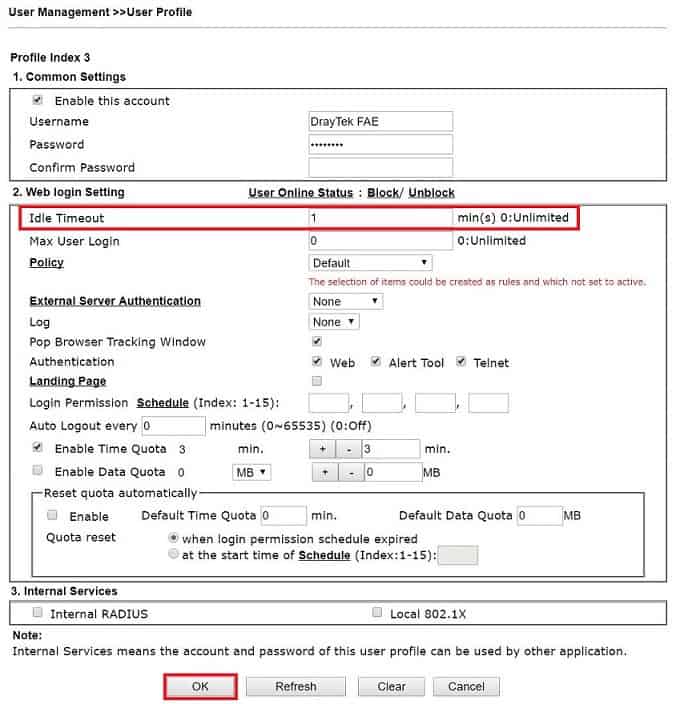
1. Go to User Management >> User Profile, click the profile that you'd like to set up an idle timeout.
2. Key a timeout period in the Idle Timeout box, click OK to save.
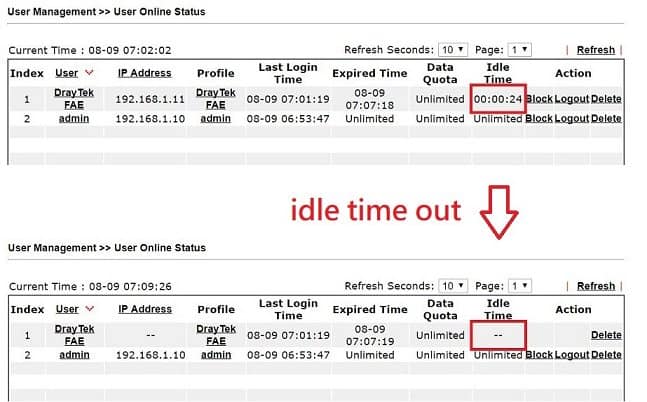
3. Network administrator could check the idle time on User Management >> User online status page
Set Data Quota
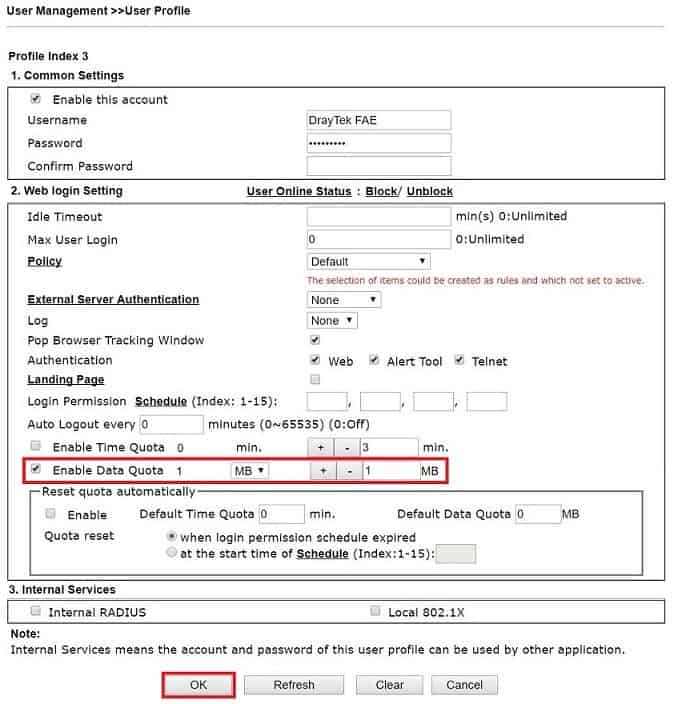
1. Go to User Management >> User Profile, click the profile you'd like to add a data quota
2. Edit the profile as follows:
- Enable Data Quota
- Enter a quantity of data in MB box then click "+."
- You should see the Data Quota changed from 0 to the number you set, click OK to apply the changes.
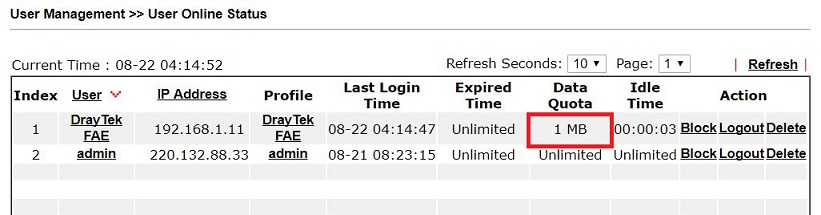
3. Now, after the user logged in, from User Management >> User Online Status, there will be a data quantity left for that user account.
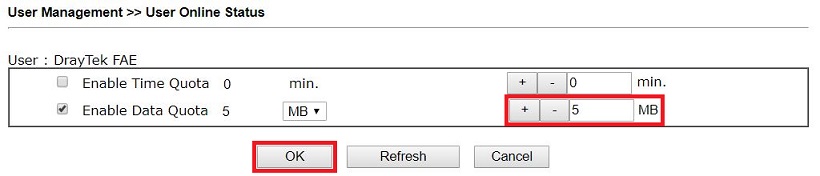
4. Click on the username will lead to a page that can give the user more Data immediately.
5. After the user runs out of the assigned quota, the user will not have Internet access and not able to log in with this account anymore.
NOTE: If the network administrator set both Time Quota and Data Quota simultaneously, the router will stop providing internet access for the user when one of the quotas runs out.
Reset the Quota Automatically
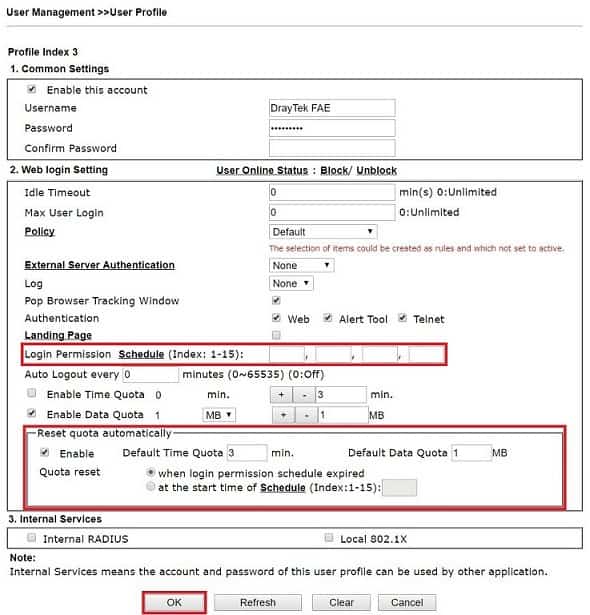
Since 3.8.5 version firmware, the network administrator can configure the router to renew the quota periodically. The router will follow the schedule set up to reset the quota of each user profile. Go to Reset quota automatically box at the bottom of the User Profile page,
- Enable the function
- Set the Default Time Quota and Default Data Quota
- Choose a program to reset the quota:
- When login permission schedule expired: the router will reset the quota when the login permission schedule which is on the upper place of this page expired, please select this option if you want to reset the quota of the user with the login permission schedule.
- At the start time of schedule: the router will reset the quota with the schedule set in the following box, please select this option if you do not want to set the login permission schedule, or you want to set a different schedule for login permission and reset cycle.
Published On:2017-08-22
Was this helpful?