
Set up the Router as a PPPoE Server
Vigor2952 (DrayOS), Vigor3220 (DrayOS), Vigor2960 (Linux), Vigor300B (Linux), and Vigor3900 (Linux) can be a PPPoE server for LAN clients. This can secure LAN clients connection on the Ethernet network by PPP authentication. Furthermore, the network administrator can apply connection time limit and data quota to the LAN clients. This article demonstrates how to enable PPPoE function and add user profiles for the LAN clients login.
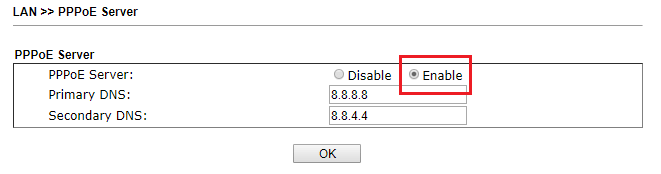
1. Go to LAN >> PPPoE Server, enable PPPoE Server and enter the Primary DNS and the Secondary DNS which will be assigned to PPPoE clients, click OK to save.
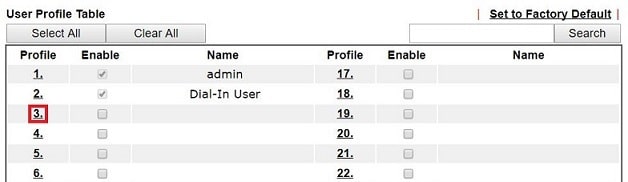
2. Go to User Management >> User Profile, click an available profile to create a user account.
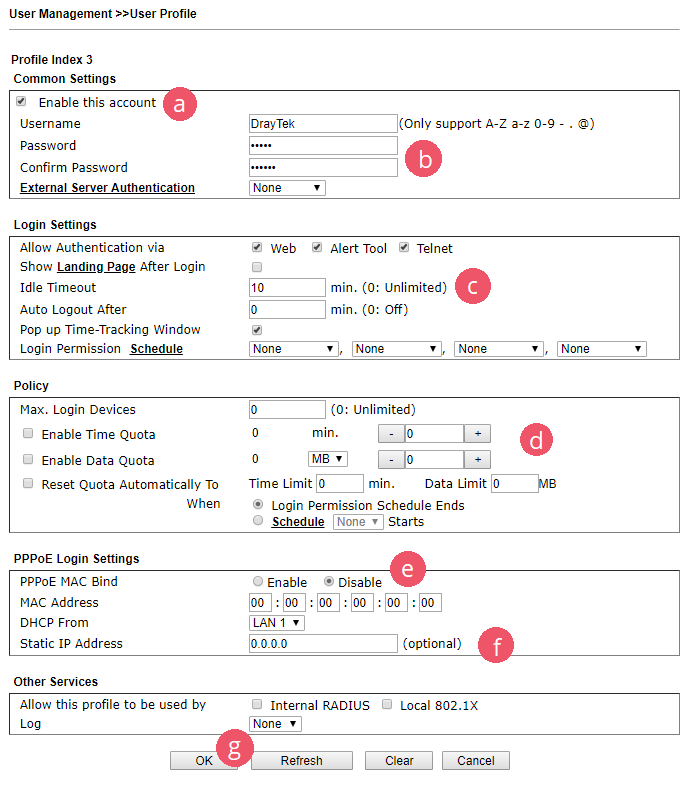
3. Edit the profile as follows:
a. Enable this account.
b. Enter Username and Password, confirm the password.
c. (Optional) Change Idle Timeout and associate with Schdule for this profile.
d. (Optional) Apply limitations to this profile.
e. (Optional) Enable MAC Address Binding and fill in the client's MAC address, this could restrict this profile to the specific device.
f. Specify the DHCP Subnet or give a Static IP Address, the router will assign the exact IP address to the user login with such profile.
g. Click OK to save the profile.
PPPoE Client Connecting
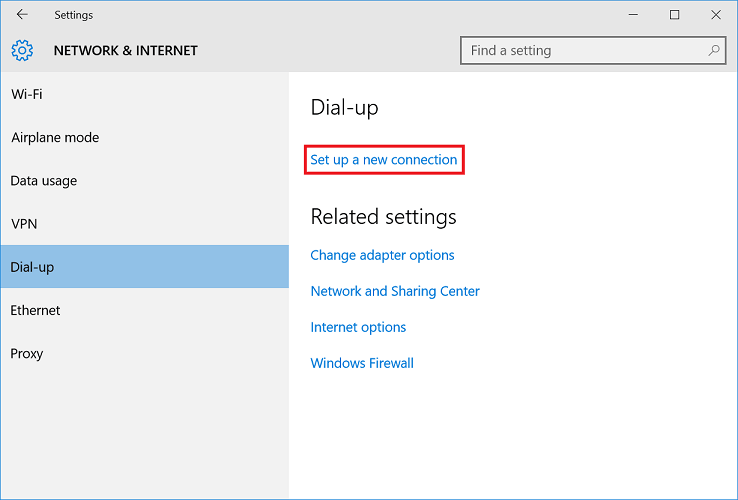
1. For Windows PC, go to Start >> Settings >> Network & Internet >> Dial-up , click Set up a new connection .
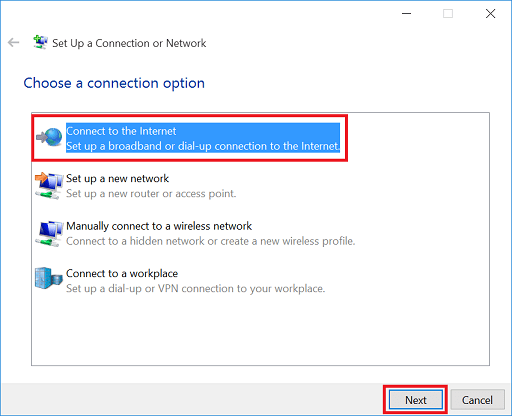
2. Select Connect to the Internet, click Next.
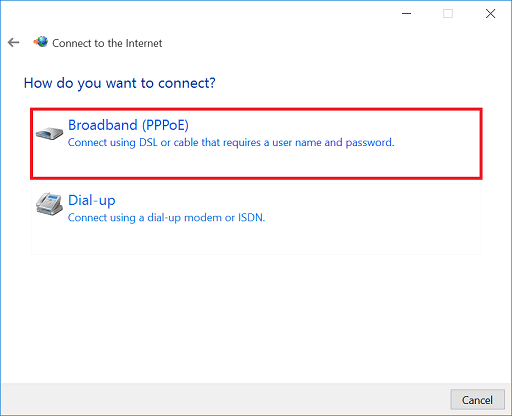
3. Select Broadband (PPPoE).
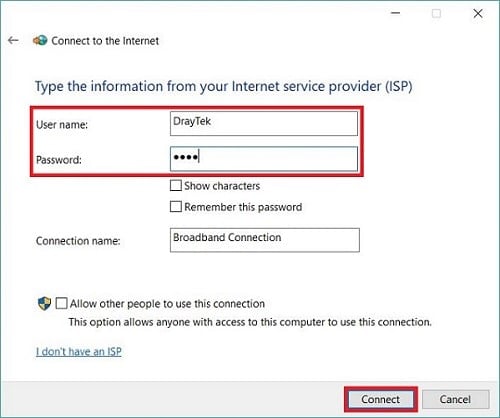
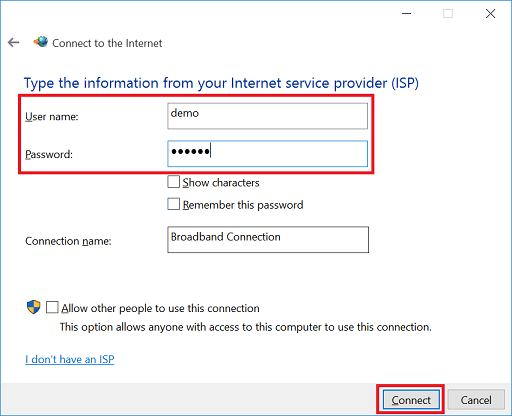
4. Enter the username and password as what was configured at step 3. Then, click connect.
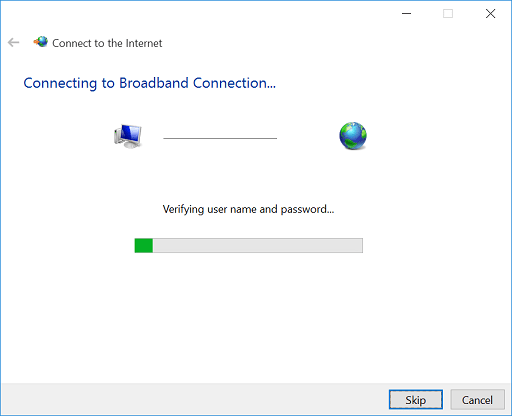
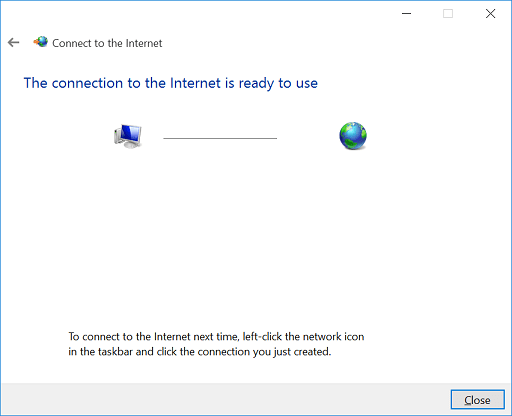
5. Wait for the connection to building up.
6. And the PPPoE client can start to browse the Internet.
Featured Products
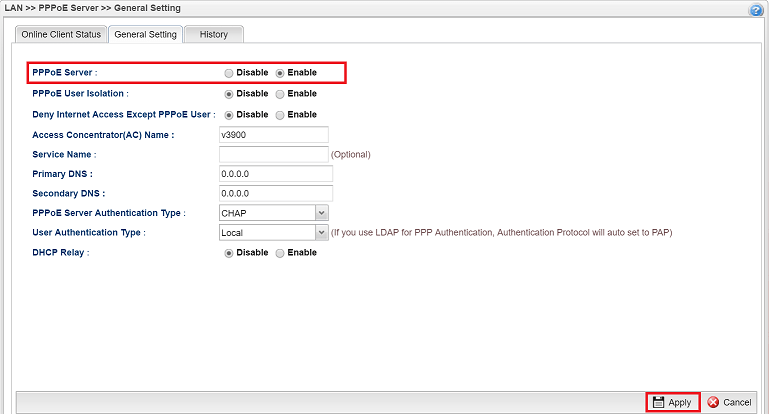
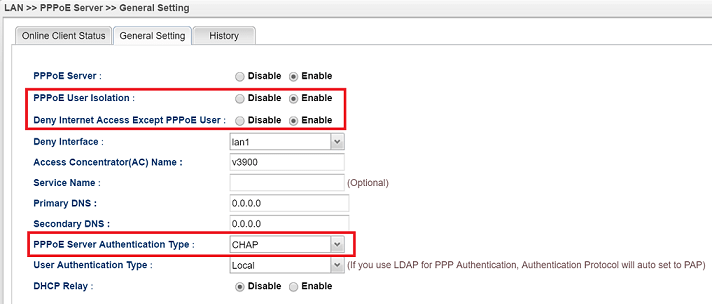
1. Go to LAN >> PPPoE Server >> General Setting,
- Select "Enable: for PPPoE Server.
- (Optional) Enable PPPoE user Isolation to prevent LAN clients from brute-force attack.
- (Optional) Enable Deny Internet Access Except PPPoE User to restrict the Internet access to PPPoE clients only.
- (Optional) Use "CHAP" for PPPoE Server Authentication Type to protect LAN clients from the replay attack.
- Click Apply to make the settings effective.
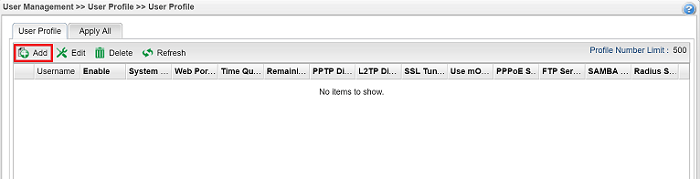
2. Go to User Management >> User Profile, click Add to create a user account,
3. Edit the profile as follows:
- Enter Username and Password
- Check Enable
- Unfold PPPoE Server and select "Enable" for PPPoE Server Login
- click Apply to save the profile.

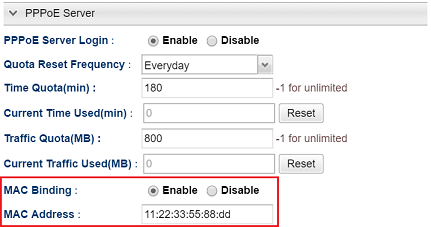
4. (Optional) In the user profile, you may assign a time and data quota, or bind the user profile to a specific device (by MAC address).
5. (Optional) Prevent PPPoE clients from network attack
- Enable PPPoE user Isolation to prevent LAN clients from brute-force attack.
- Enable Deny Internet Access Except PPPoE User to assure only the PPPoE clients can access the Internet.
- Choose CHAP for PPPoE Server Authentication Type is better than PAP because it can protect LAN clients from reply attack.
PPPoE Client Connecting
1. For Windows PC, go to Start >> Settings >> Network & Internet >> Dial-up , click Set up a new connection .
2. Select Connect to the Internet, click Next.
3. Select Broadband (PPPoE).
4. Enter the username and password as what was configured at step 3. Then, click connect.
5. Wait for the connection to building up.
6. And the PPPoE client can start to browse the Internet.
Published On: 2017-08-15
Was this helpful?