
How to have more subnets in one LAN profile (for Vigor3900/2960)
Vigor3900 and Vigor 2960 supports multiple subnets within one VLAN profile, to let Network Administrator separate the LAN hosts into different IP subnets without setting up either tag-based or port-based VLAN. This article demonstrates how to configure this feature. However, traffic between these subnets will pass by default. It's needed to set up firewall rules if the traffic is forbidden.
1. Go to LAN >> General Setup, and click Edit to configure LAN profile.

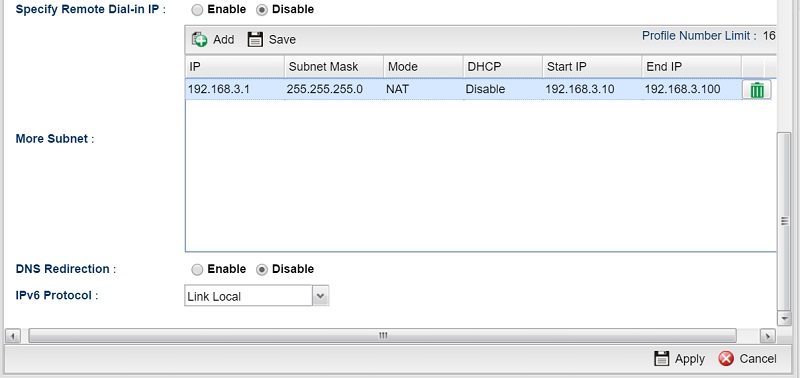
2. Click Add in More Subnet field
- Specify the router's IP in this subnet at IP
- Select Mask of the subnet in Subnet Mask
- Select 'NAT' for Mode
- Disable DHCP if there is another DHCP server in the LAN profile
- You may modify the DHCP start IP and End IP if DHCP is enabled
- Click Apply to save
Now, hosts can decide which subnet to belong to by using DHCP and obtain IP in 192.168.1.0/24 subnet or manually configuring static IP in 192.168.3.0/24 subnet.
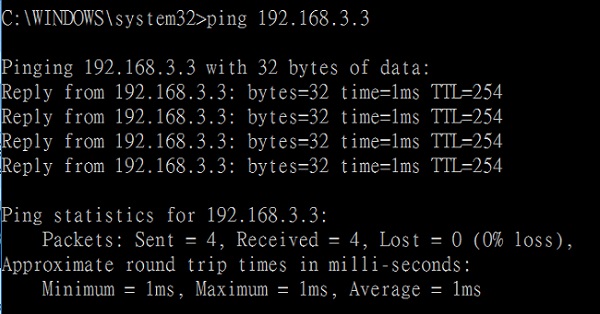
Block the host from accessing each other
Assume there are two LAN hosts, and their IP are 192.168.1.10 and 192.168.3.3. They can access each other by default, which can be verified by ping command.
To block the traffic between them, we will need to configure firewall rules. To set up a firewall rule:
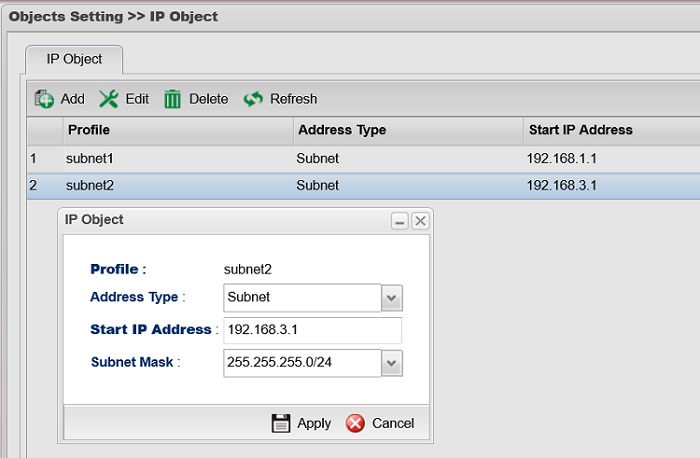
1. Go to Objects Setting >> IP Object, and add two IP objects, one for the 192.168.1.0/24 subnet, and the other for the 192.168.3.0/24 subnet.
- Give a profile name
- Select "Subnet" for Address Type
- Type Network IP in Start IP Address
- Specify Subnet Mask
- Click Apply to save
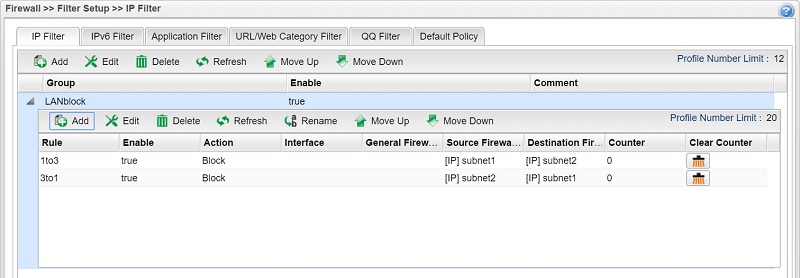
2. Go to Firewall >> Filter Setup >> IP Filter, click Add to create a group, then click Add in Group tab to create two firewall rules:
- Give profile name and enable it
- Select 'Block' for Action
- Select the first subnet in Source IP Object and the second subnet for Destination IP Object, For the second rule, the Source IP Object should be the second subnet, and Destination IP Object should be the first subnet.
- Click Apply to save
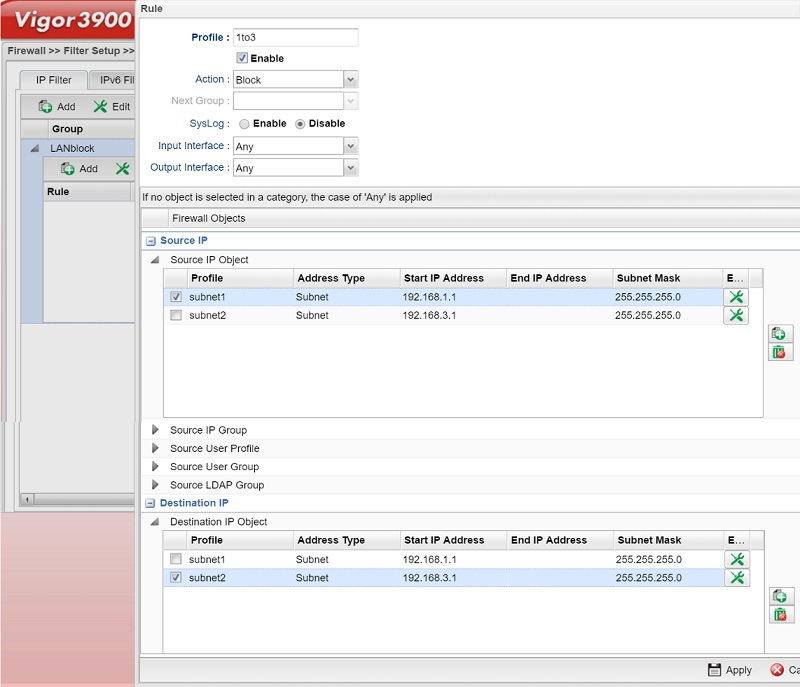
After finishing the configuration, the firewall setting should be as follows.
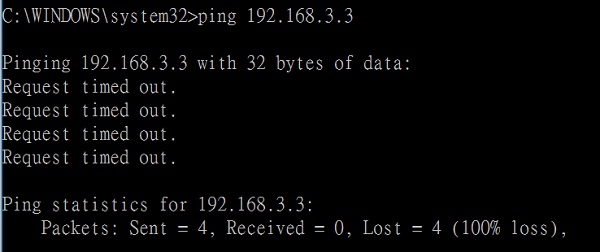
Now, we can use ping to verify the Firewall configuration.
Published On:2016-06-29
Was this helpful?