
GRE Tunnel between Teltonika RUT950 and DrayTek
Generic Routing Encapsulation is a simple IP packet encapsulation protocol. A GRE tunnel is used to send IP packets from one network to another, without being parsed by any routers in between. This article demonstrates how to set up a GRE tunnel between Teltonika RUT950 router and a Vigor Router.
Settings of Teltonika RUT950 Router
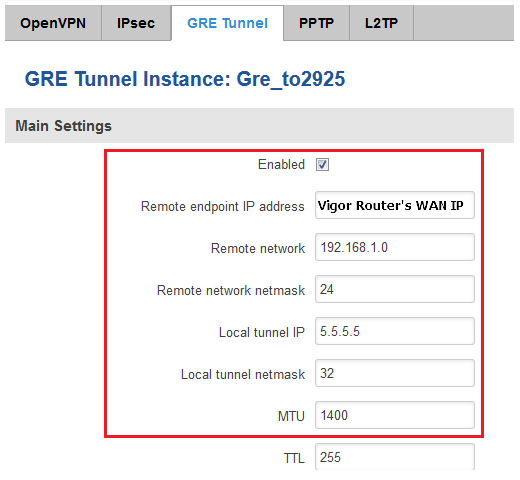
1. Go to GRE Tunnel page and create the profile as follows:
- Enter the WAN IP of Vigor Router at Remote Endpoint IP address
- Enter Vigor Router's LAN network IP and mask in Remote network and Remote network netmask
- Enter a Local Tunnel IP (this is the GRE IP) and the Local tunnel netmask as "32"
- Use 1400 for MTU
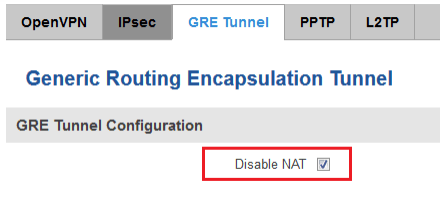
2. Check Disable NAT in GRE Tunnel Configuration
Settings of Vigor Router
Before setting up the tunnel, please make sure PPTP service is enabled in VPN and Remote Access >> Remote Access Control.

1. Go to VPN and Remote Access >> LAN to LAN page, click an available index number and create a profile as follows.
- In Common Settings, give a Profile Name, Enable this profile, and select GRE Tunnel.
- In GRE Settings, enter Peer GRE IP as the GRE IP configured on Teltonika RUT950 router.
- In TCP/IP Network Settings, enter Remote Gateway IP as the WAN IP of Teltonika RUT950 router.
- And enter Remote Network IP/Mask as the LAN Network of the Teltonika RUT950 router.
- Click OK to save the profile.

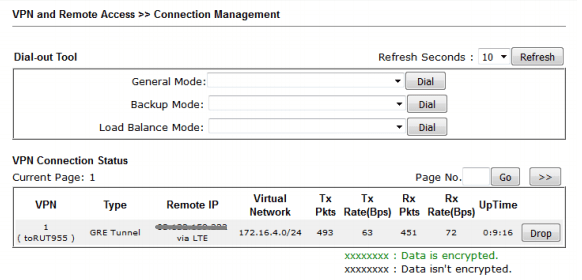
2. The GRE tunnel will be up as soon as we finish the configurations. We may go to VPN and Remote Access >> Connection Management to check the status.
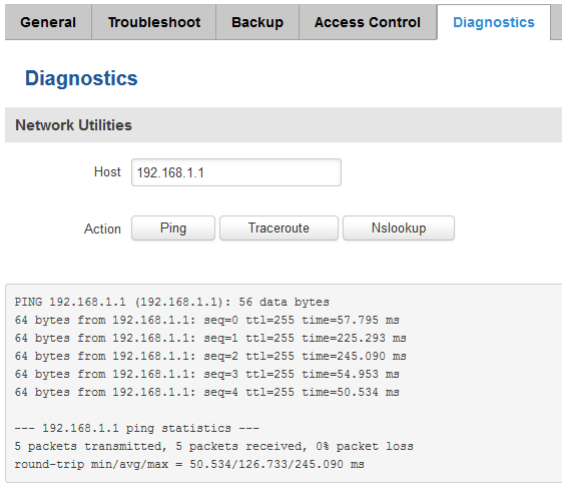
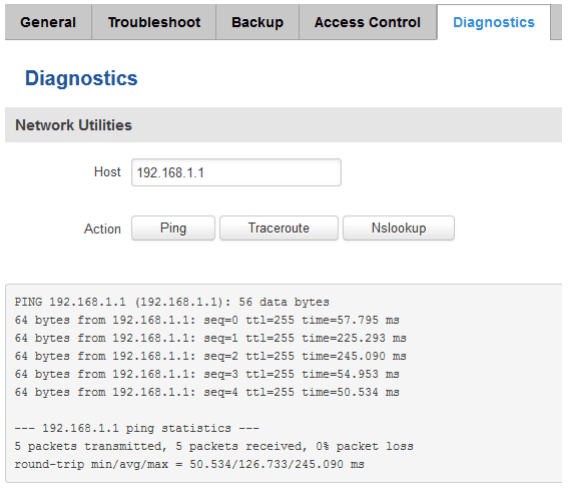
3. We may use Ping tool to check the connectivity between the Teltonika RUT950 router and Vigor Router.
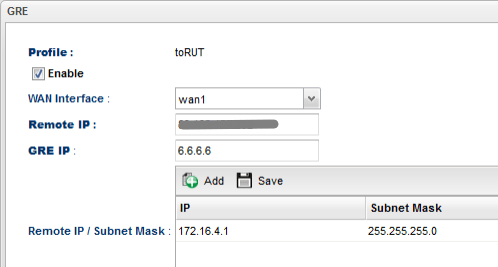
1. Go to VPN and Remote Access >> VPN Profiles >> GRE, click Add and then create a profile as follows.
- Enter a Profile name and check Enable
- Select the WAN Interface to which is connecting to the Teltonika router
- Enter the WAN IP of Teltonika RUT950 router for Remote IP
- Enter the GRE IP as the Local tunnel IP configured on the Teltonika router
- Add the LAN network of the Teltonika router to Remote Network IP/Mask
2. GRE tunnel will be up as soon as we finish the configurations. We may go to VPN and Remote Access >> Connection Management to check the tunnel status.

3. We may use Ping tool to check the connectivity between the Teltonika router and Vigor Router.
Published On: Jun 27, 2017
Was this helpful?